EP1000 Digital Fabrication Prototyping Fundamentals
Embedded Programming, Input and Output Devices
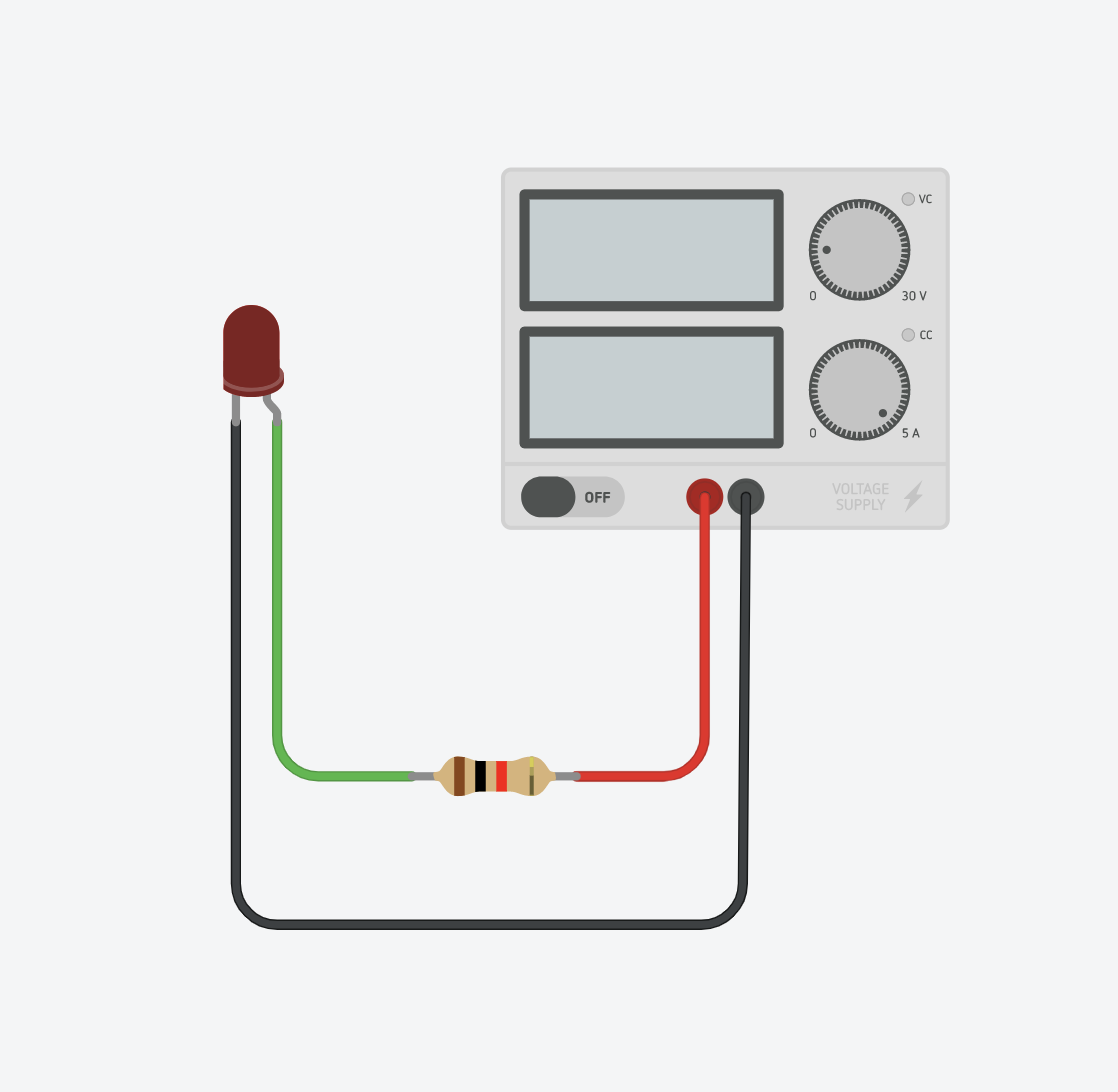
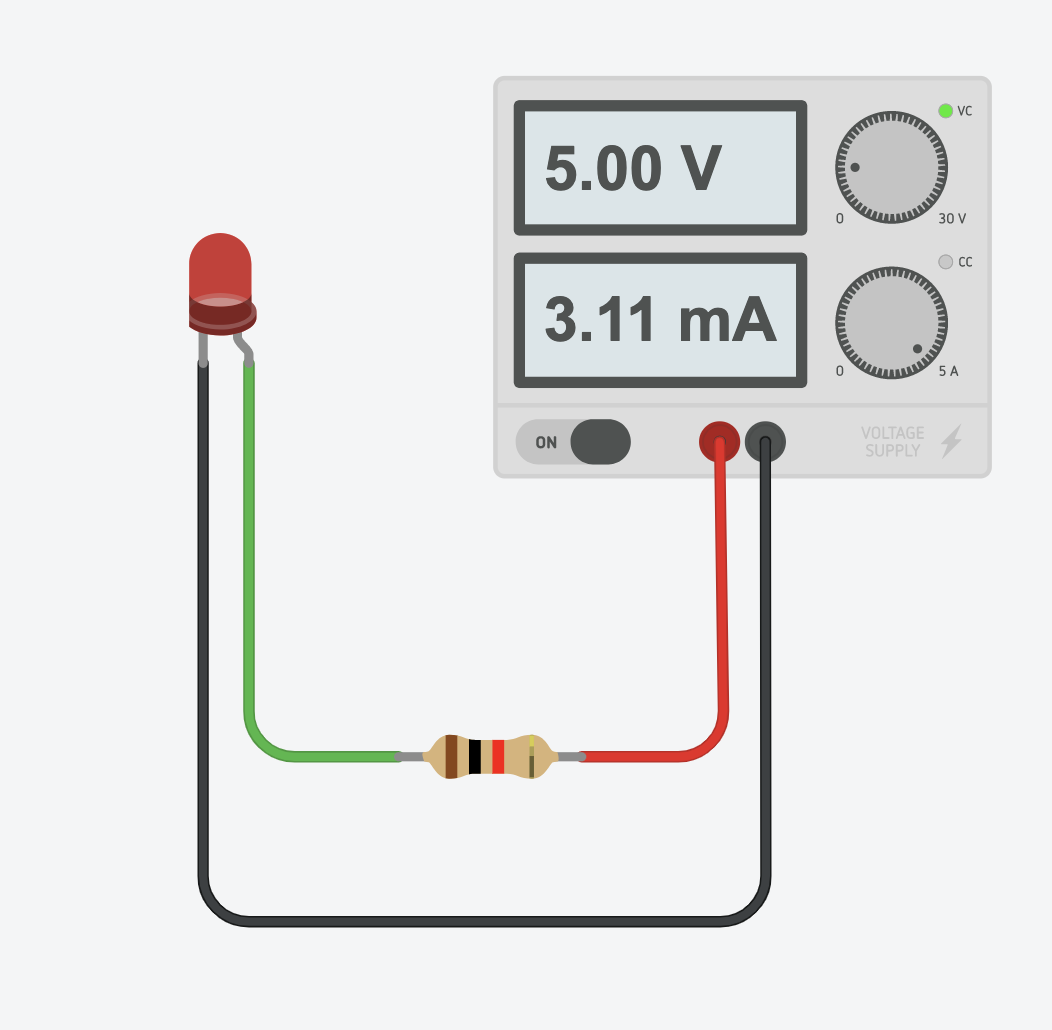
We were introduced to Electronic Embedded Programming. Mr Steven Chew went through the theroy and basics behing it, such as the formulas, as well as the equipment and circuits. We were then introduced to TinkerCad, where we can digitally test our circuits and codes. We started off by testing the voltage and value of a LED.
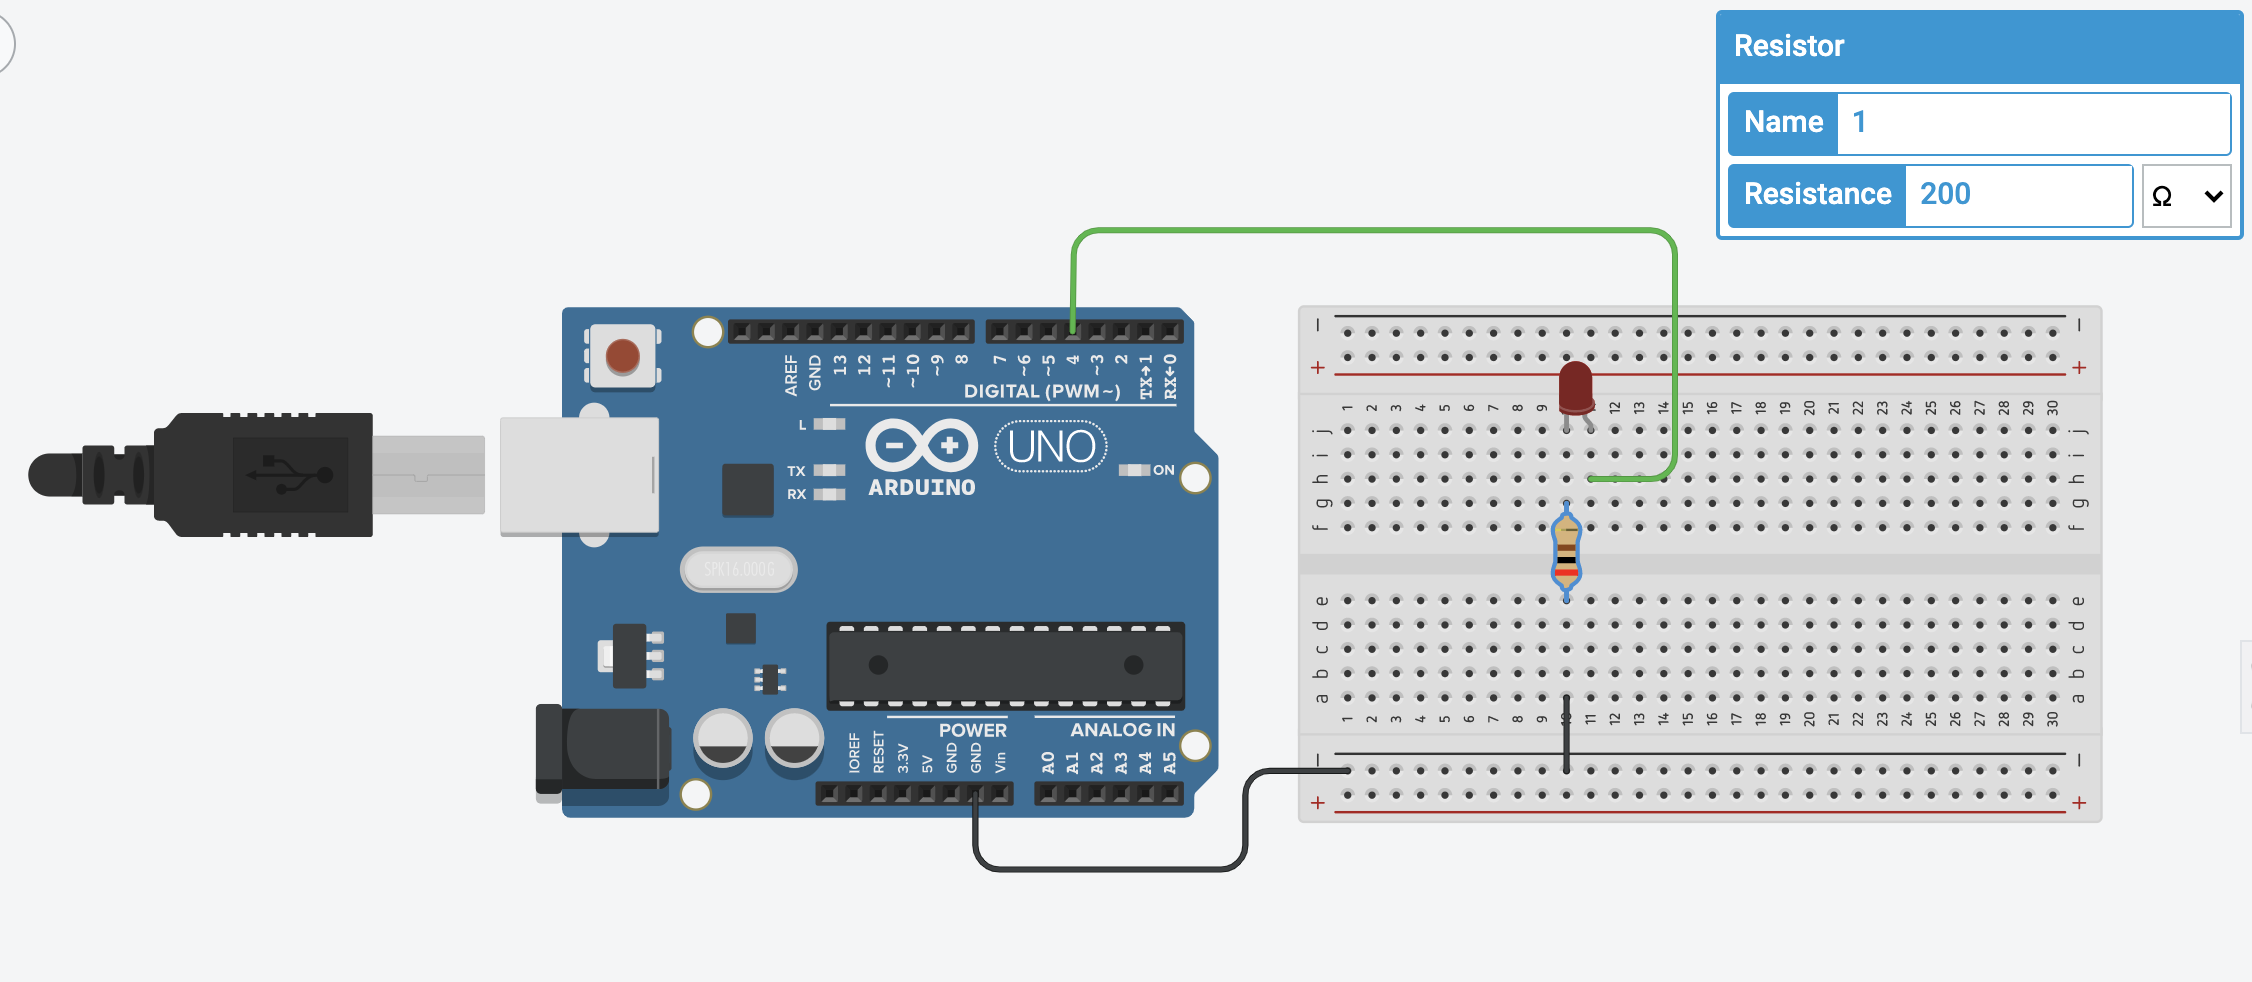
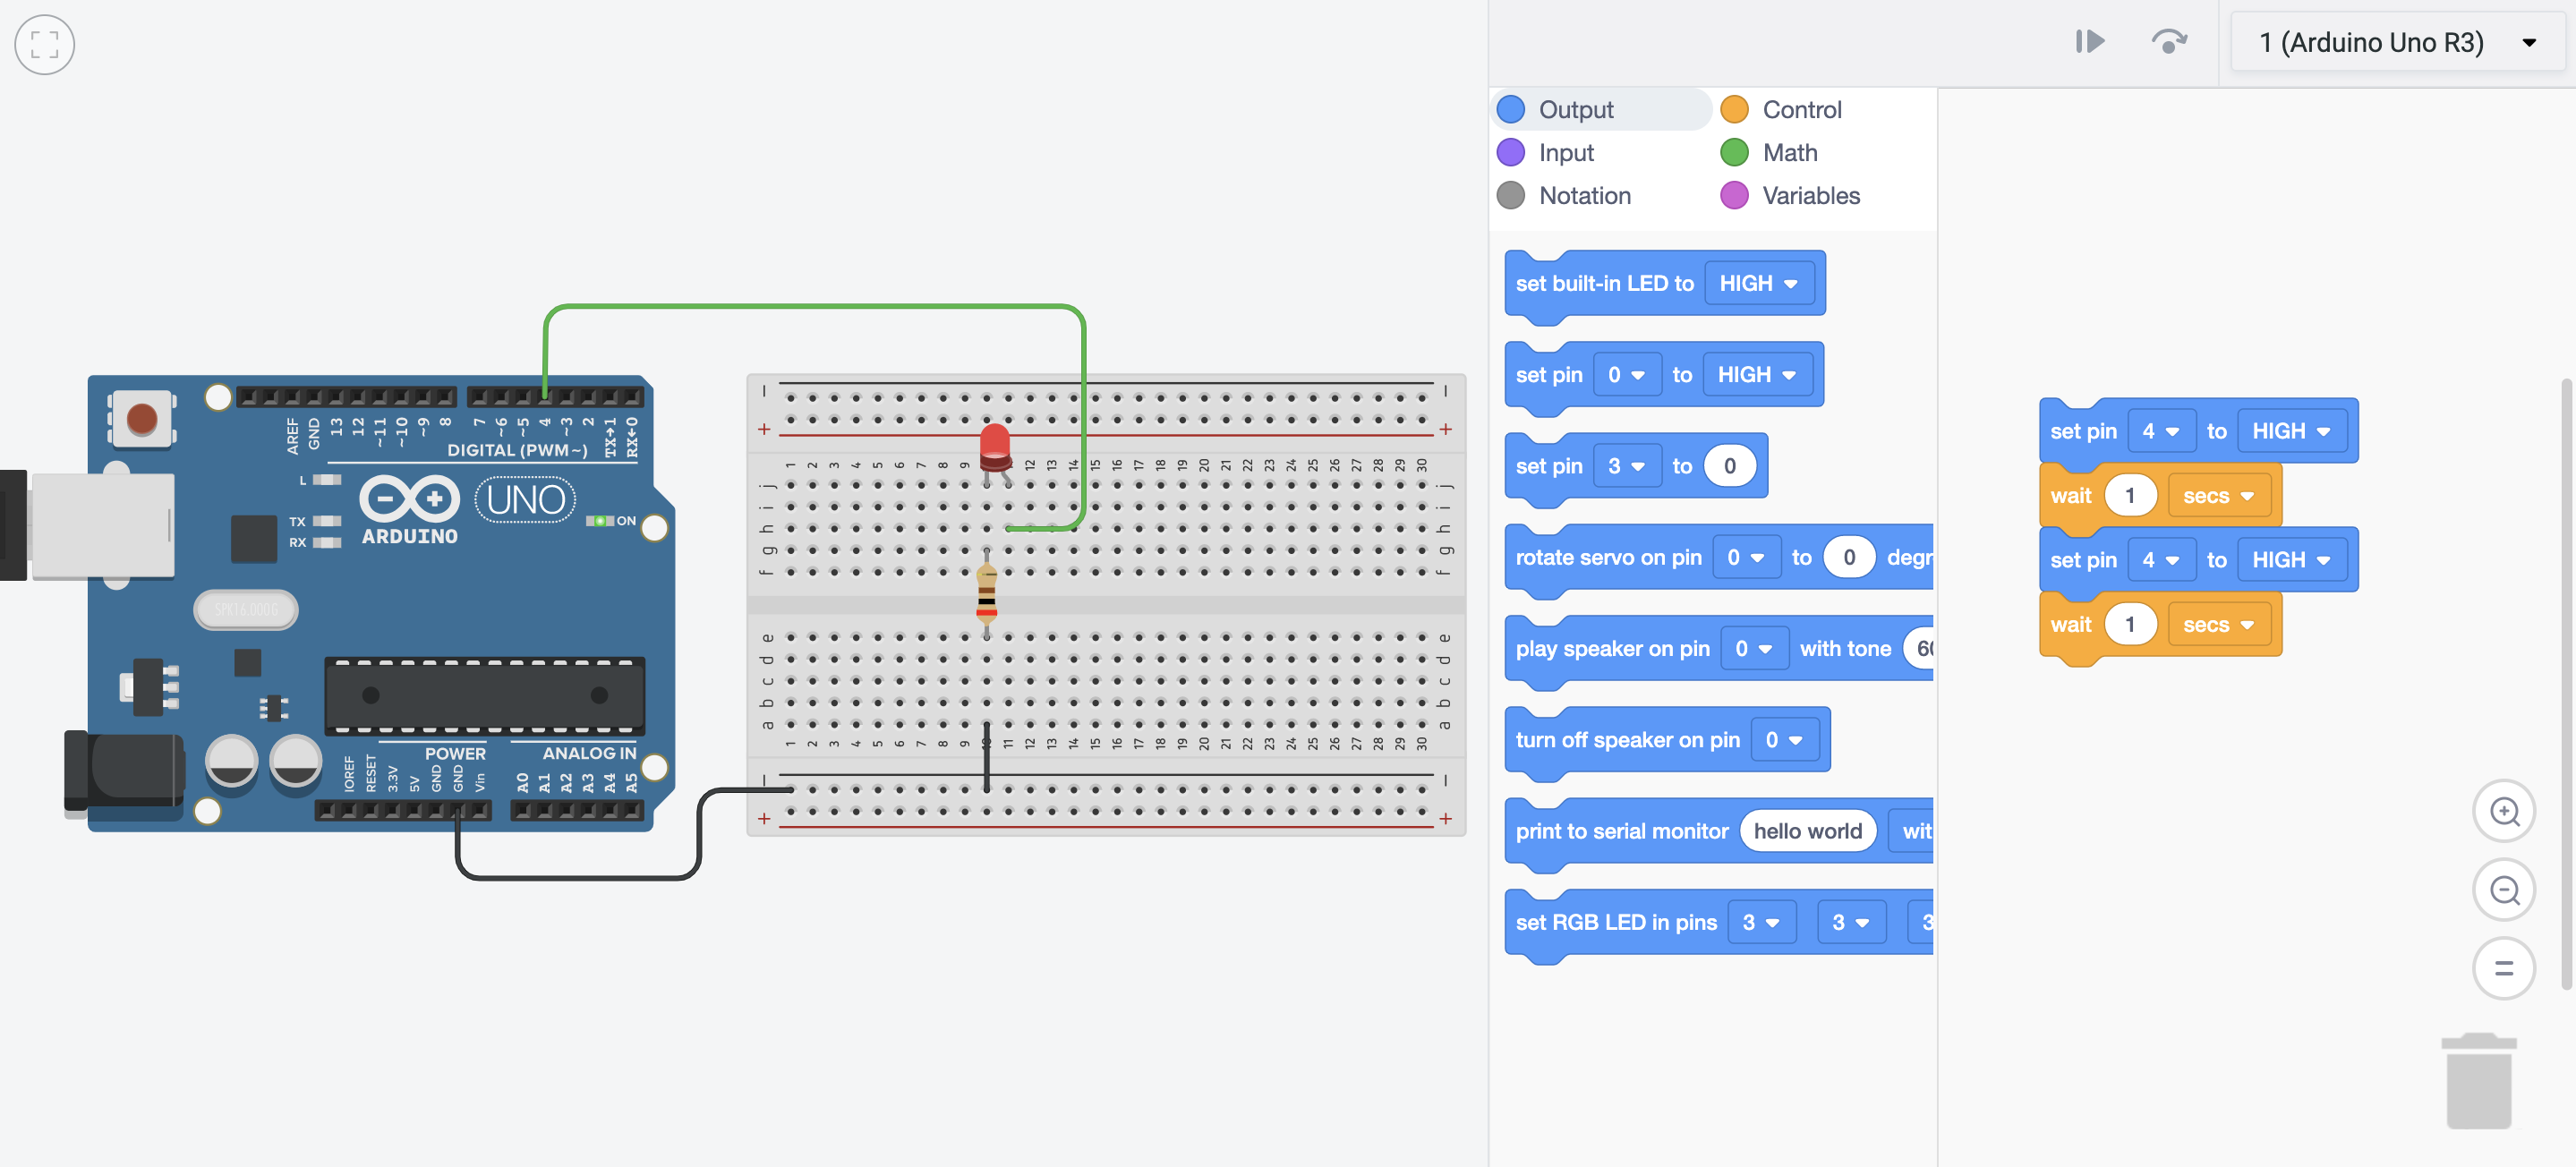
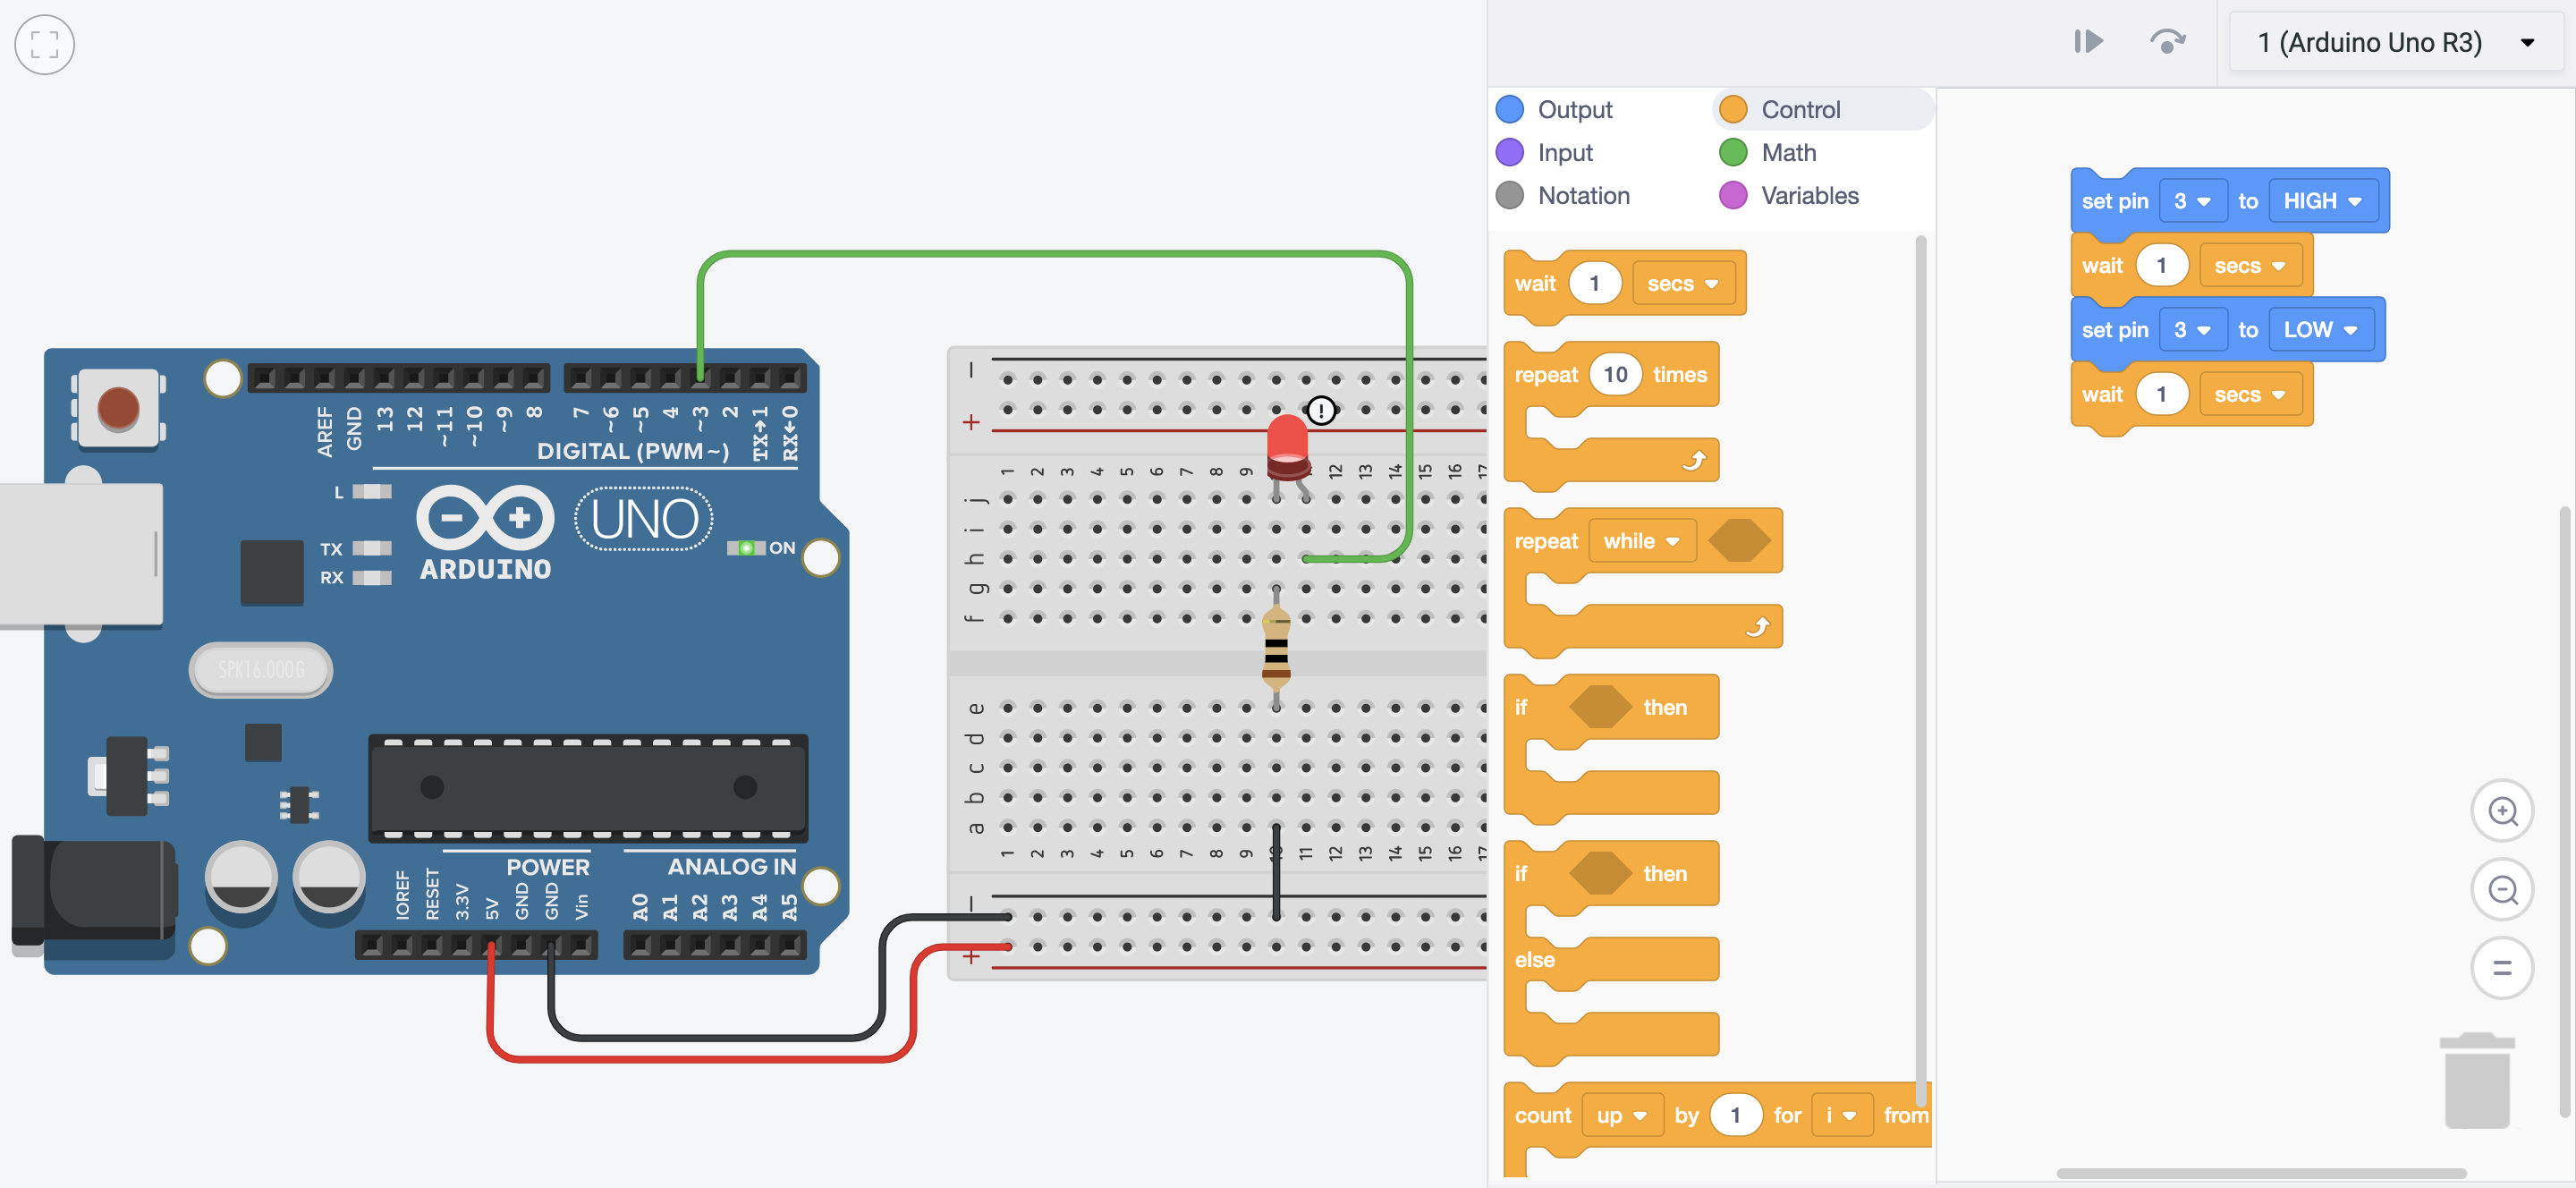
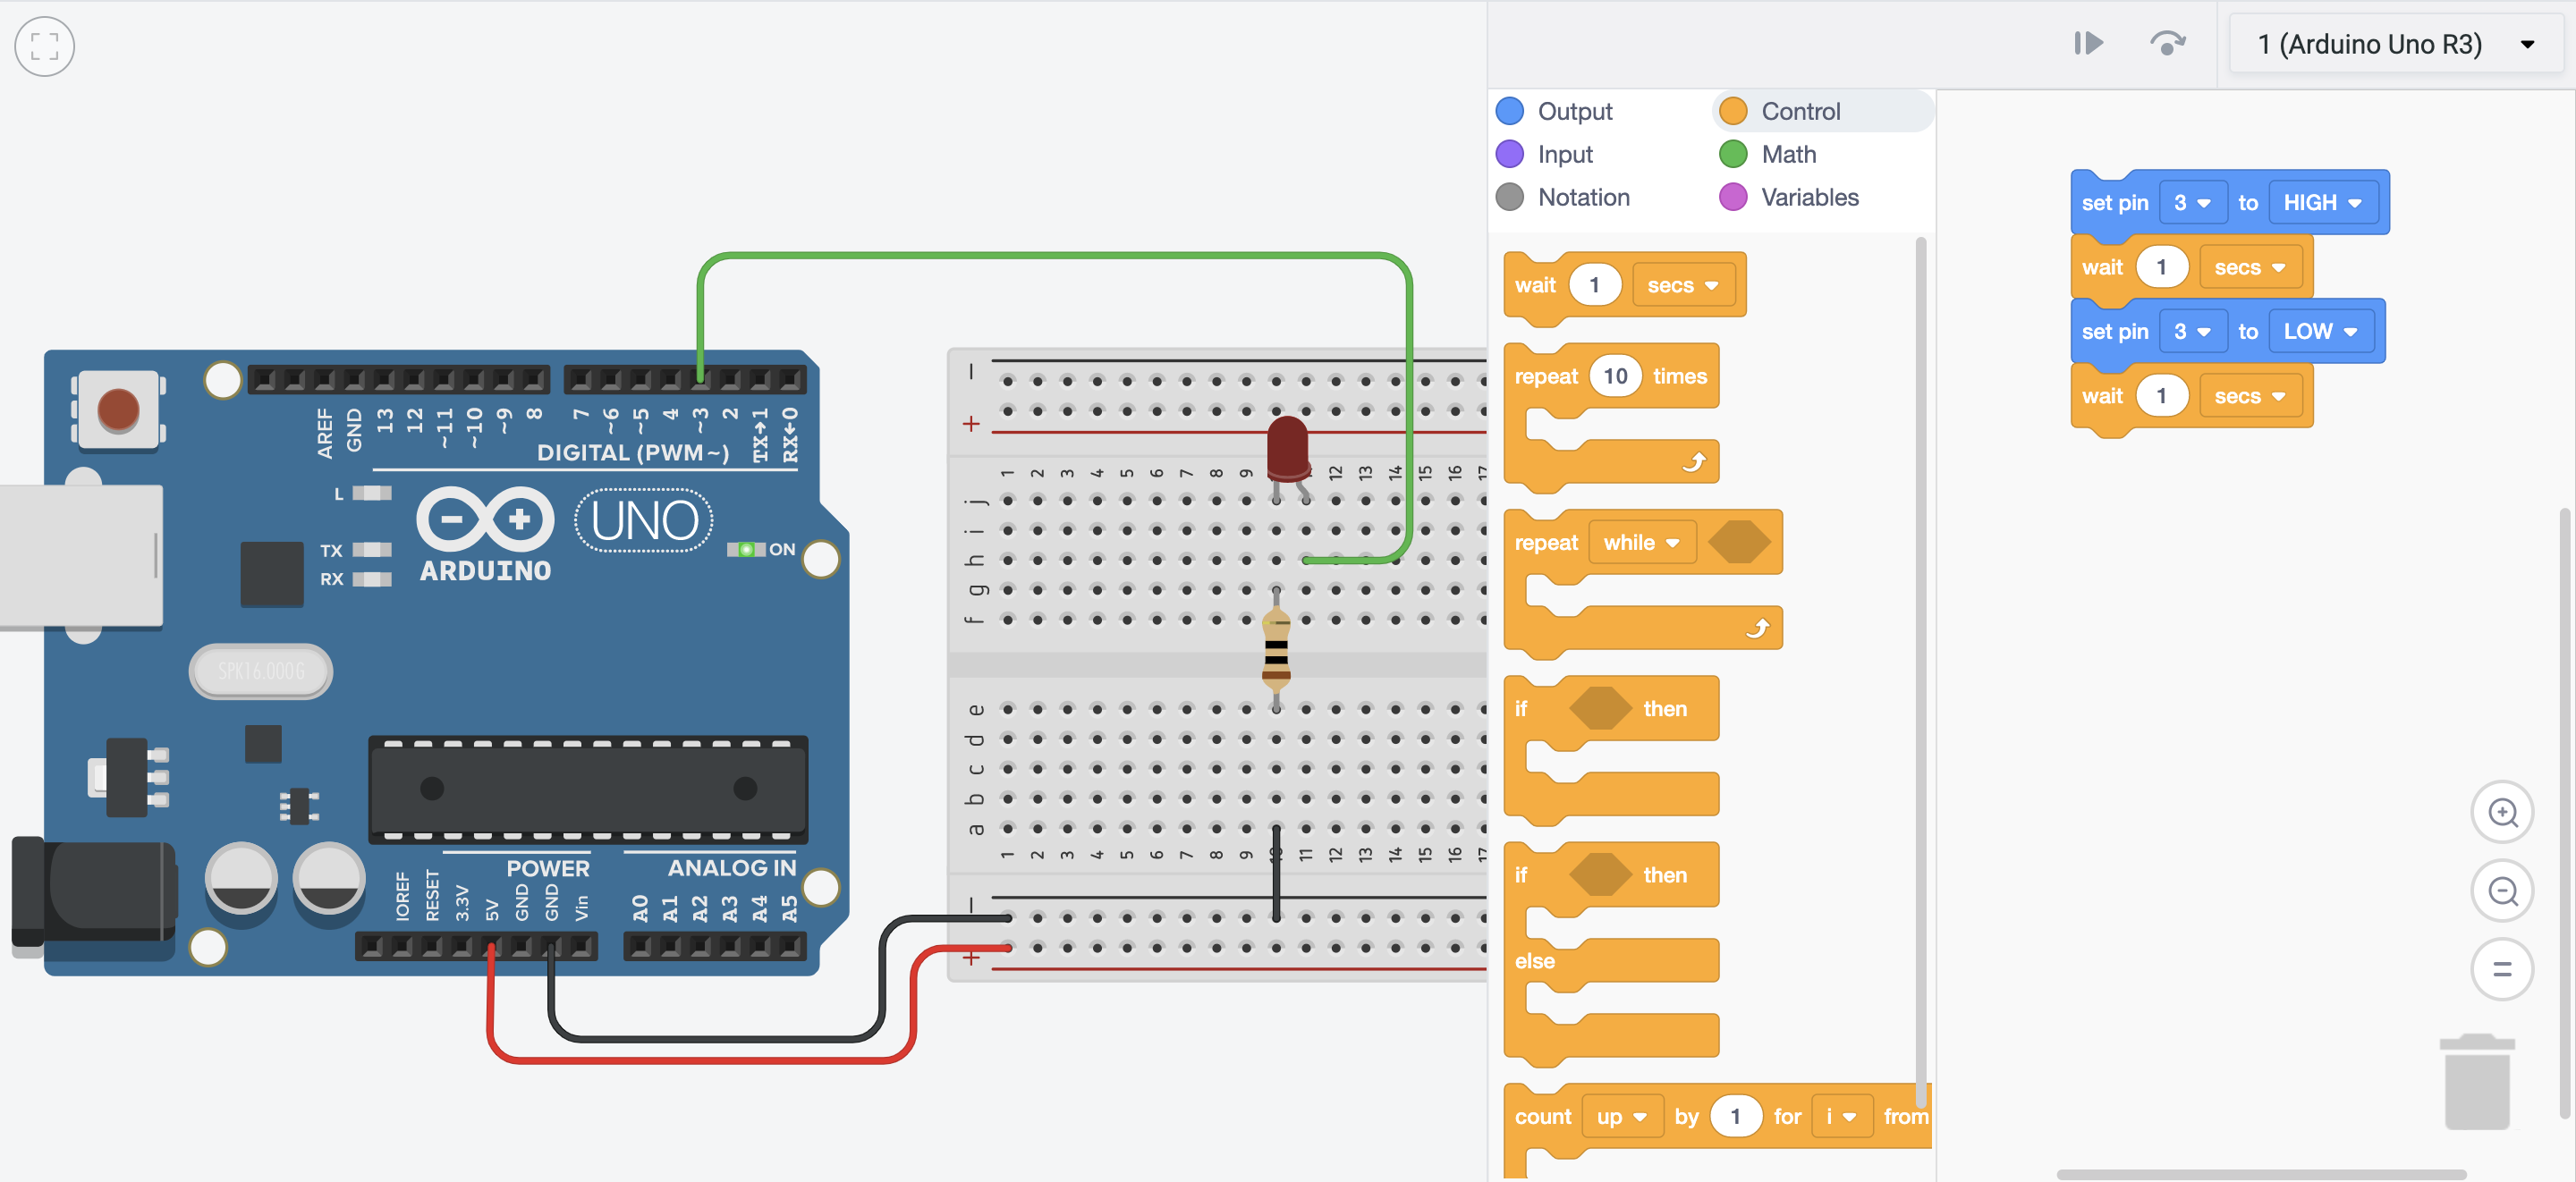
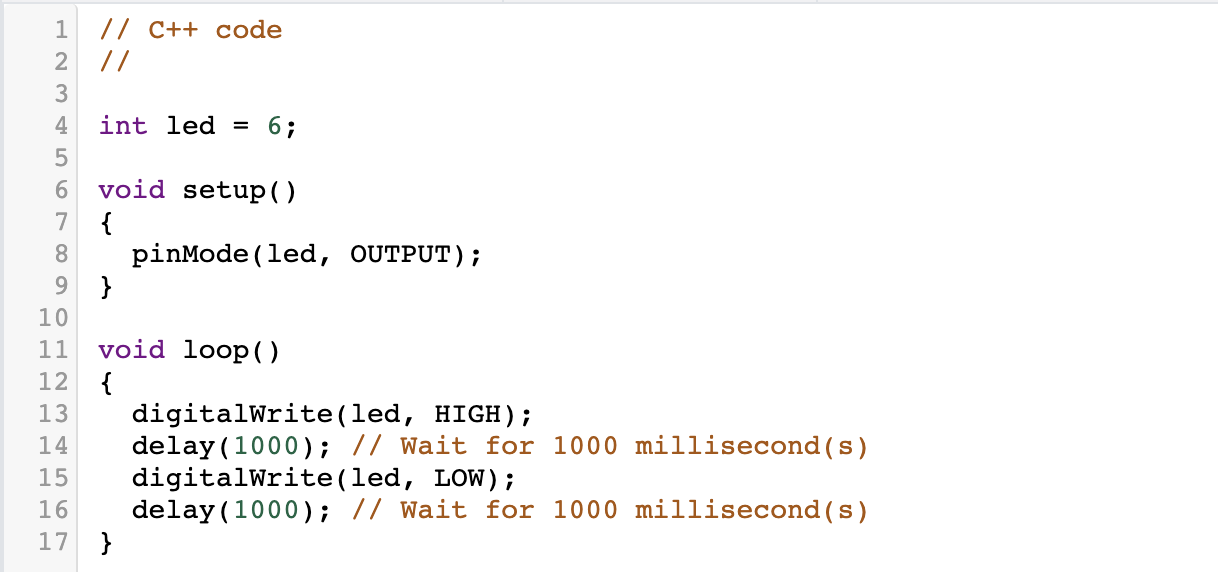
This time, we had to code a circuit with a blinking LED. We set the resistor at 200 ohms, and set up block codes which let us light up the LED before it goes off in a timed duration. We then slightly altered the circuit, but still made one that would cause the LED to blink on and off.
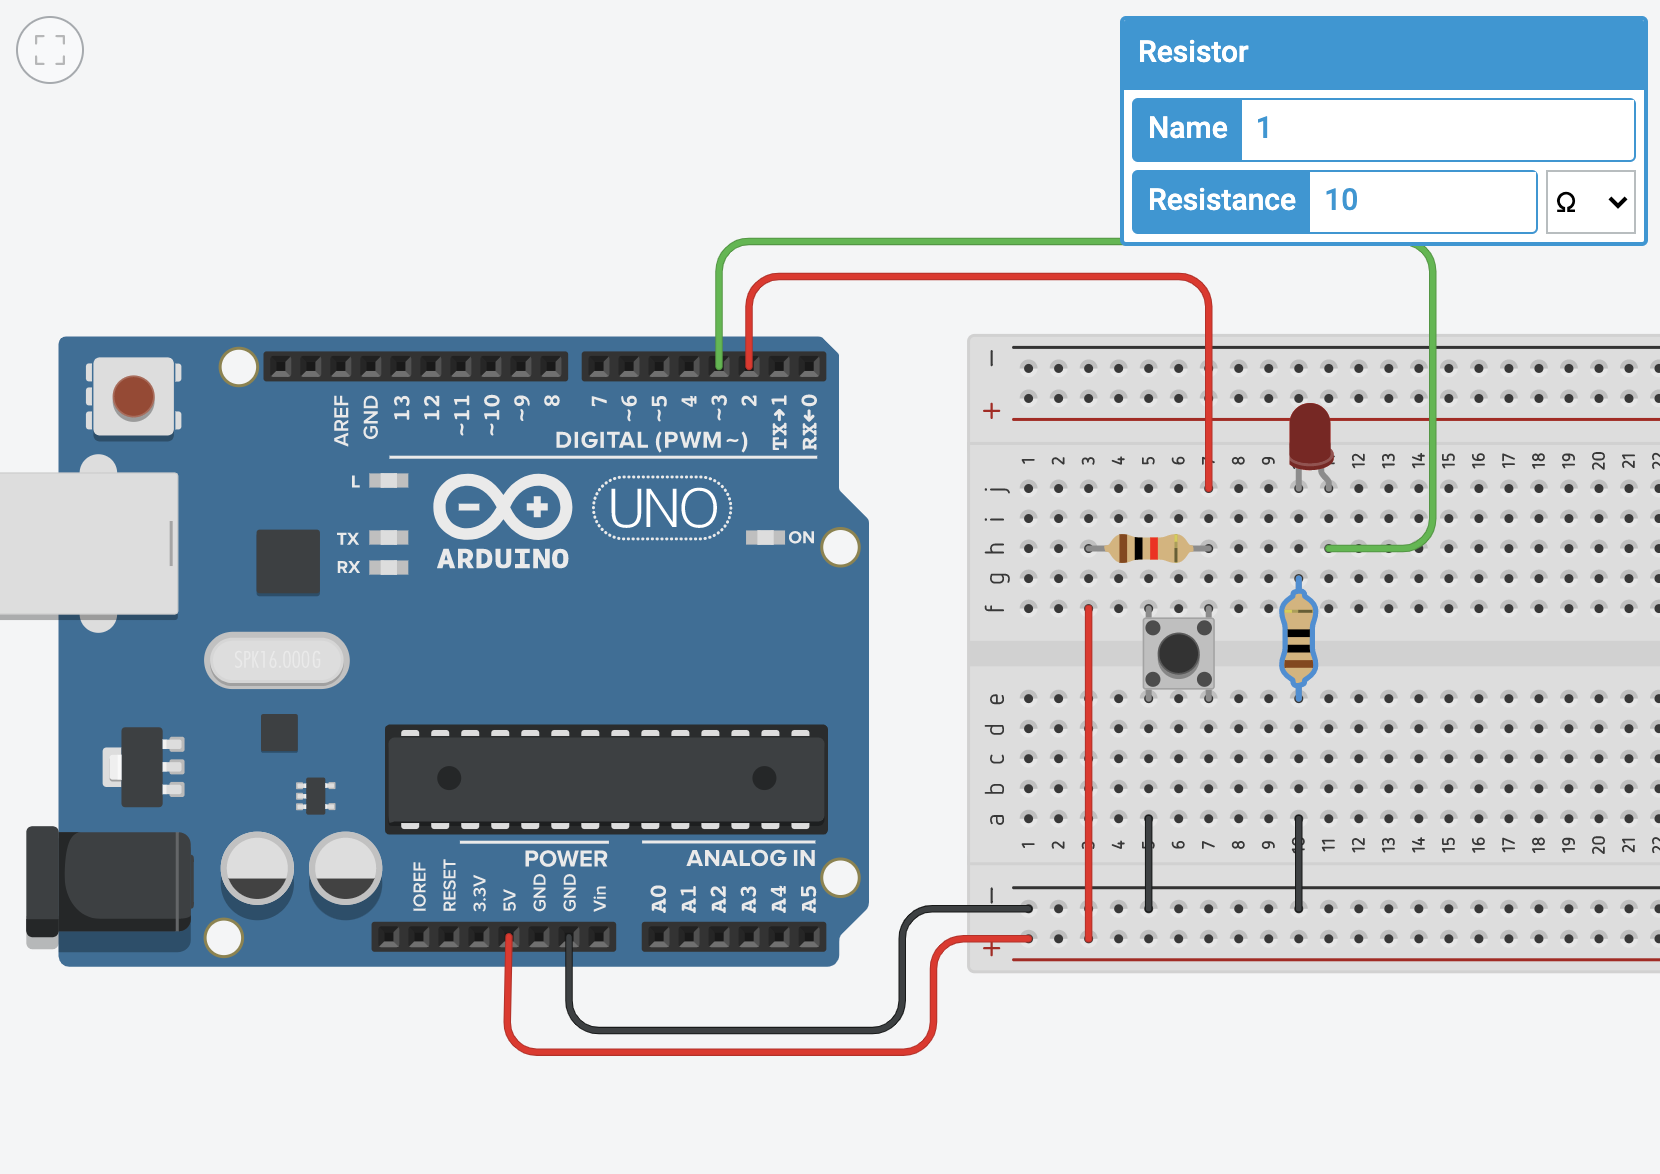
Next, we made another circuit. We used block codes for this, in which they would light up the LED.
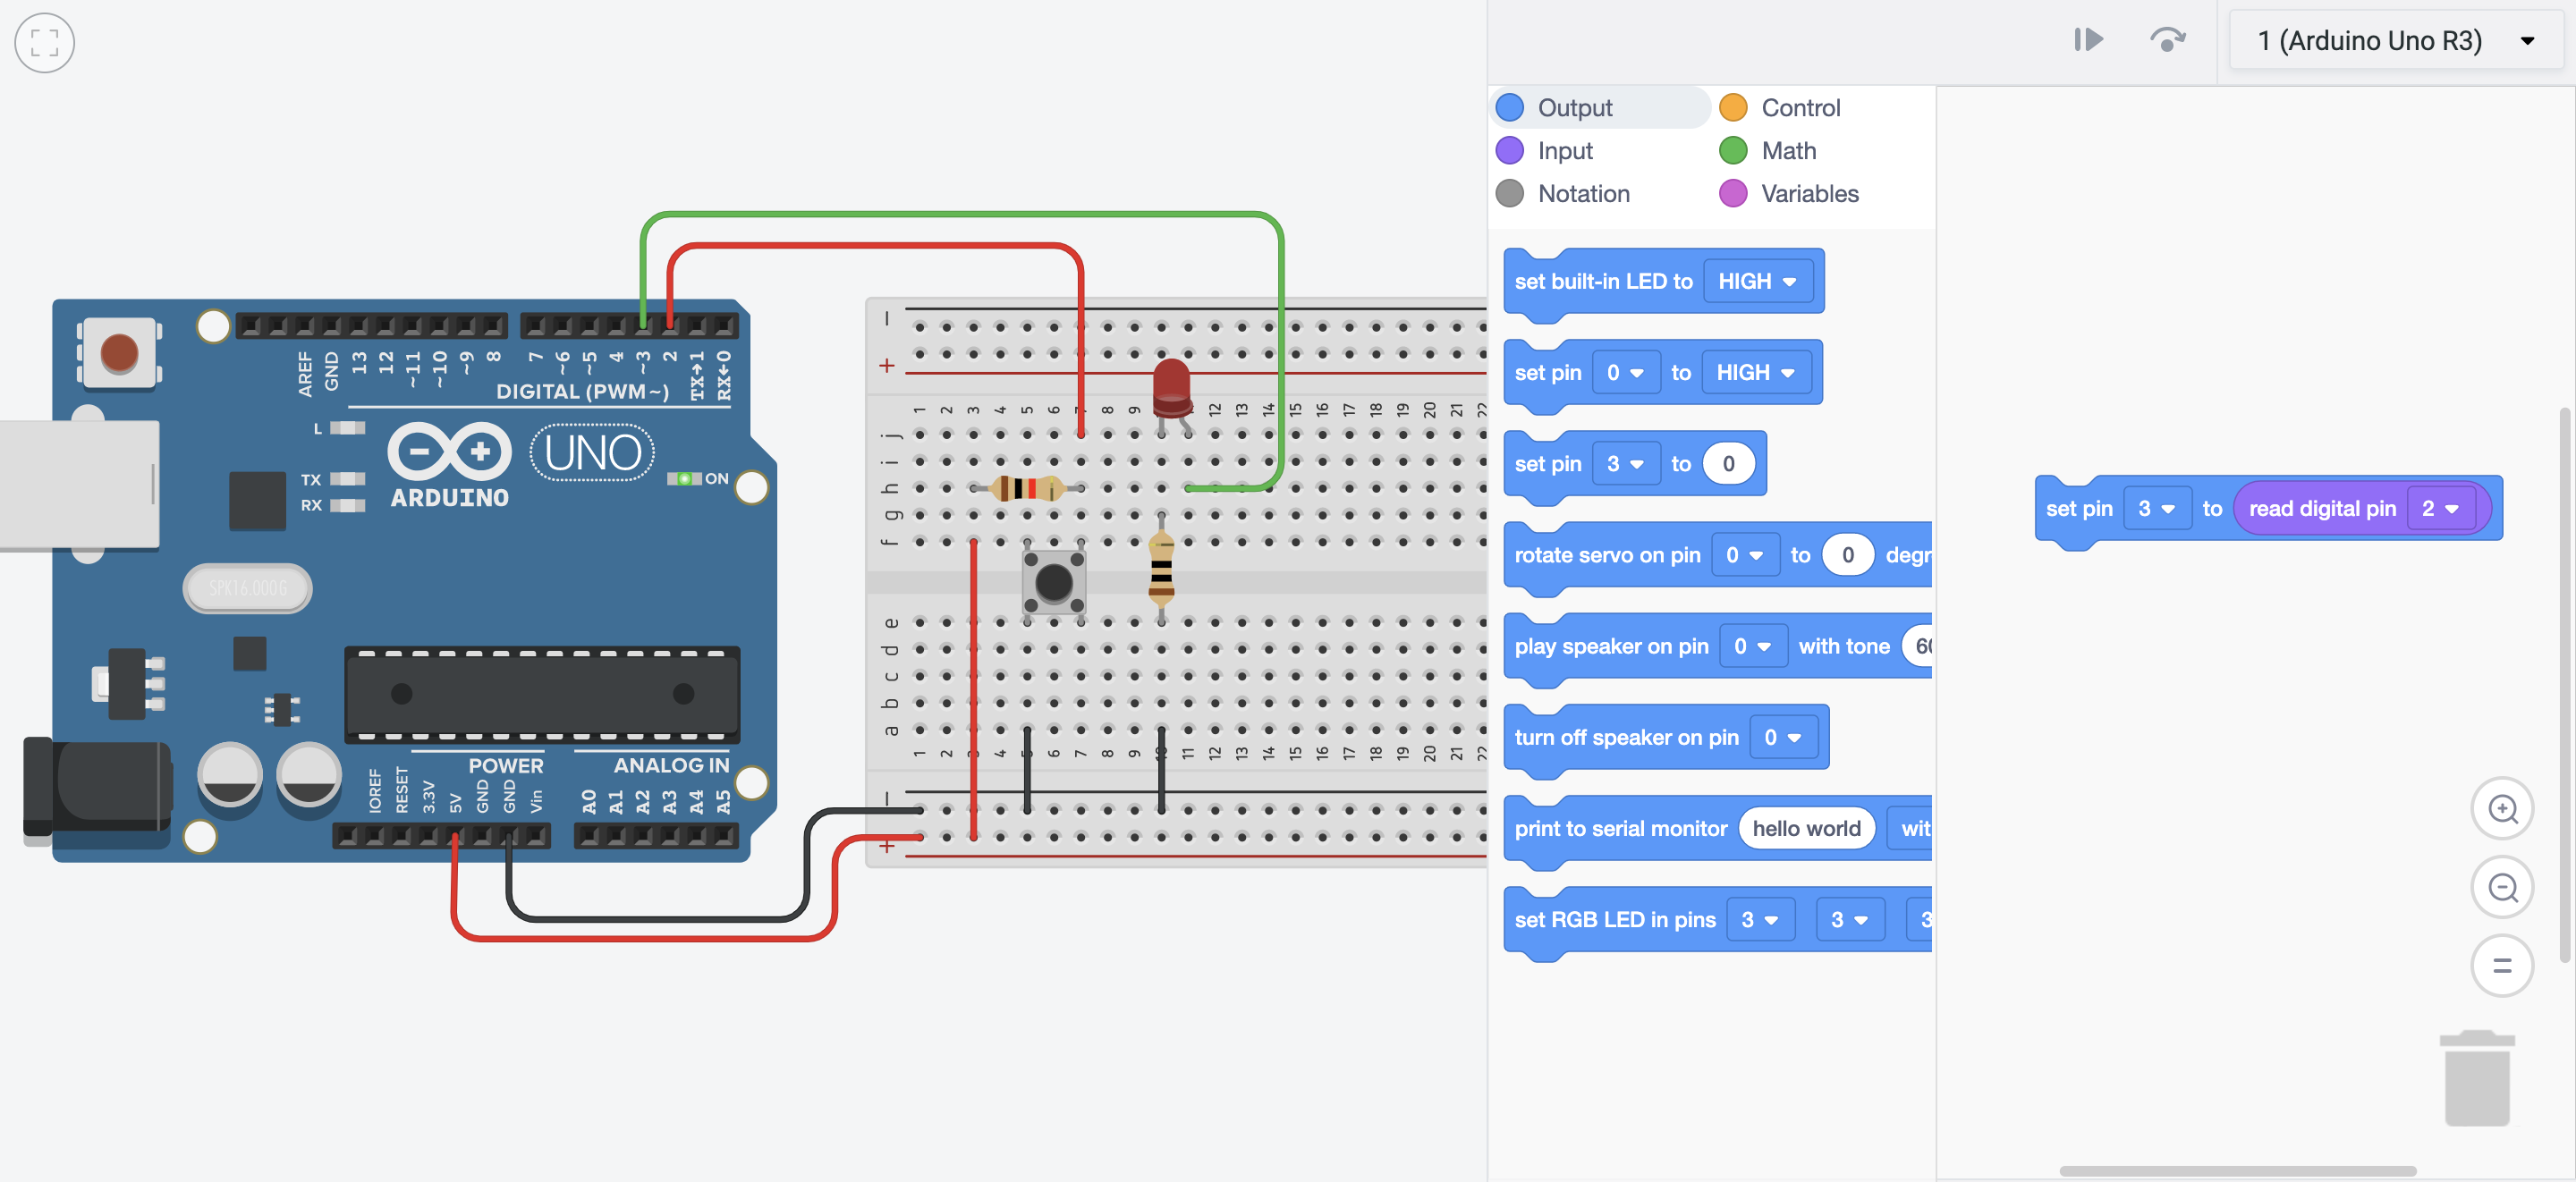
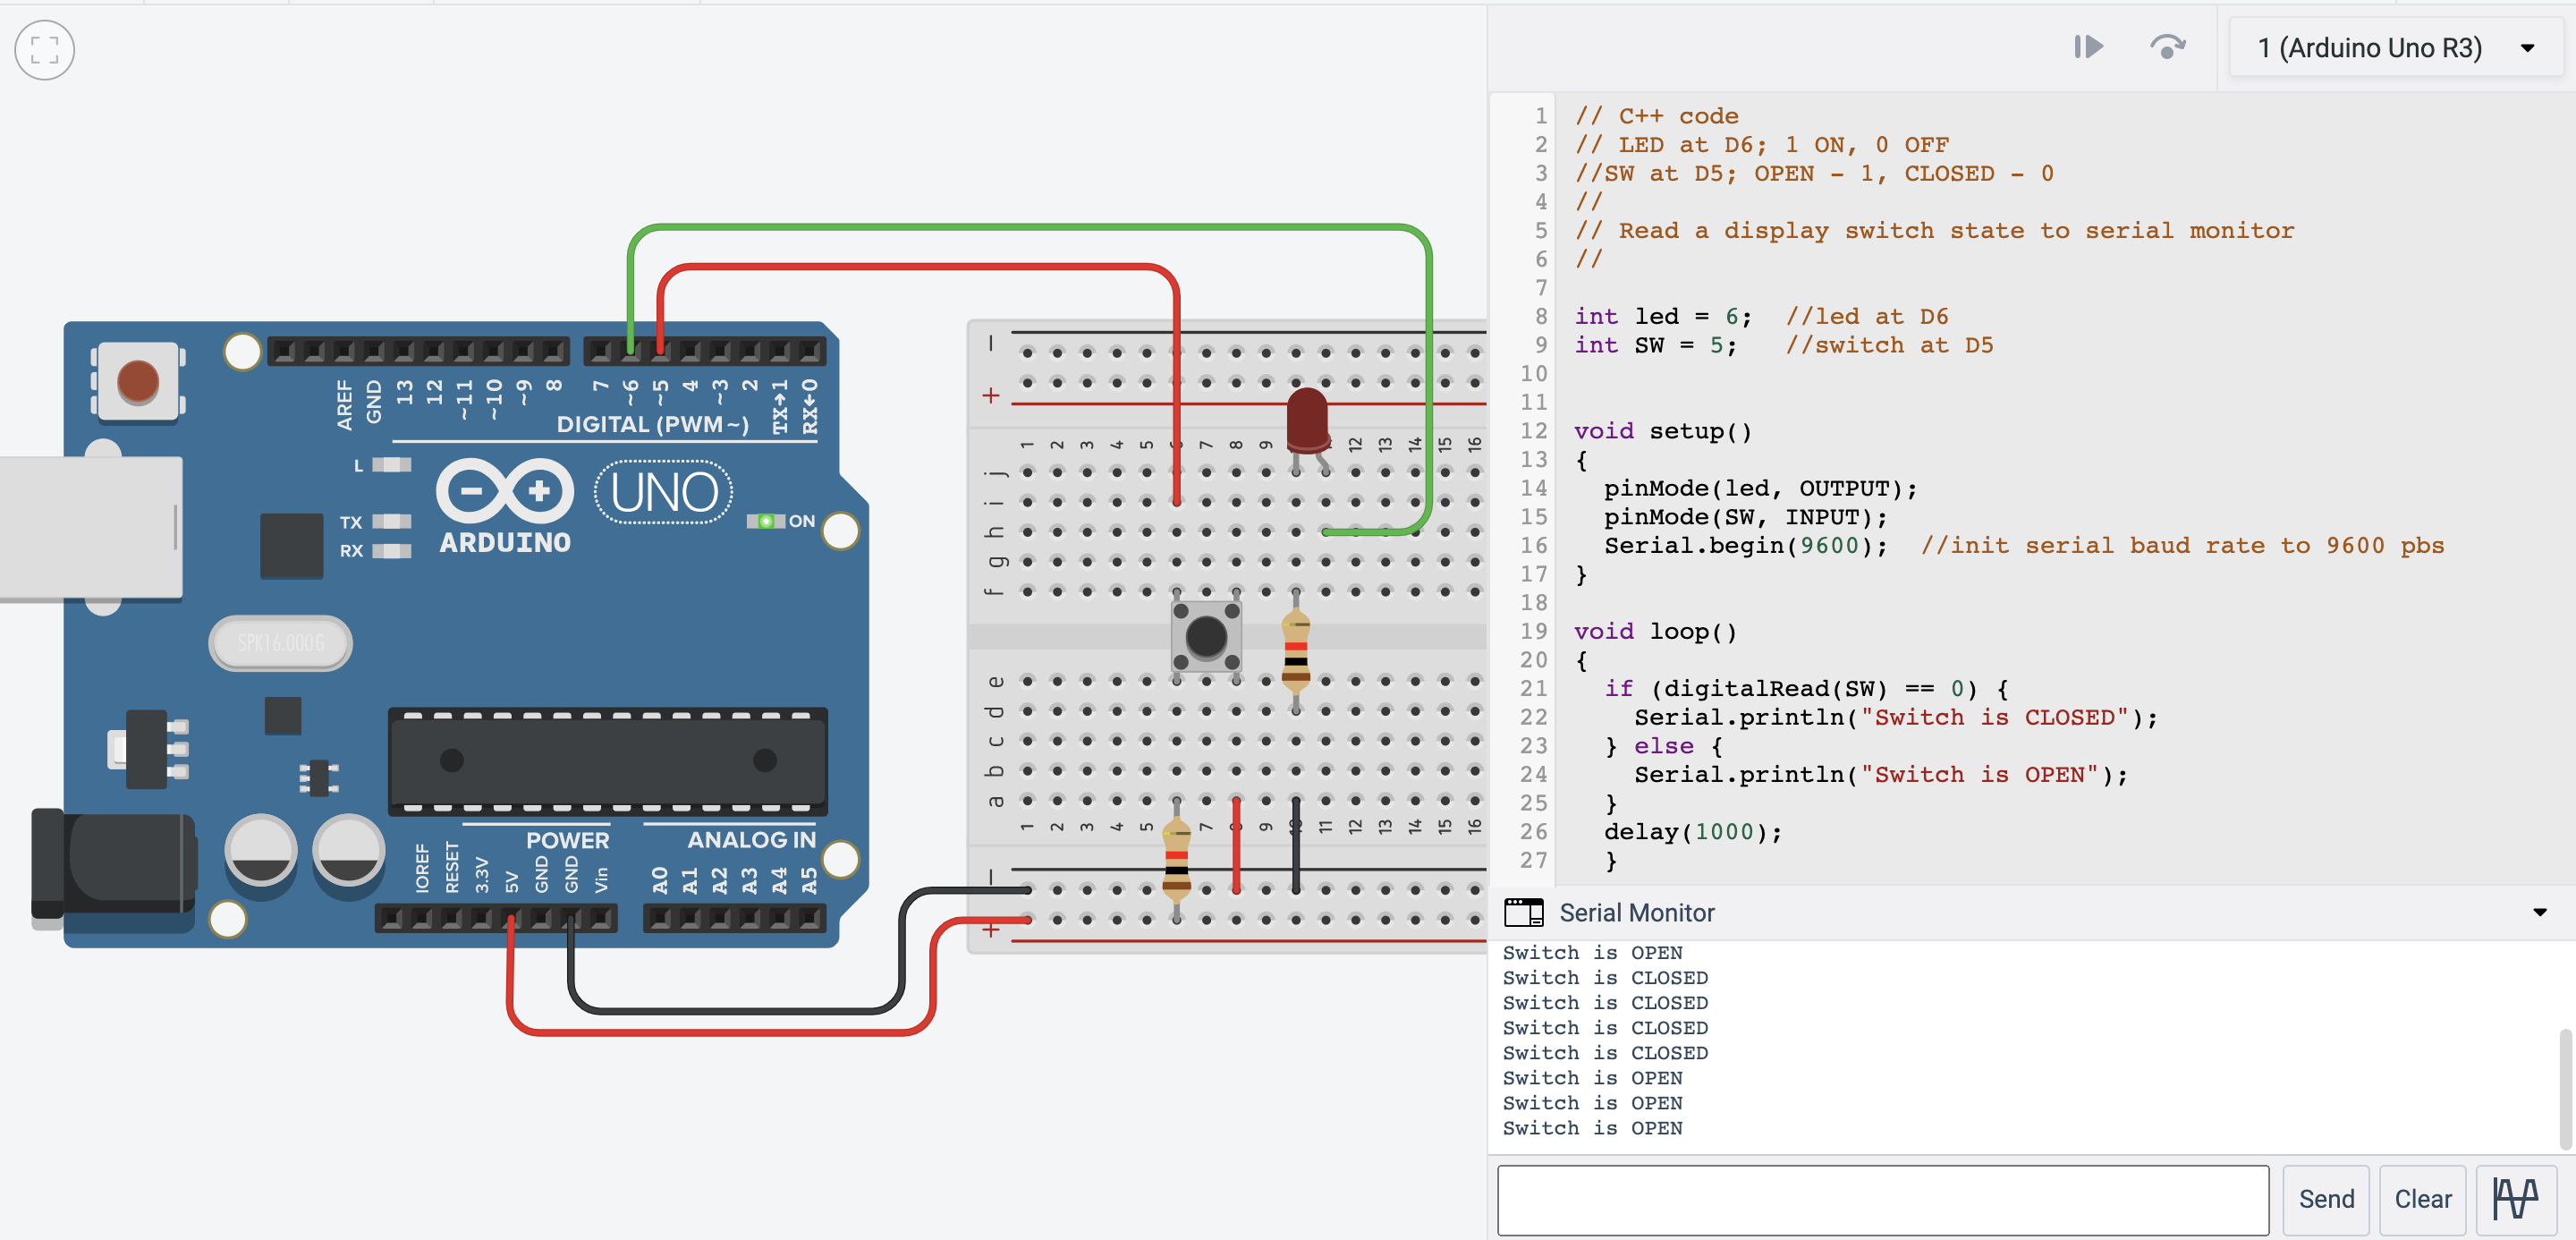
Using the same circuit, we then switched to using text codes. This time, pressing the push button would cause the serial monitor to read 'Switch is OPEN' or 'Switch is CLOSED' due to the serial print code.
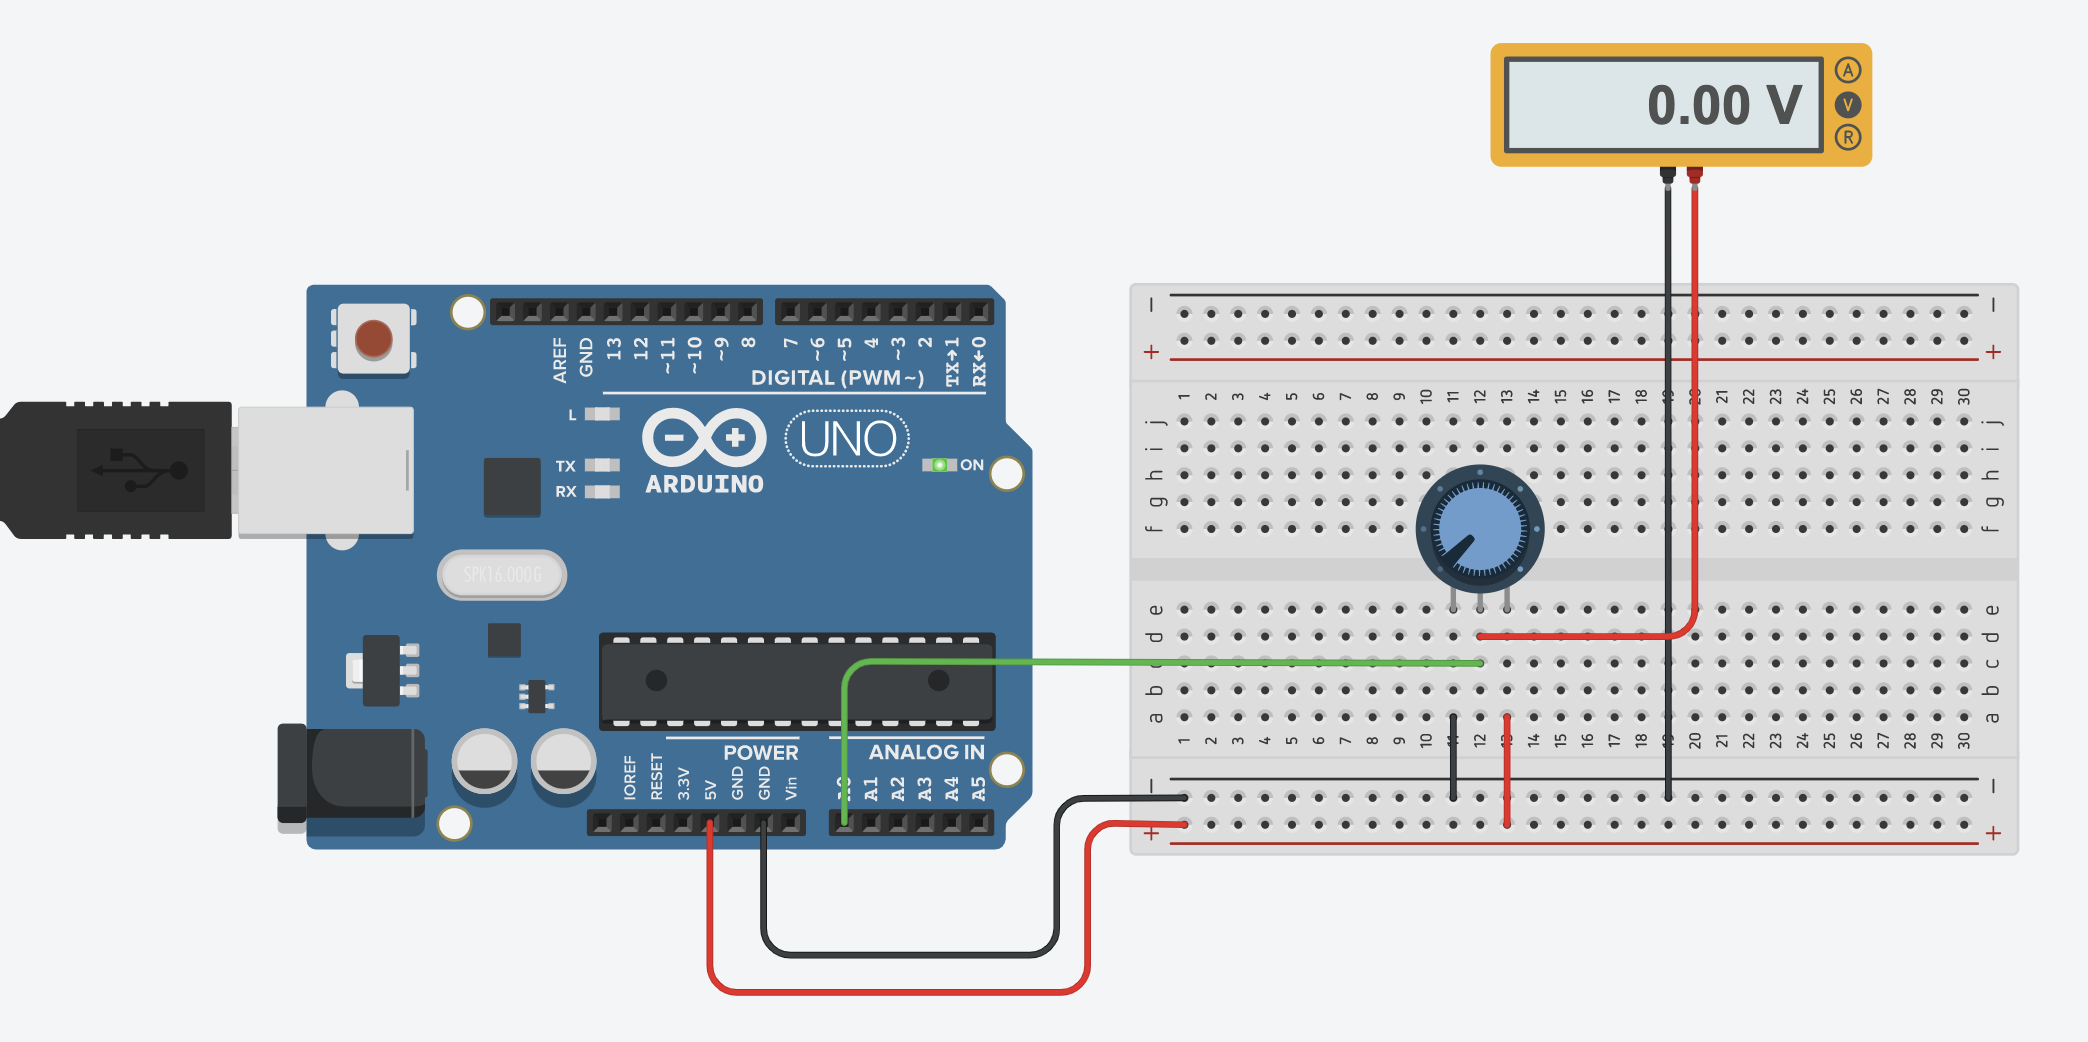
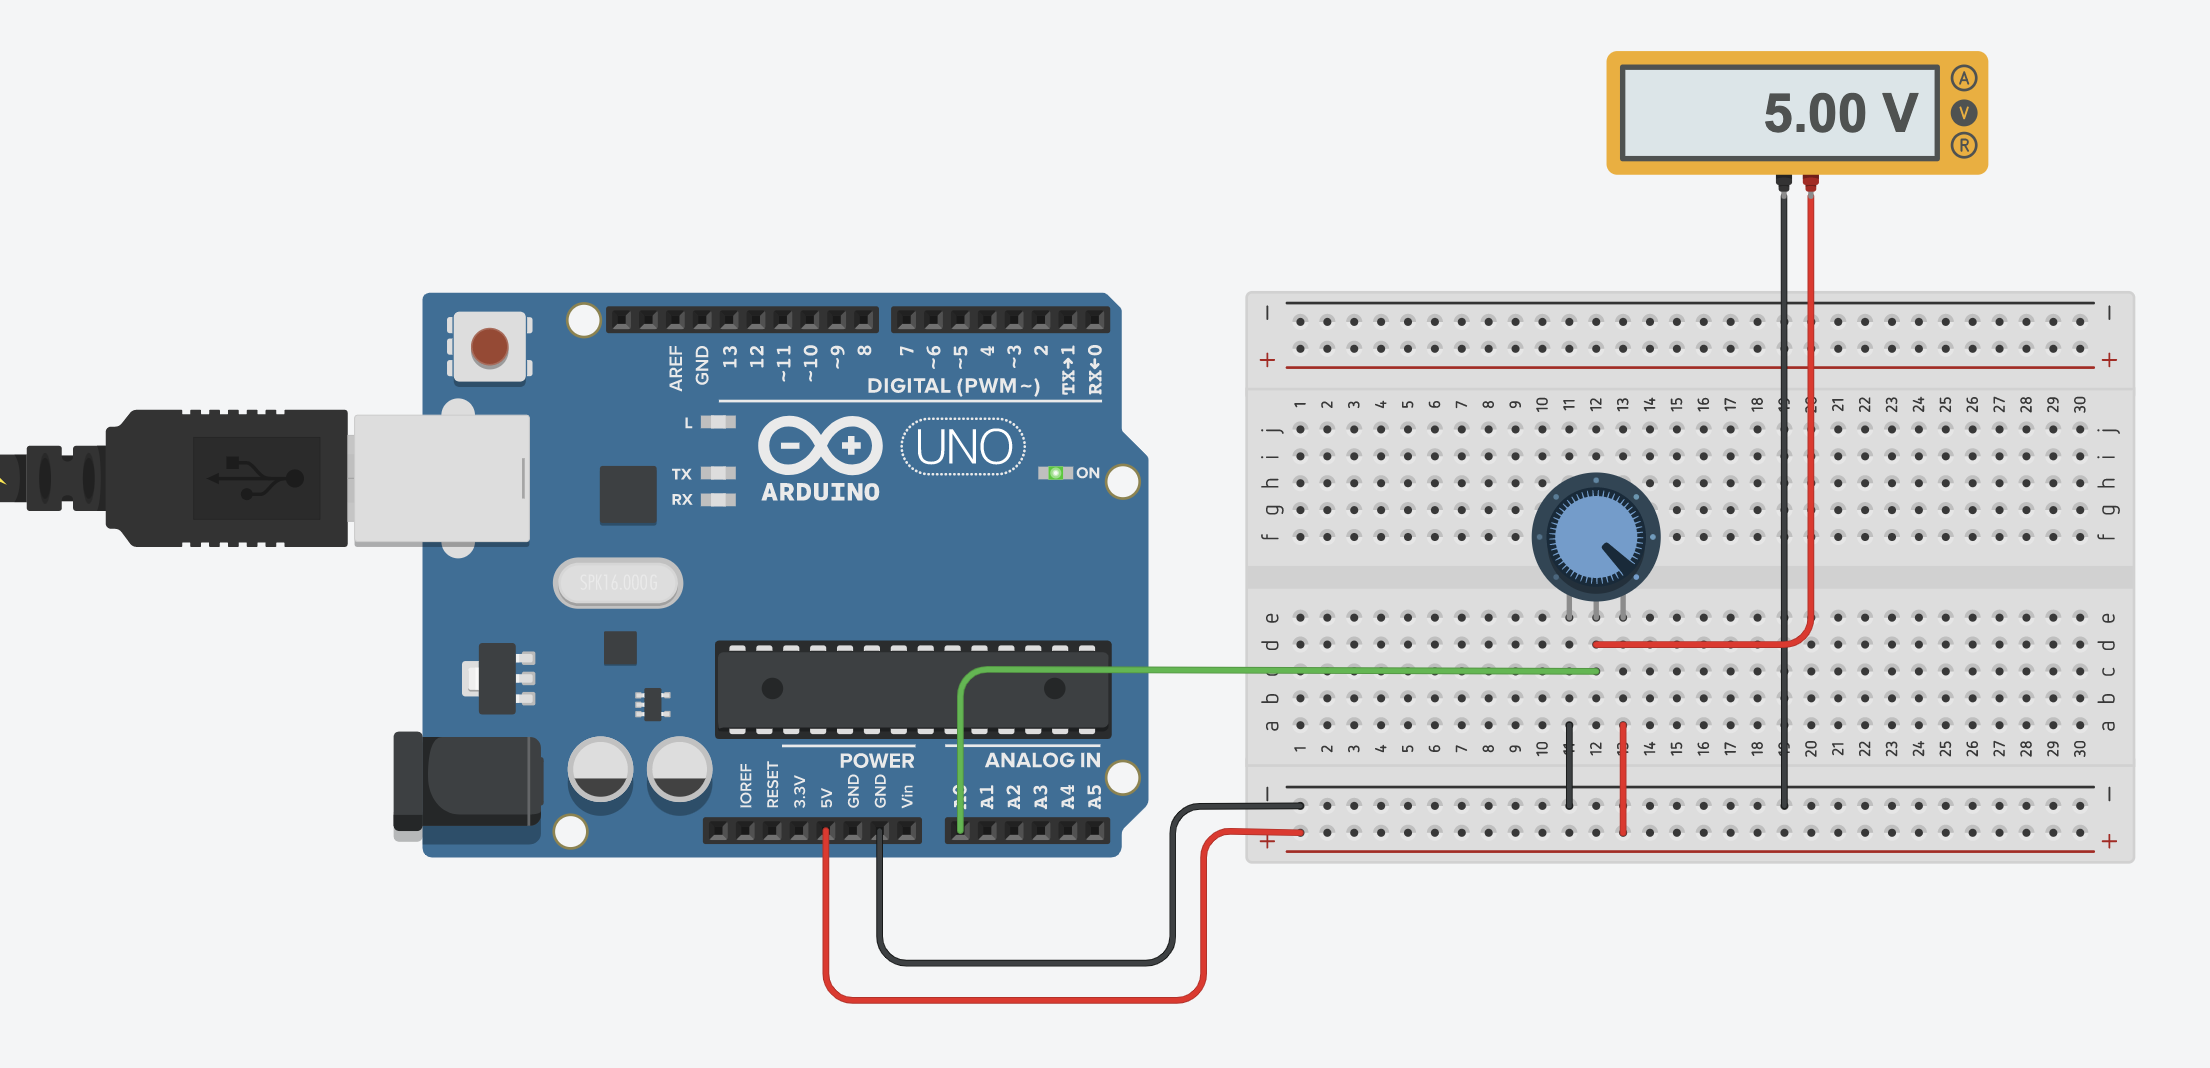
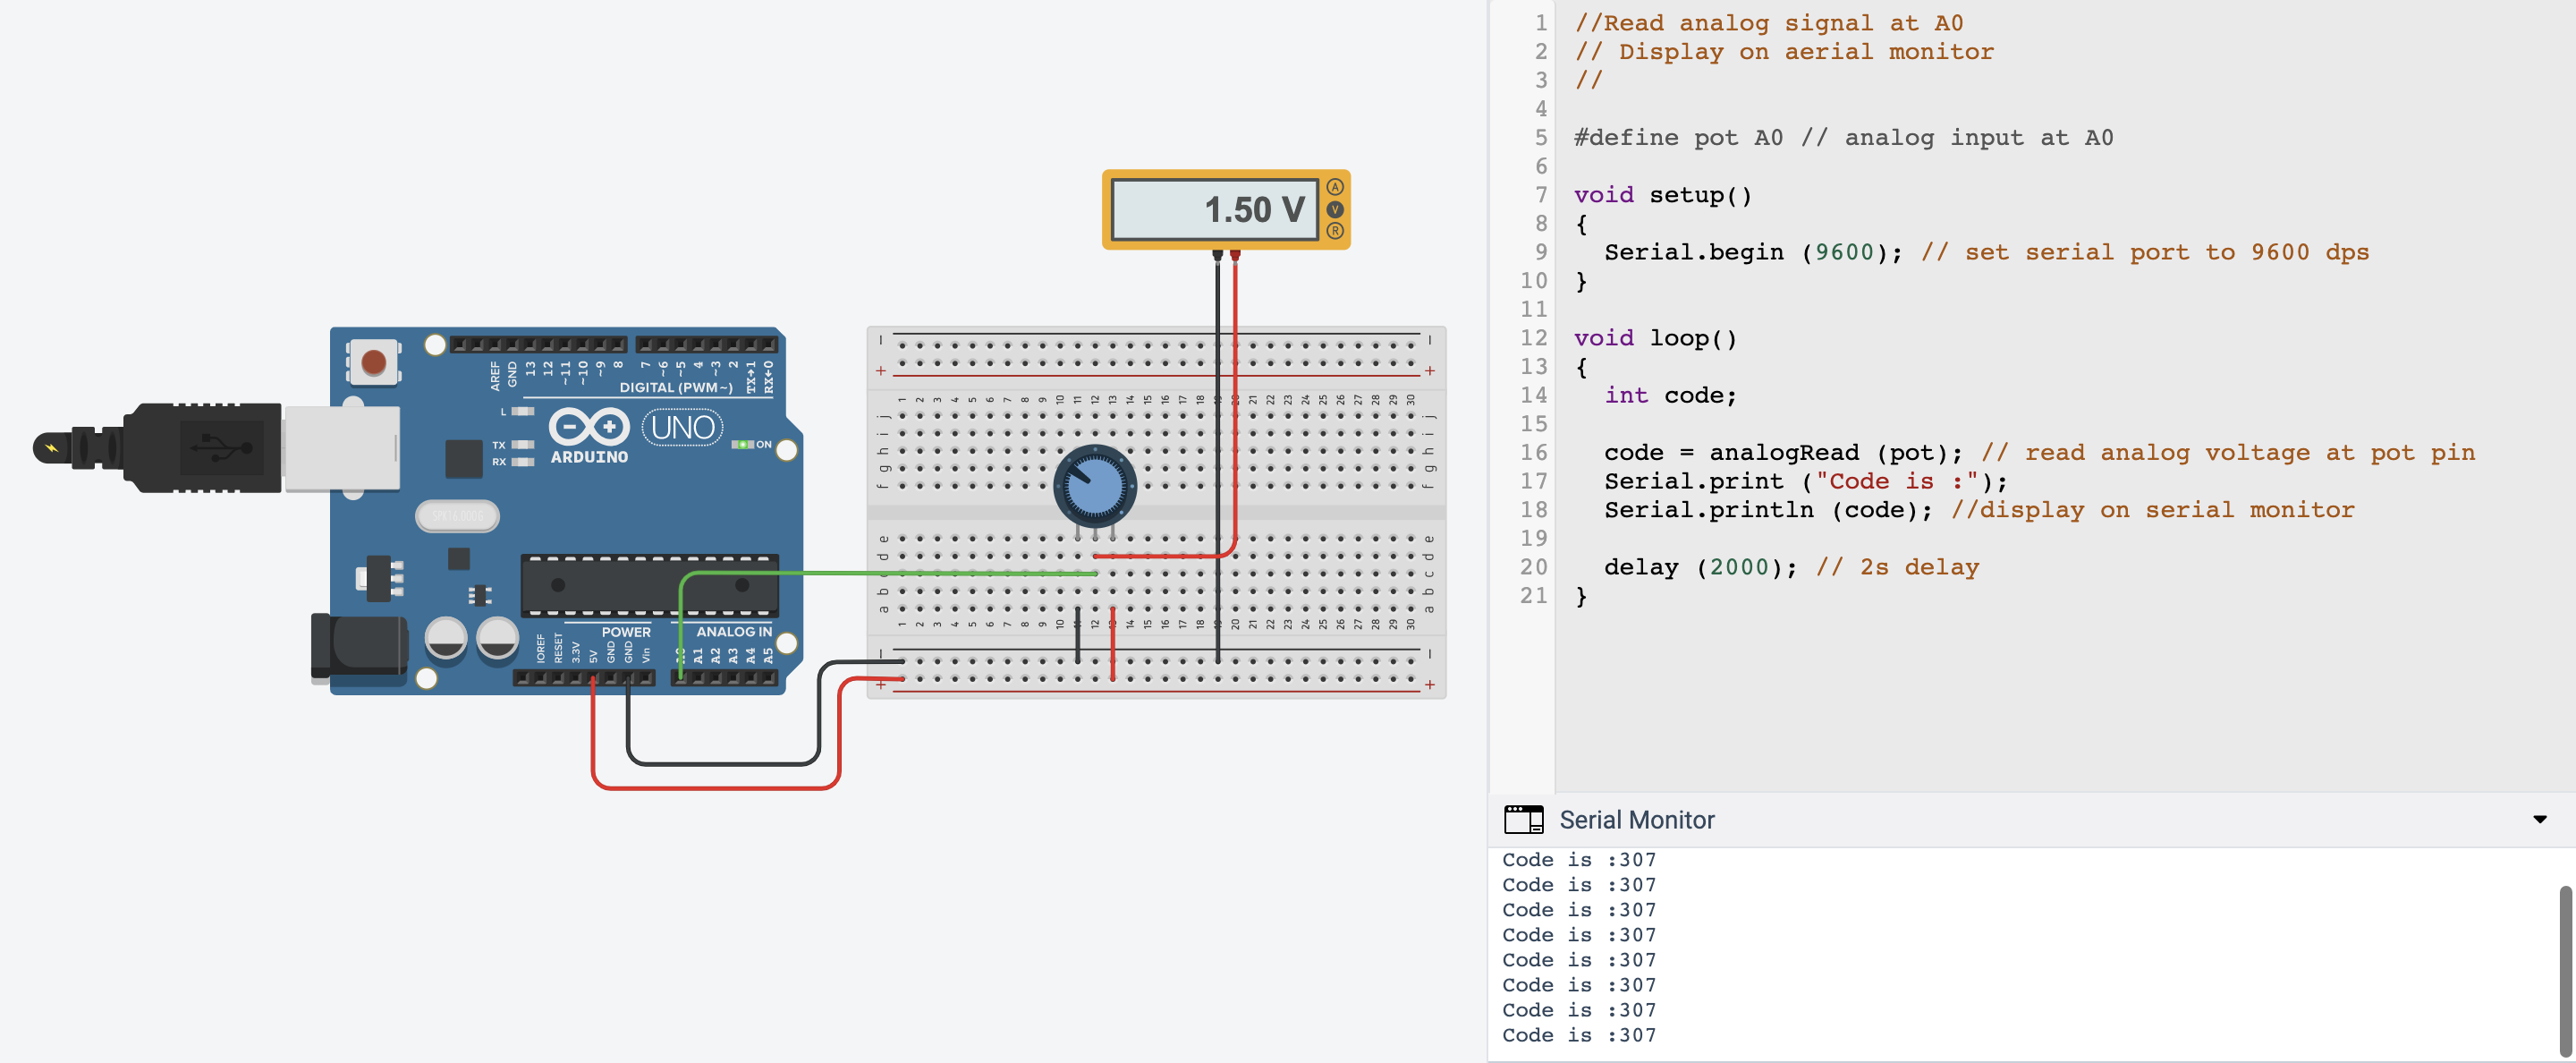
Now, we use a potentiometer and a multimeter, allowing us to read the voltage depending on how far the potentiometer is rotated to.
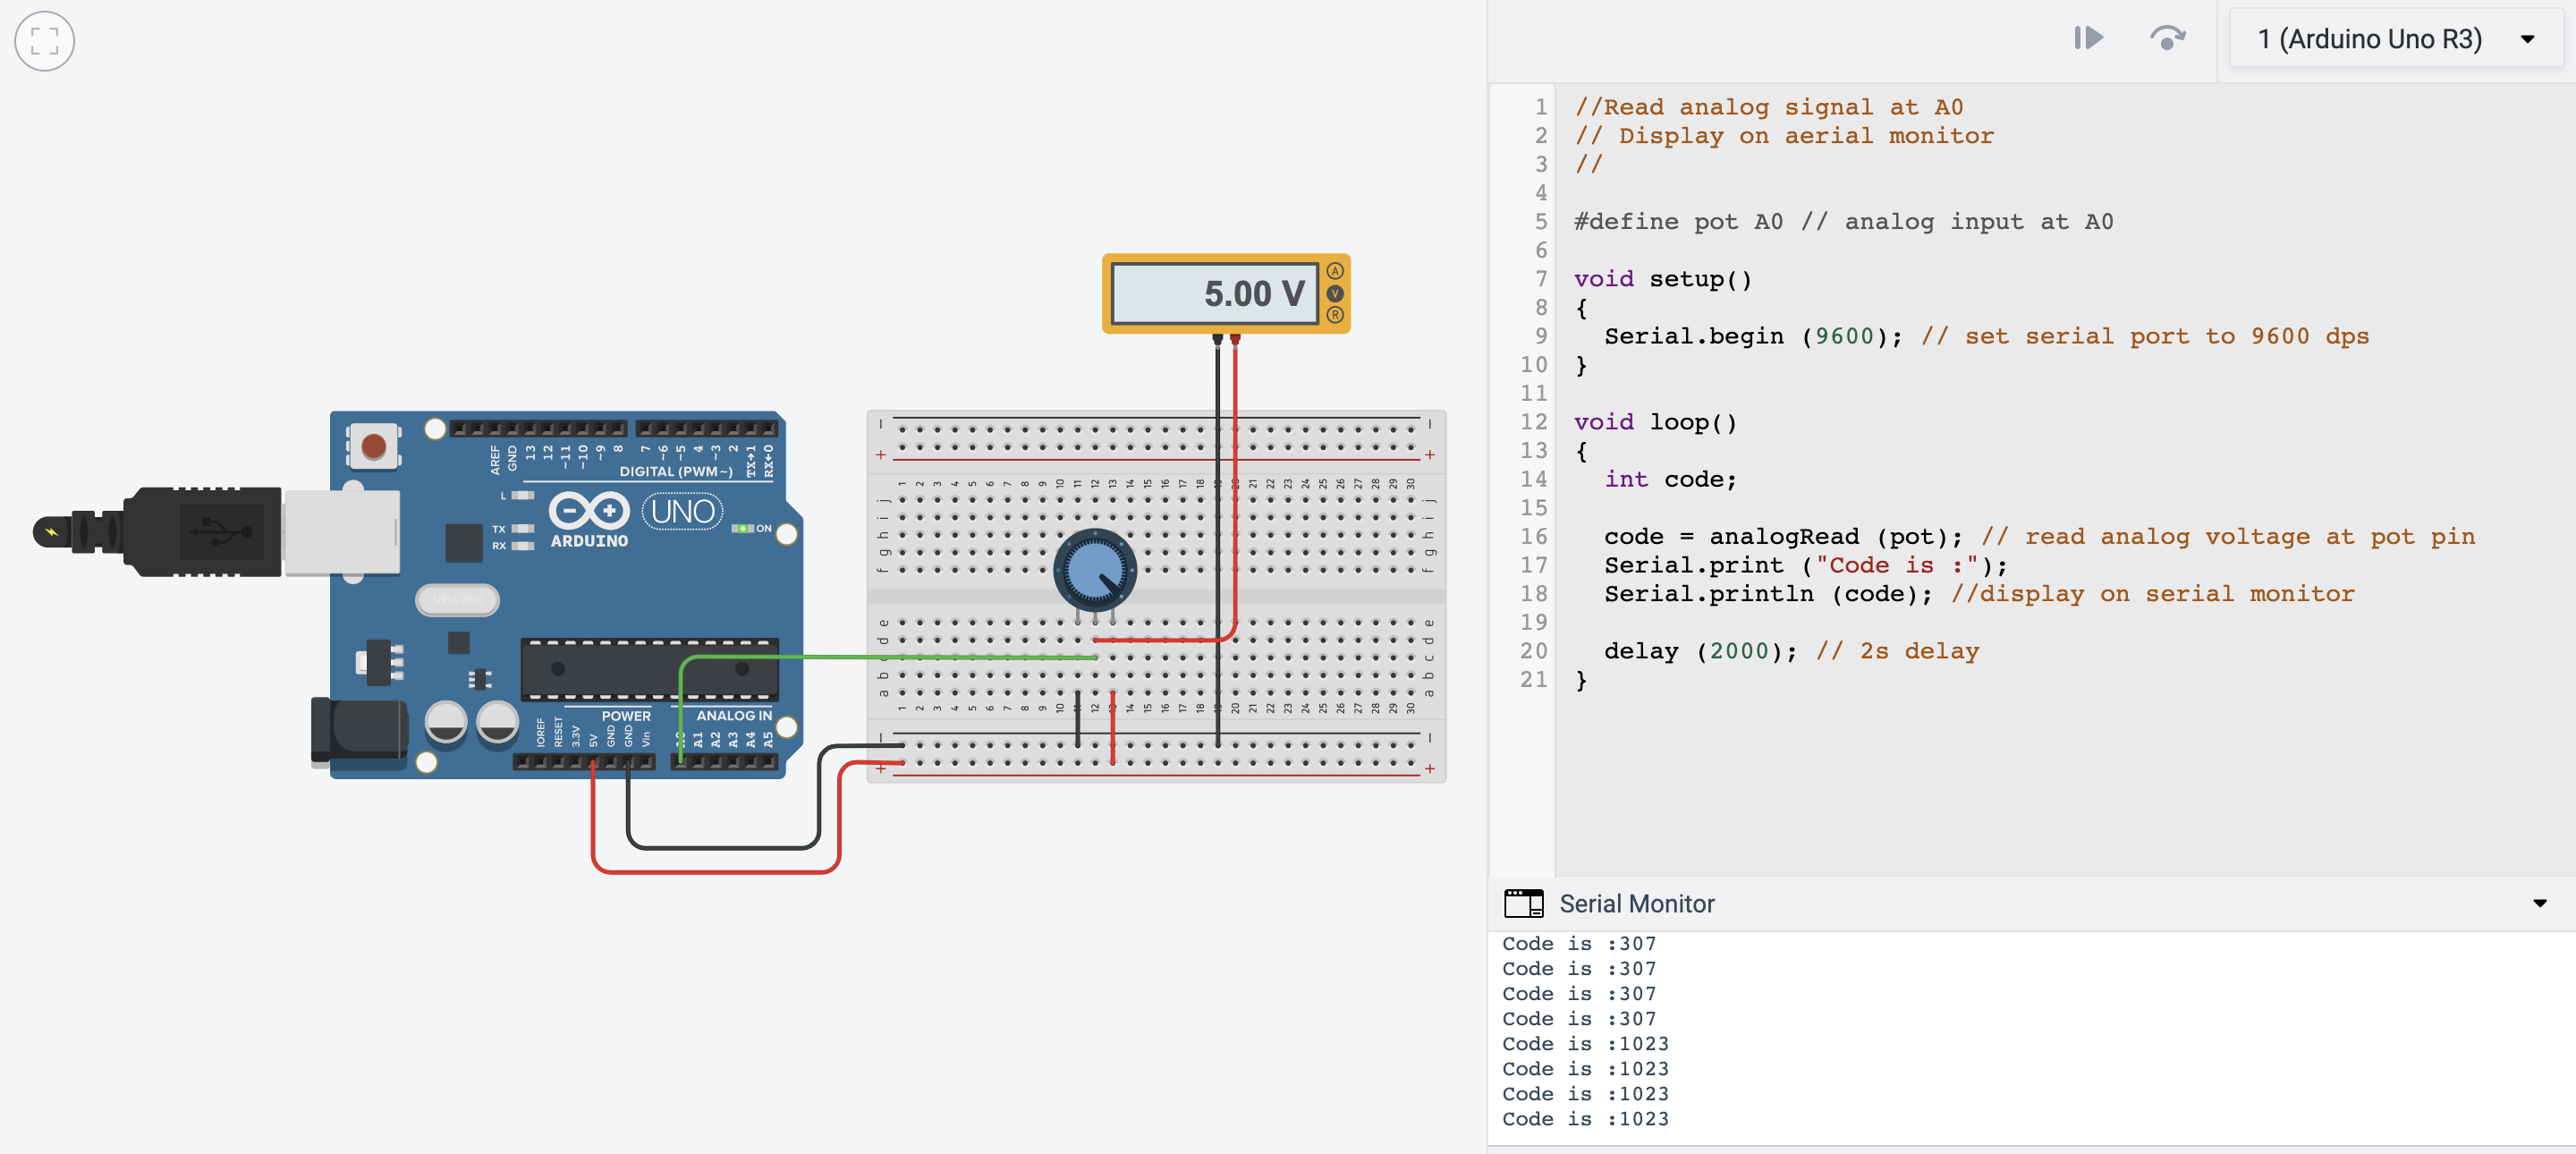
Using the same circuit, we added the serial print code, which would record the value from the potentiometer down in the serial monitor as well.
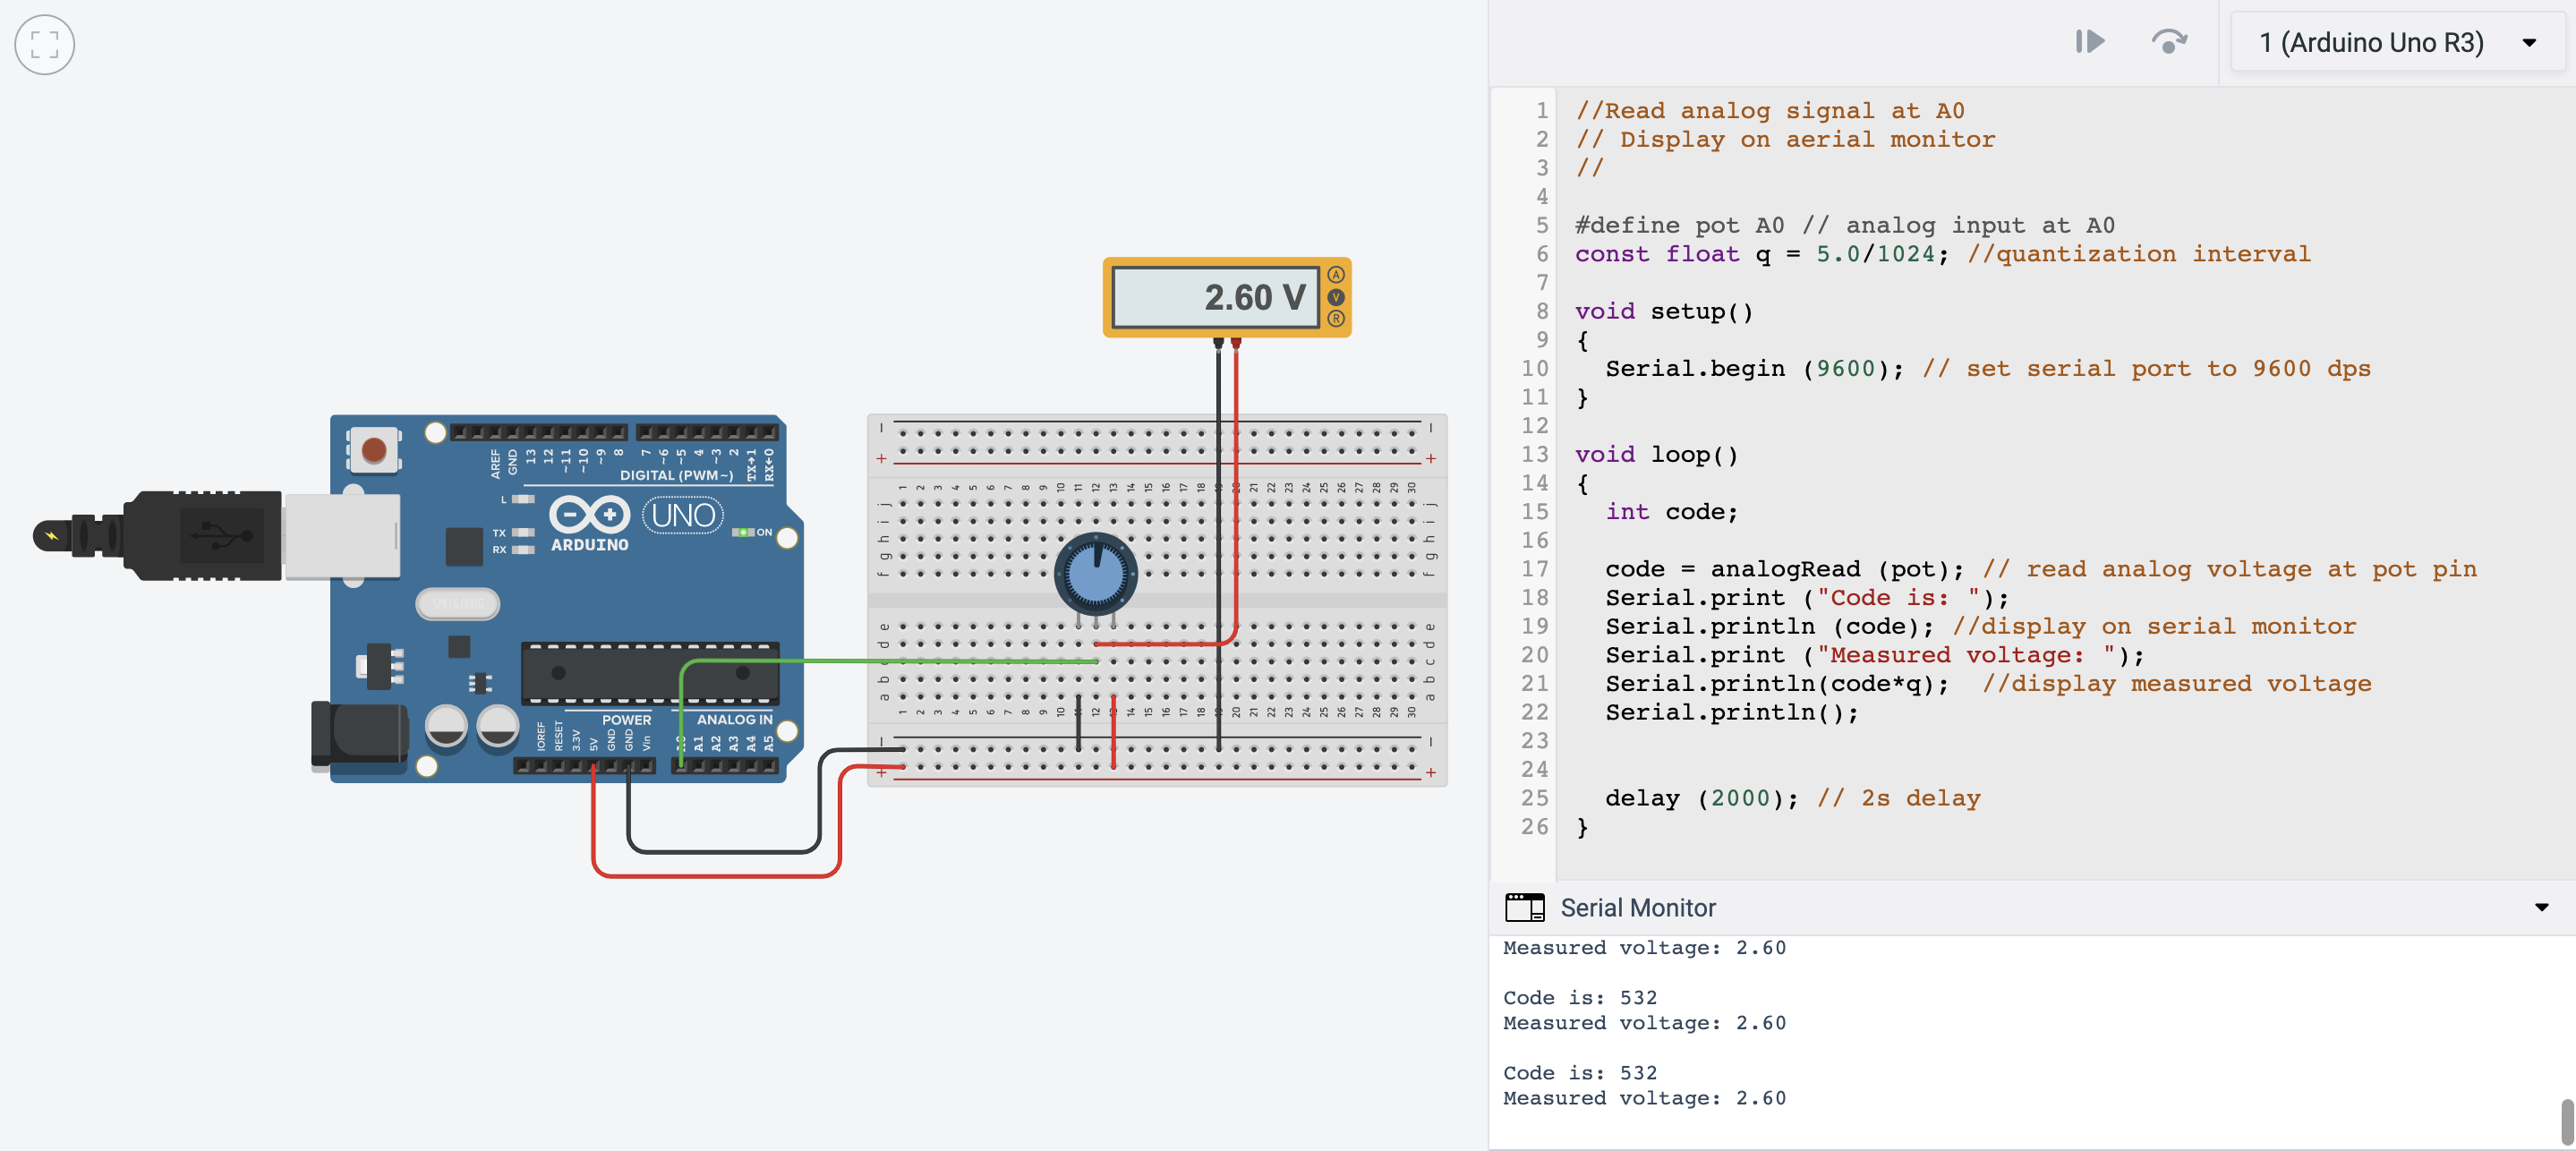
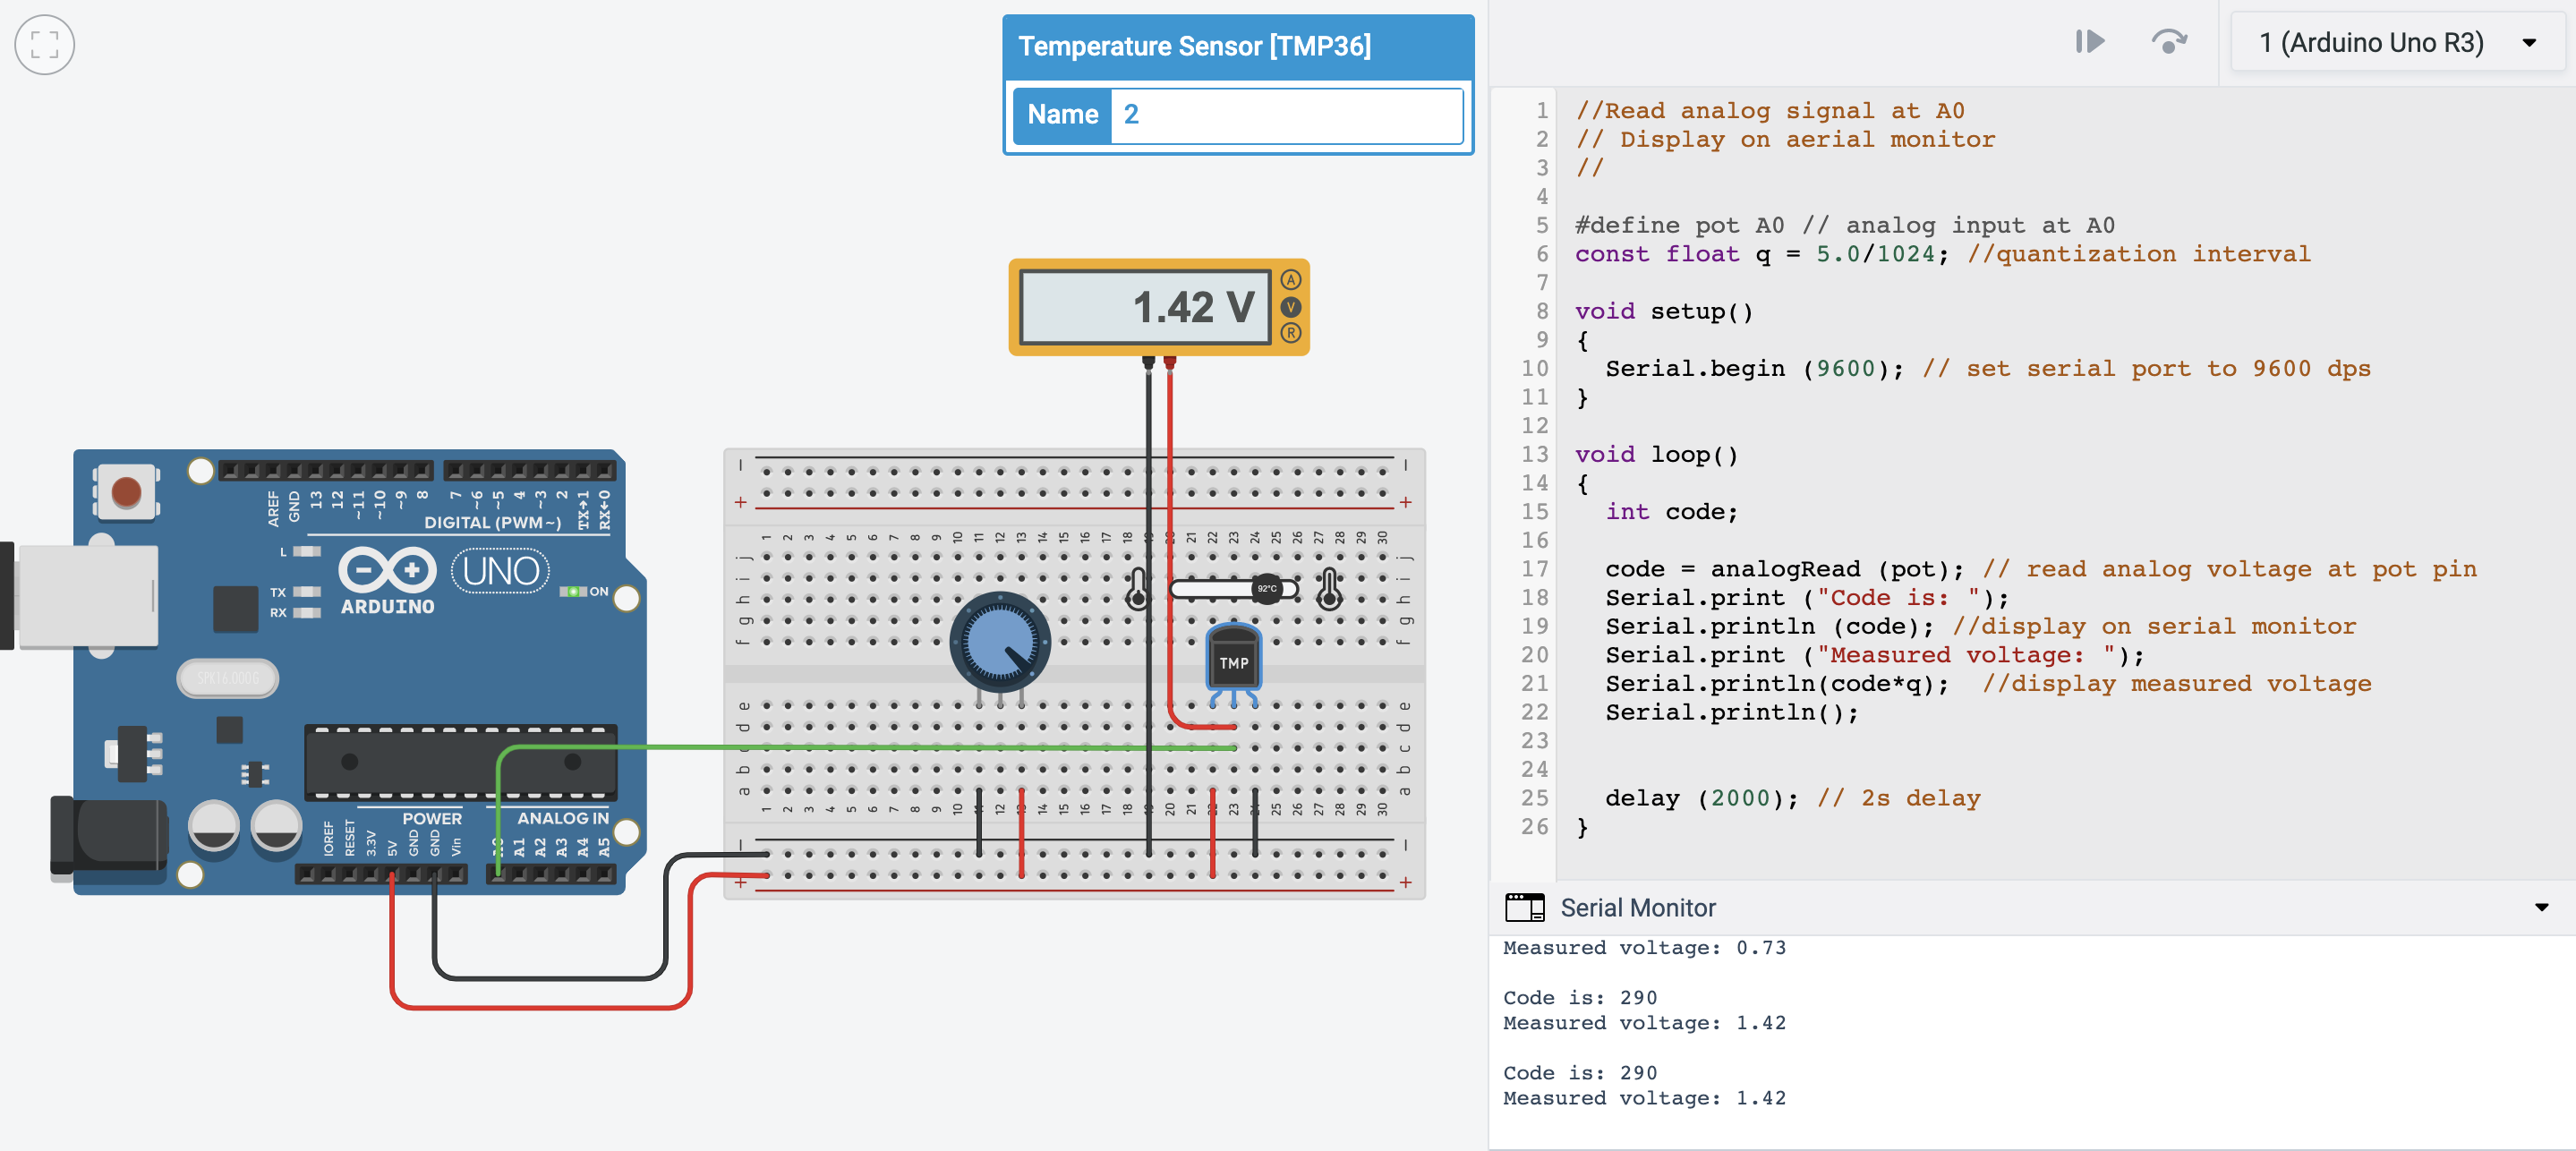
Altering the code, we can now read both the potentiometer value and the voltage as listed on the multimeter.
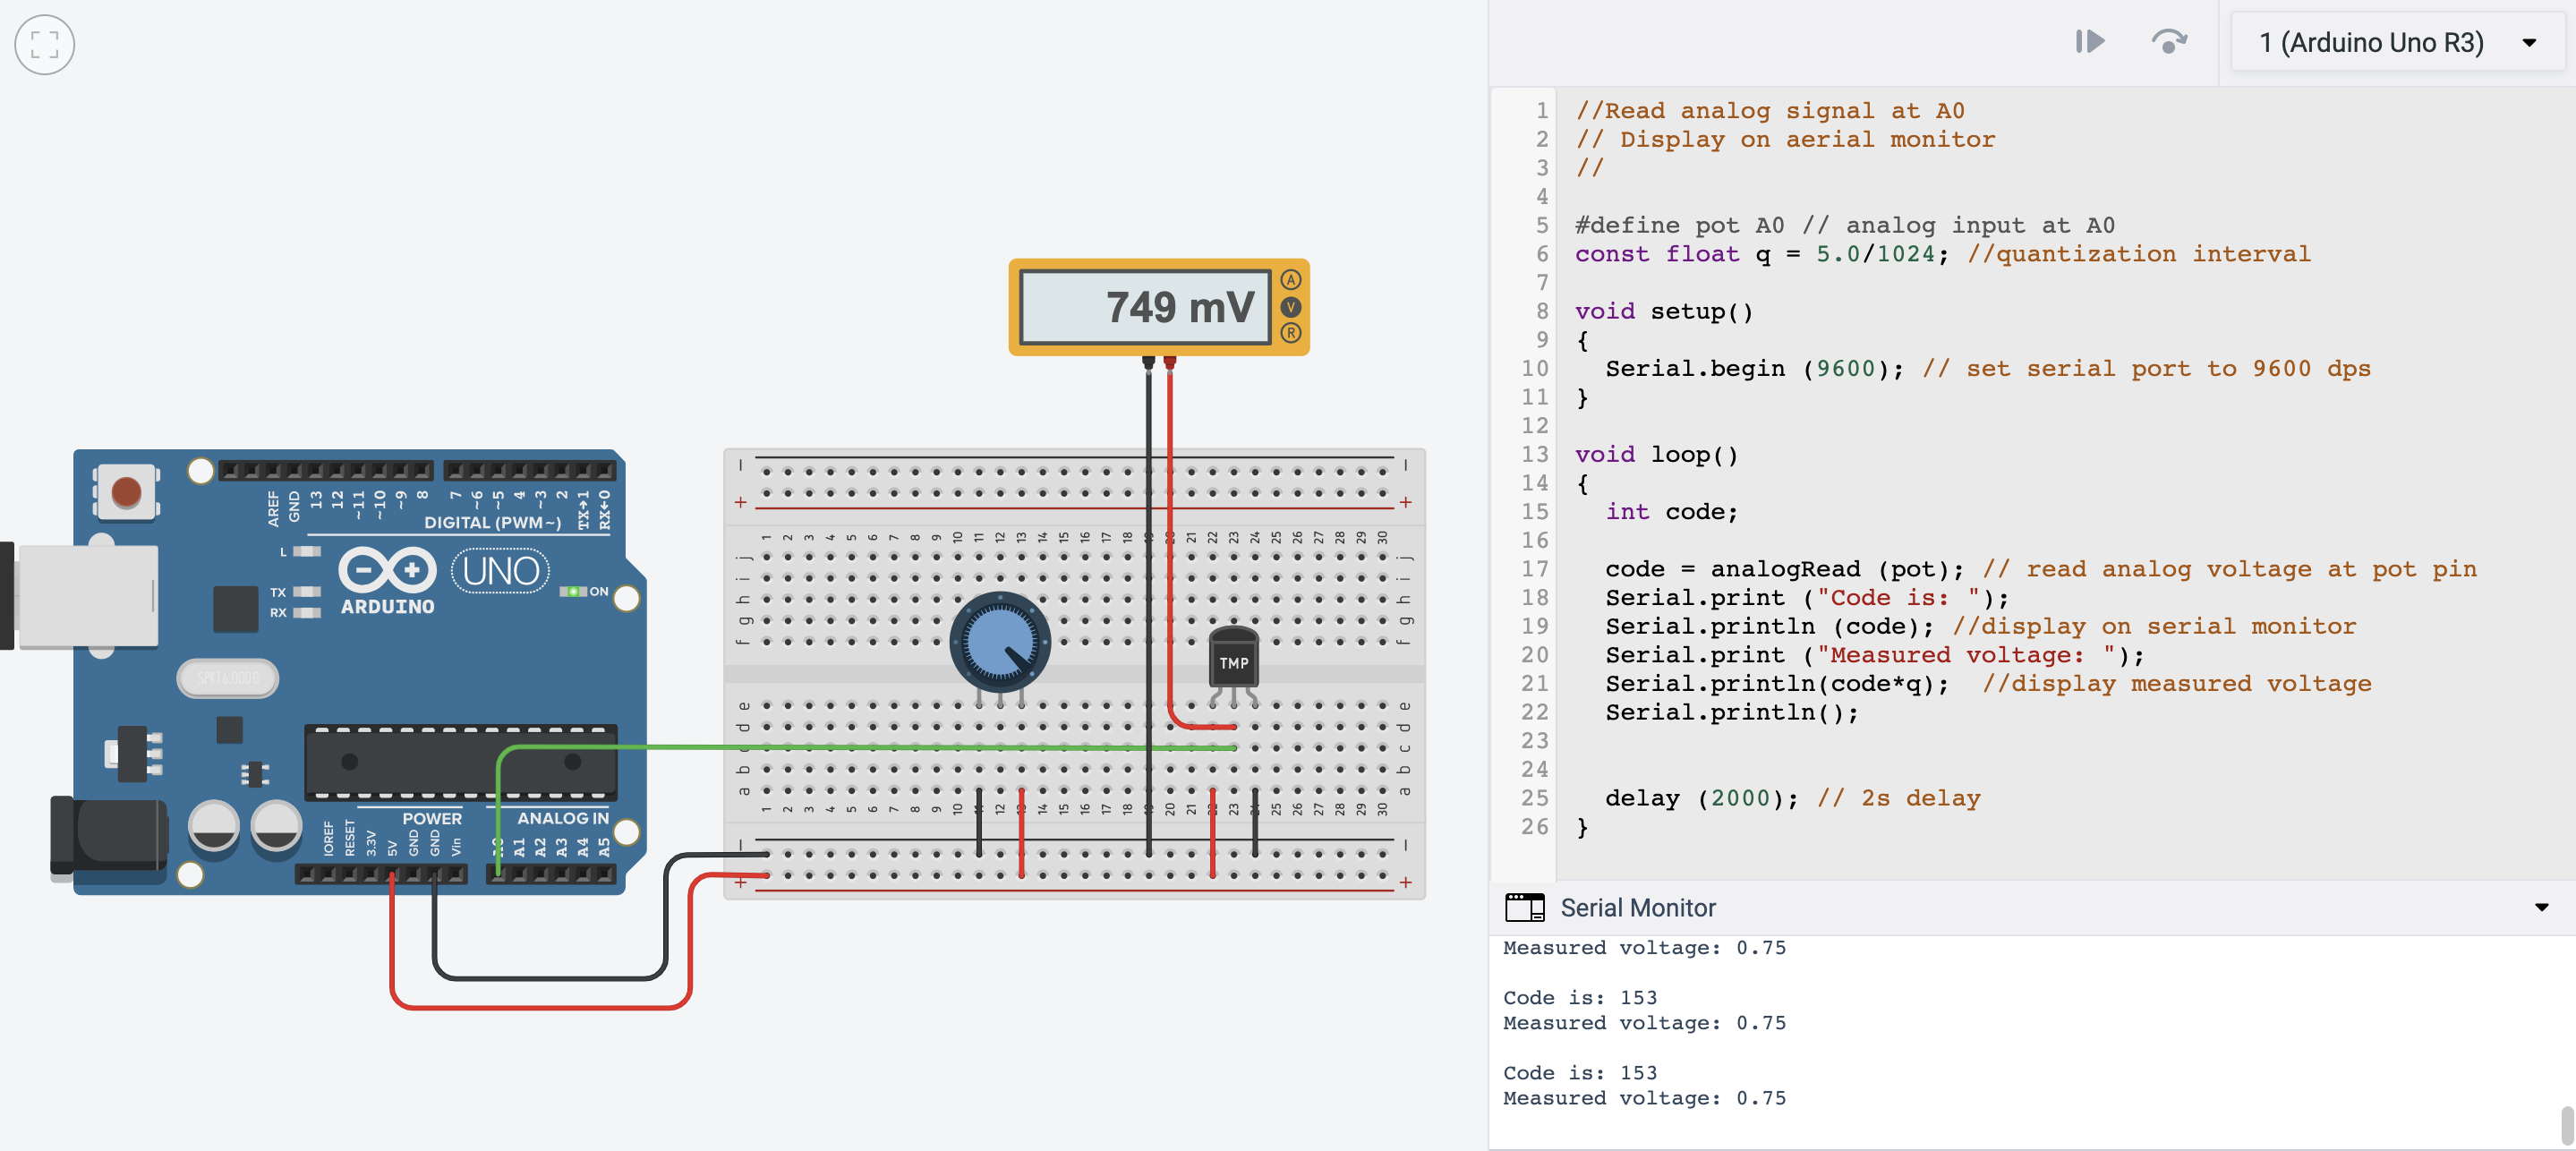
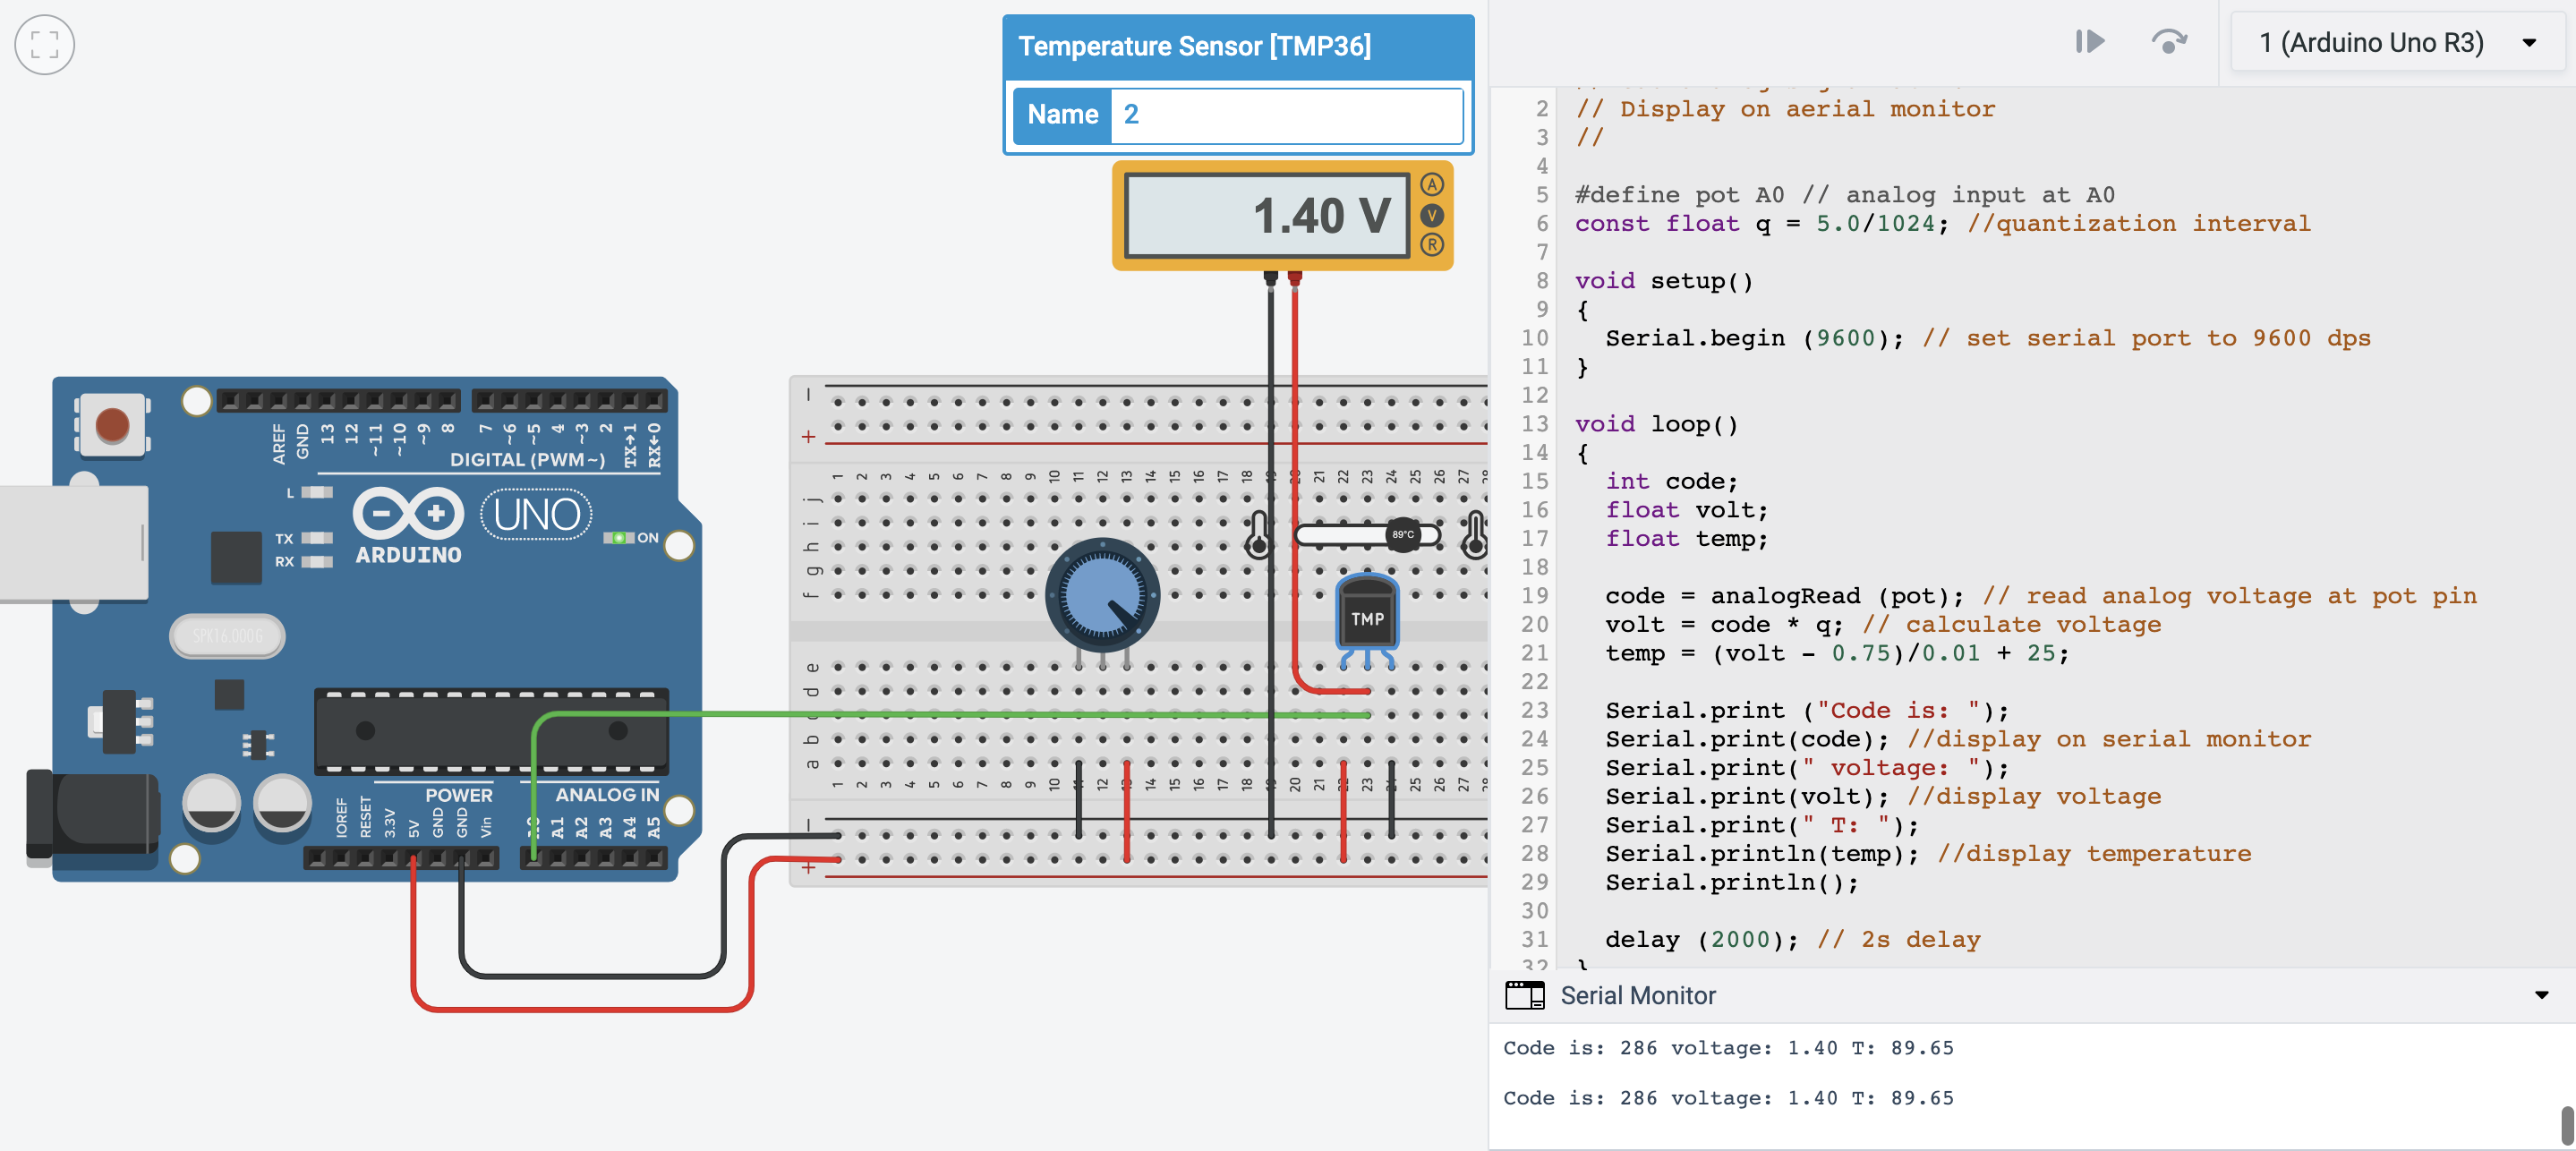
Next, we added the temperature sensor. The first time, similar to the potentiometer, we adjusted the temperature to see a change in voltage on the multimeter. The serial monitor then provides us with the value and the voltage. We then altered the code, where the temperature will be serial printed onto the serial monitor as T values along with the existing serial printed codes.
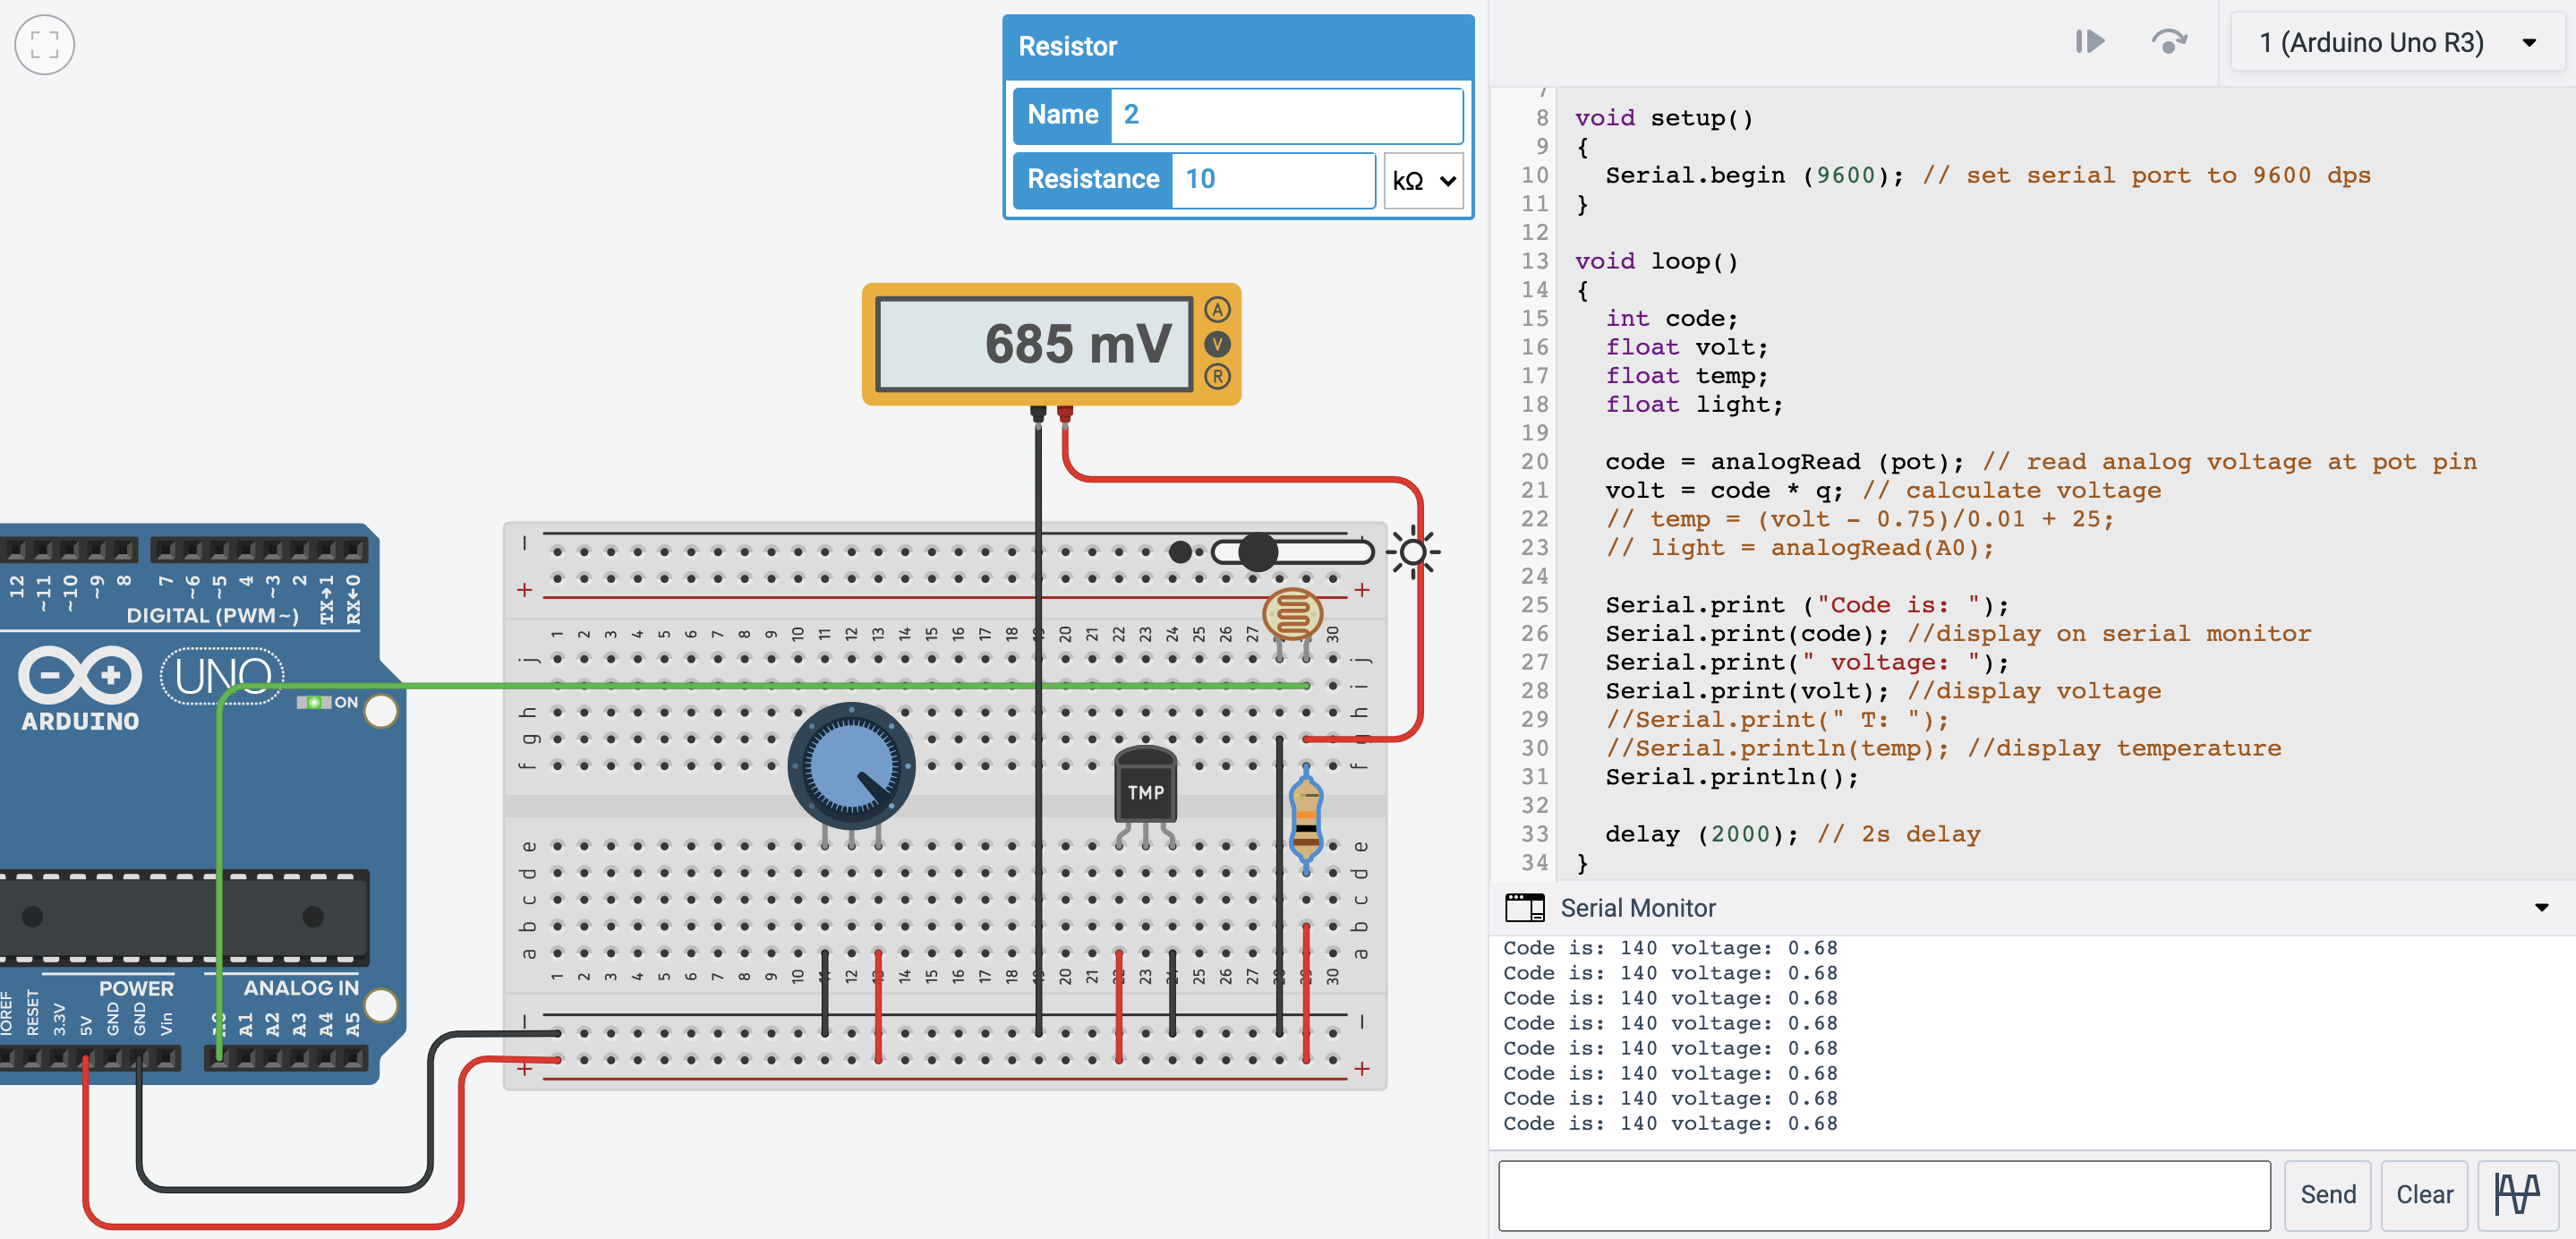
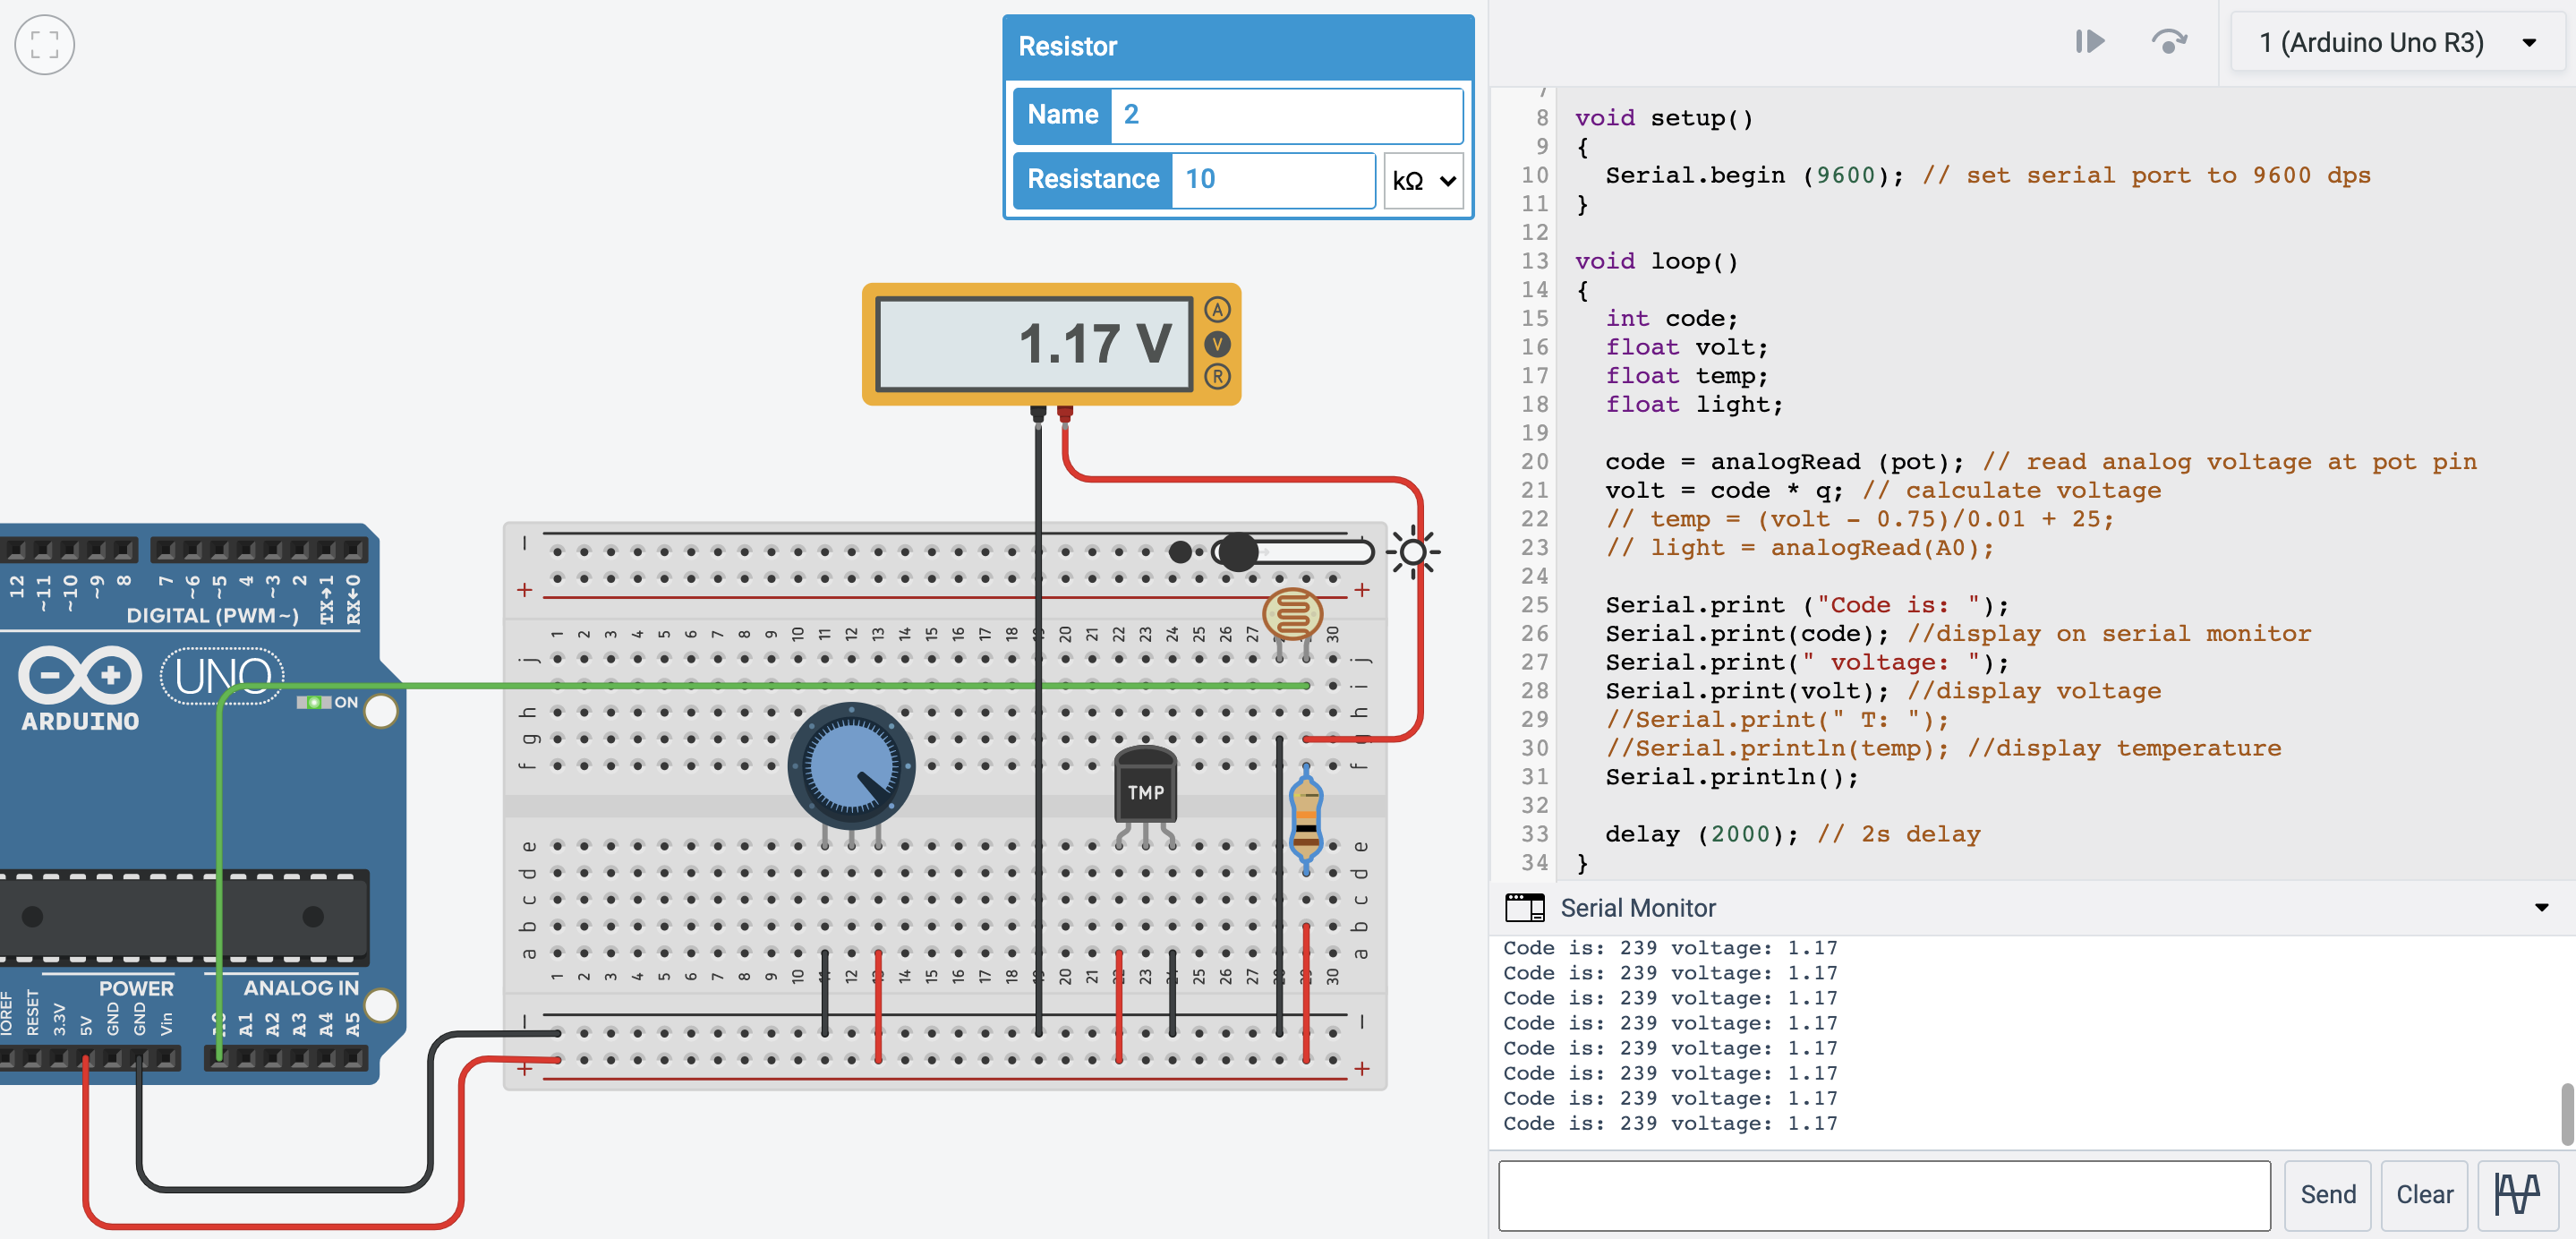
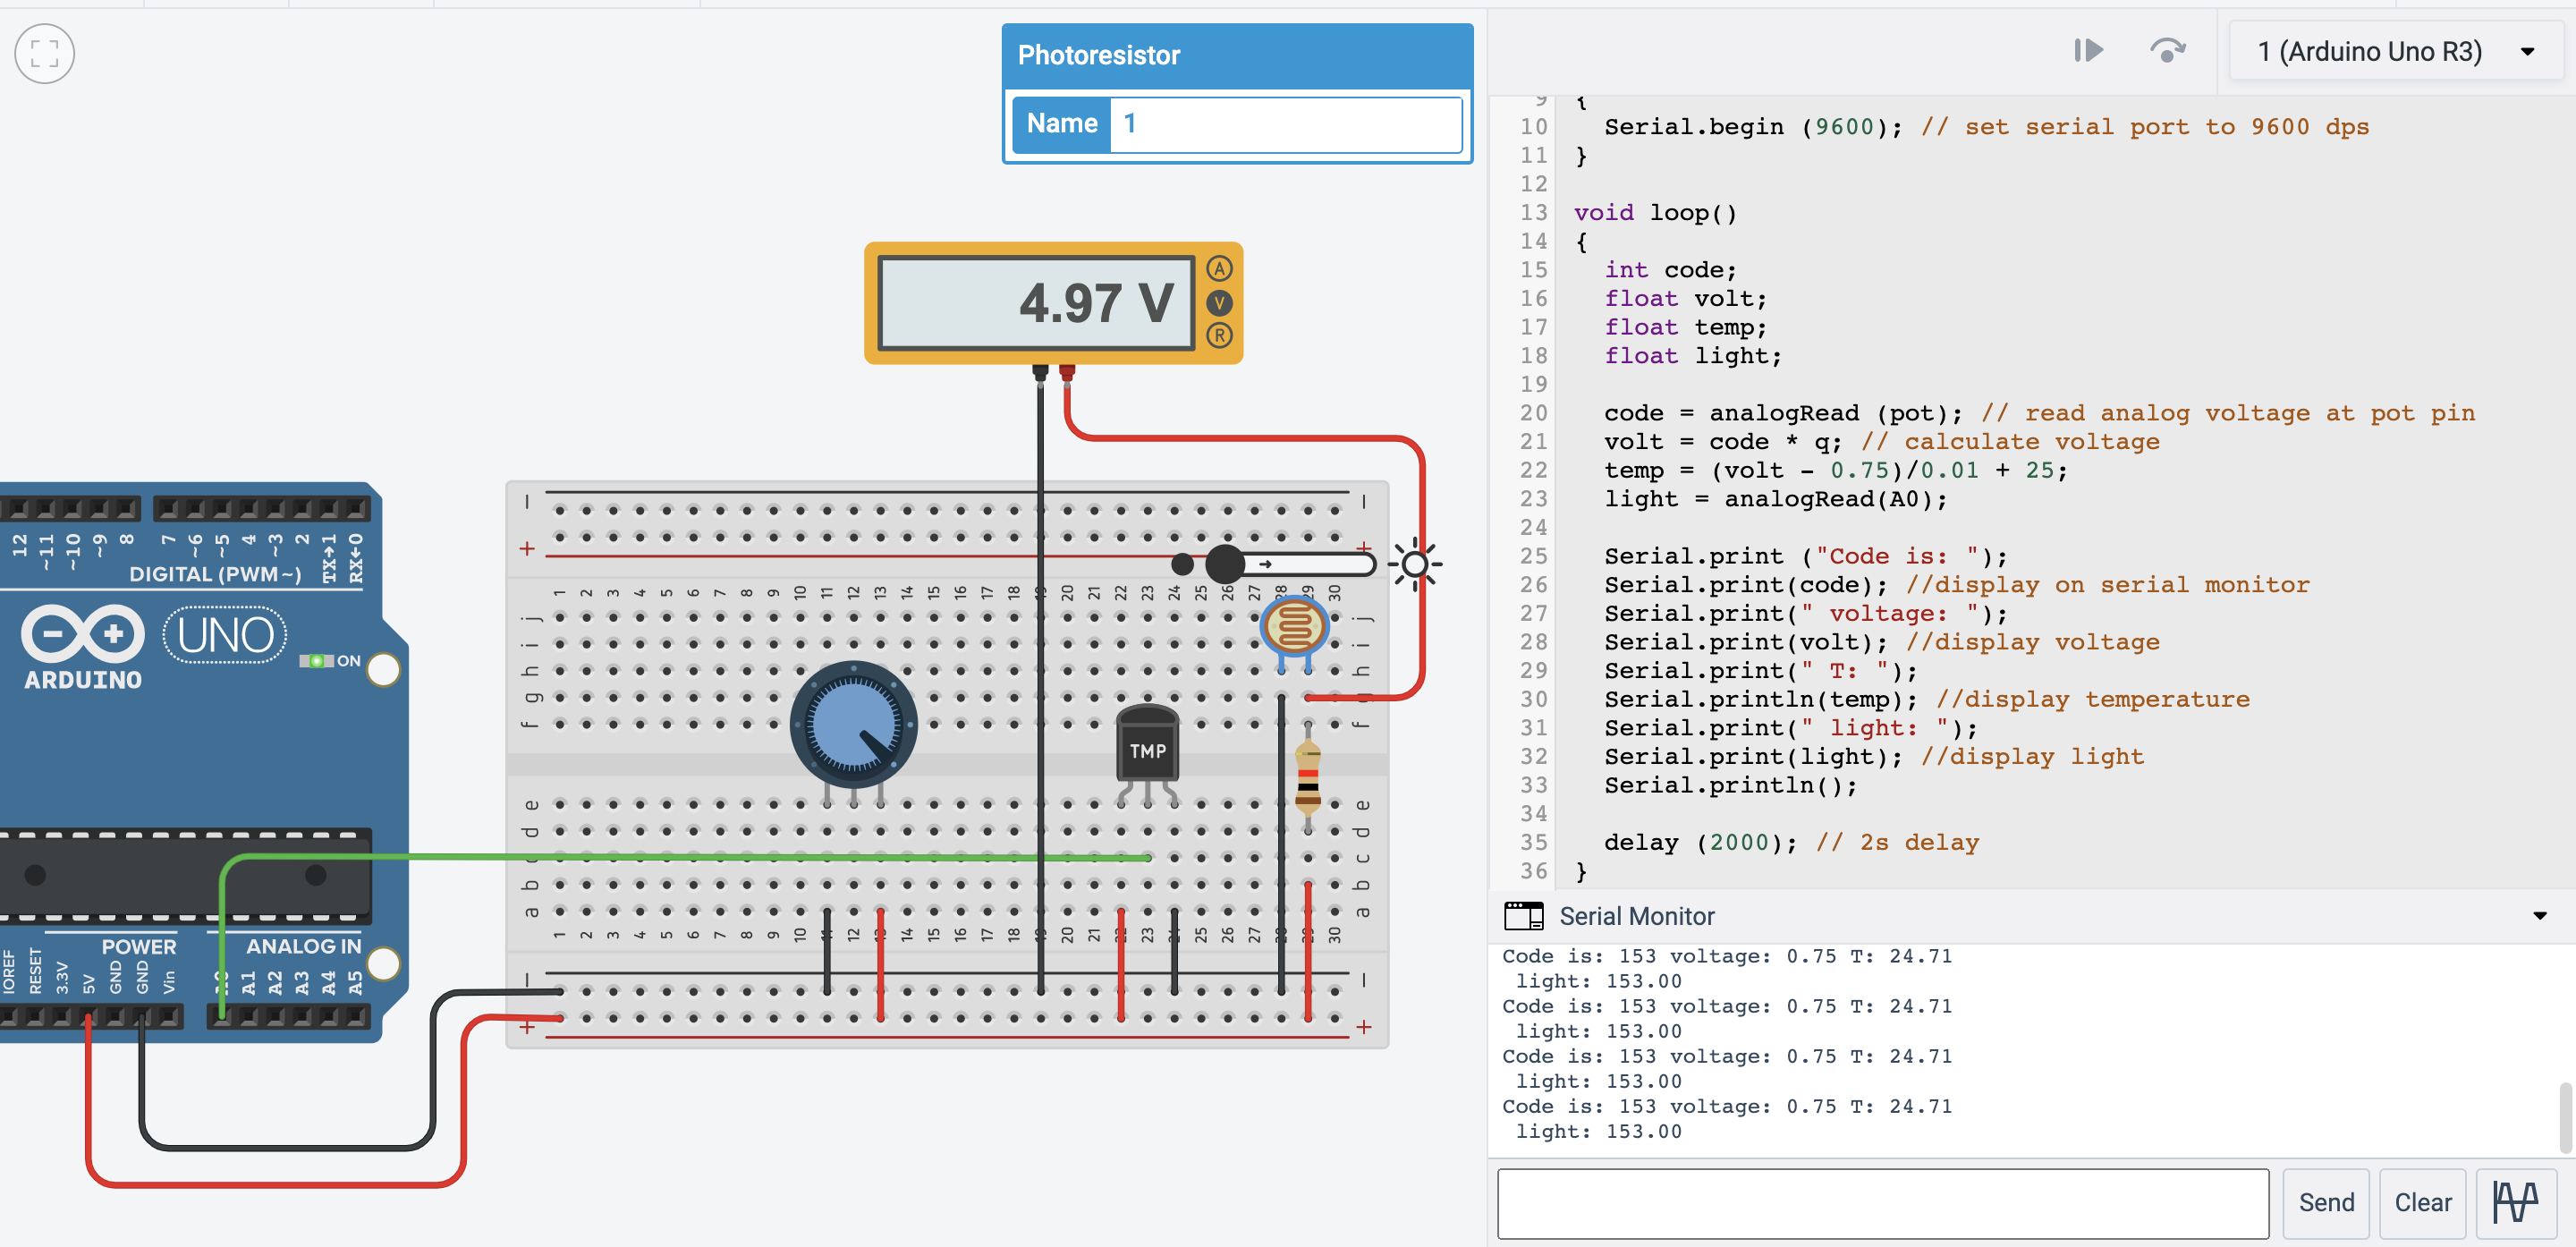
We add on the photoresistor, and by adjusting the brightness, we can see a change in the voltage on the multimeter. We also adjusted the code, where it will serial print the amount of light the photoresistor senses onto the serial monitor as light.

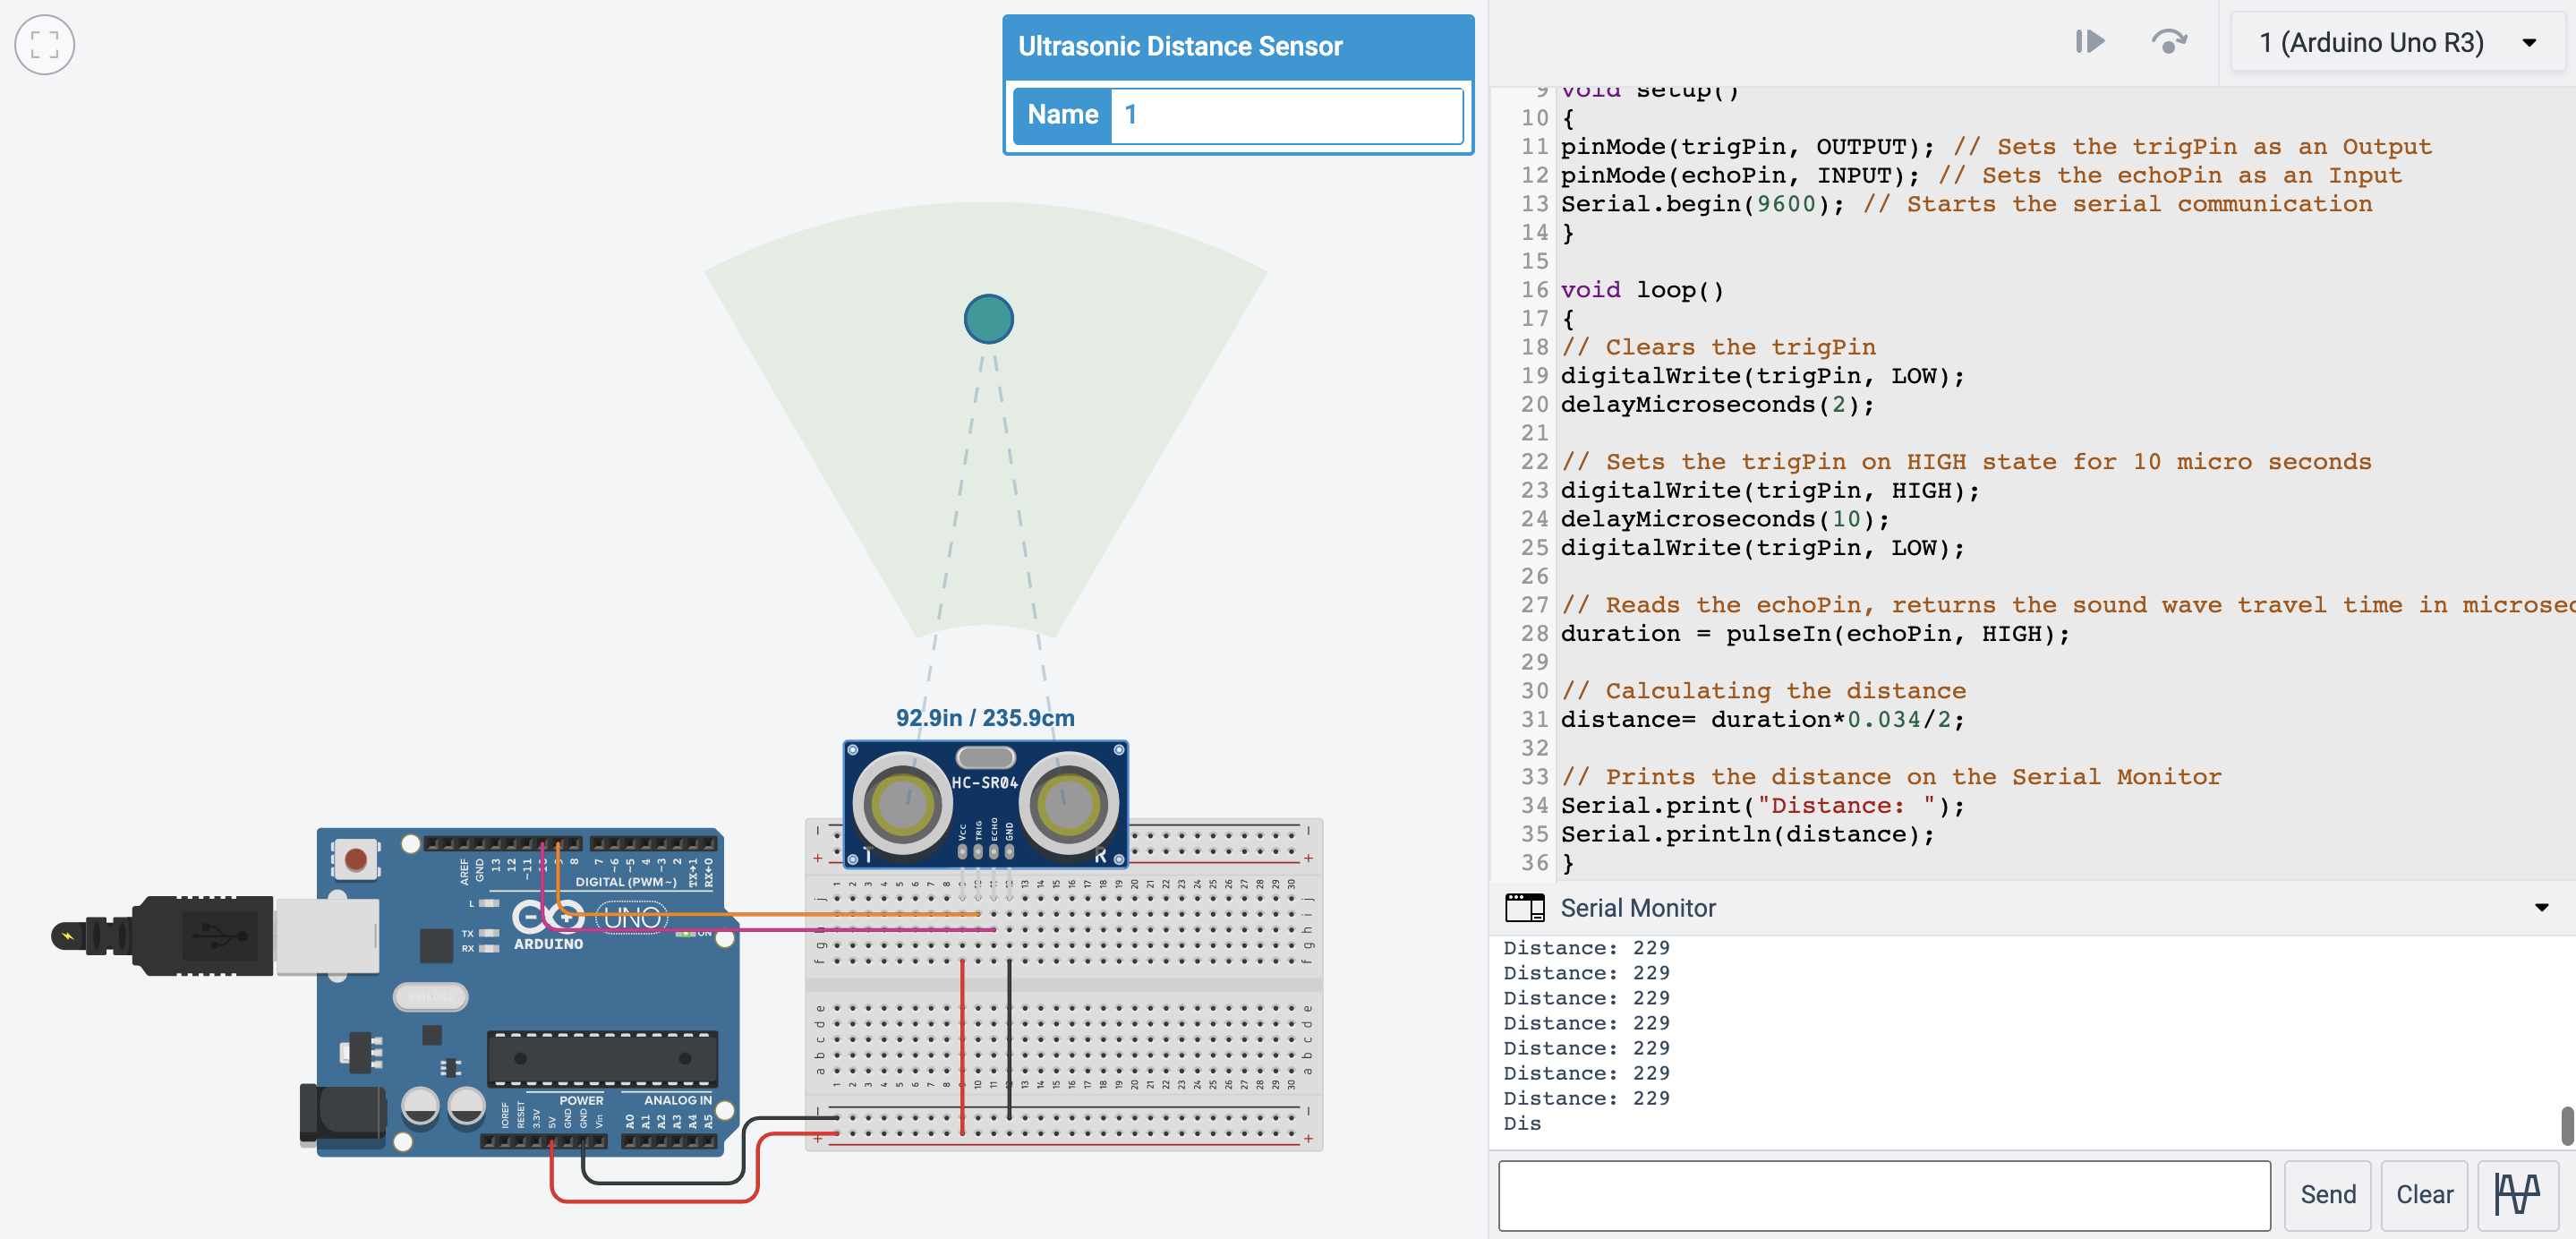
Now, we are introduced to the ultrasonic distance sensor. When adjusting the distance, the serial print takes note and jots down the distance on the serial monitor.

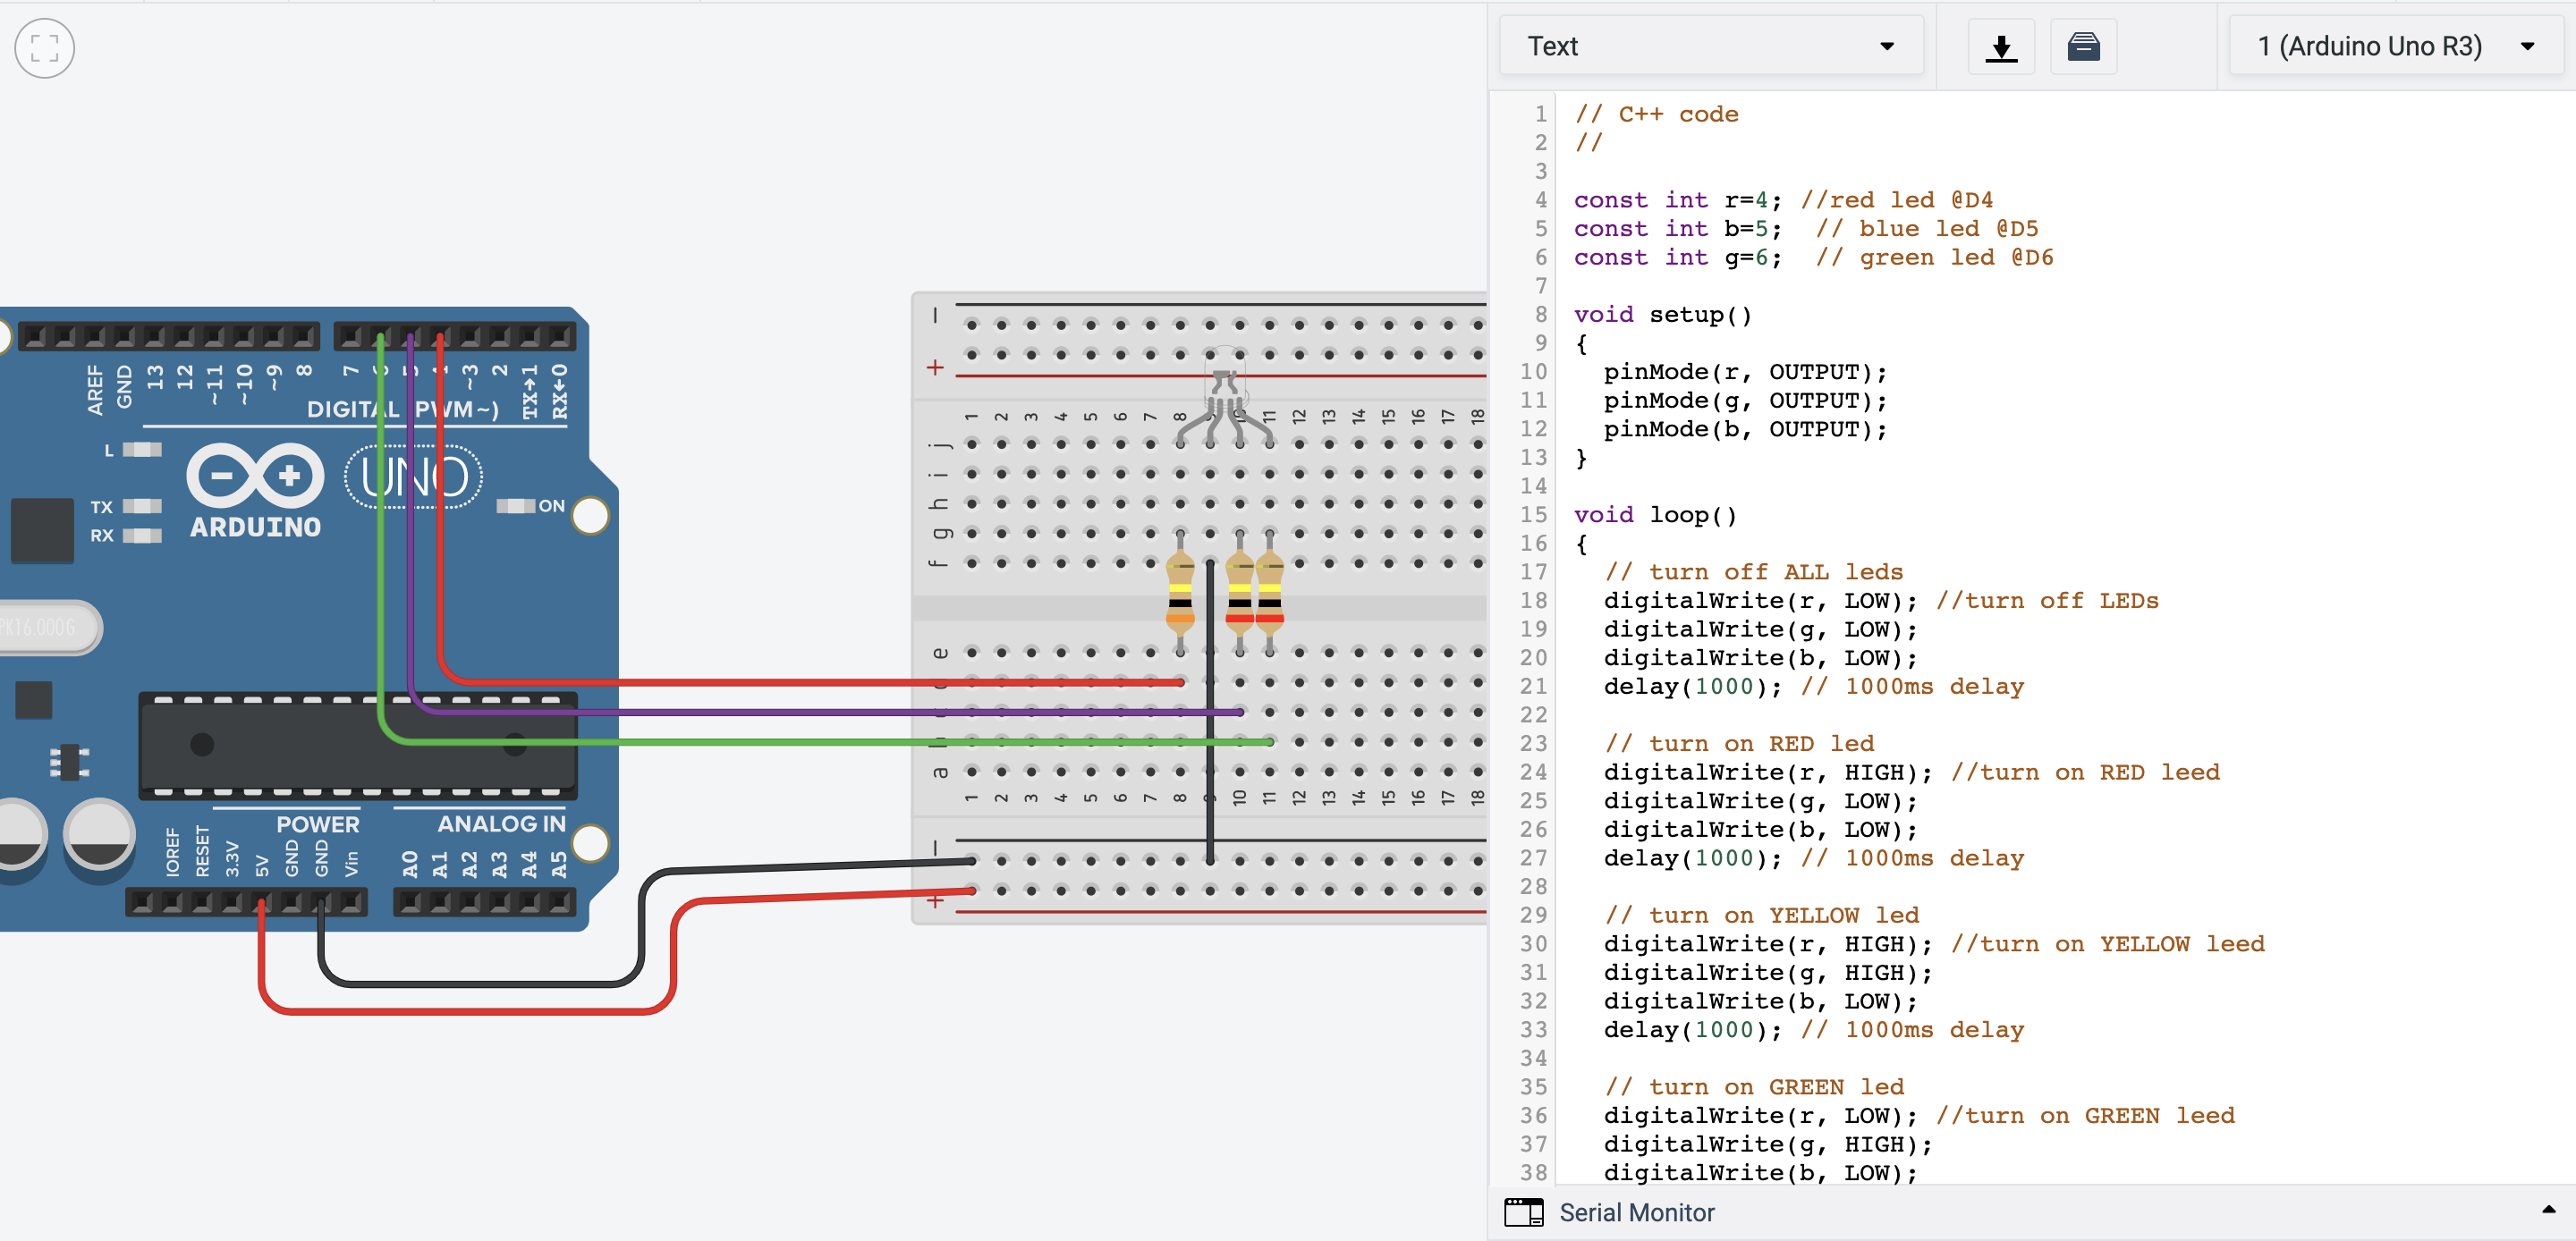
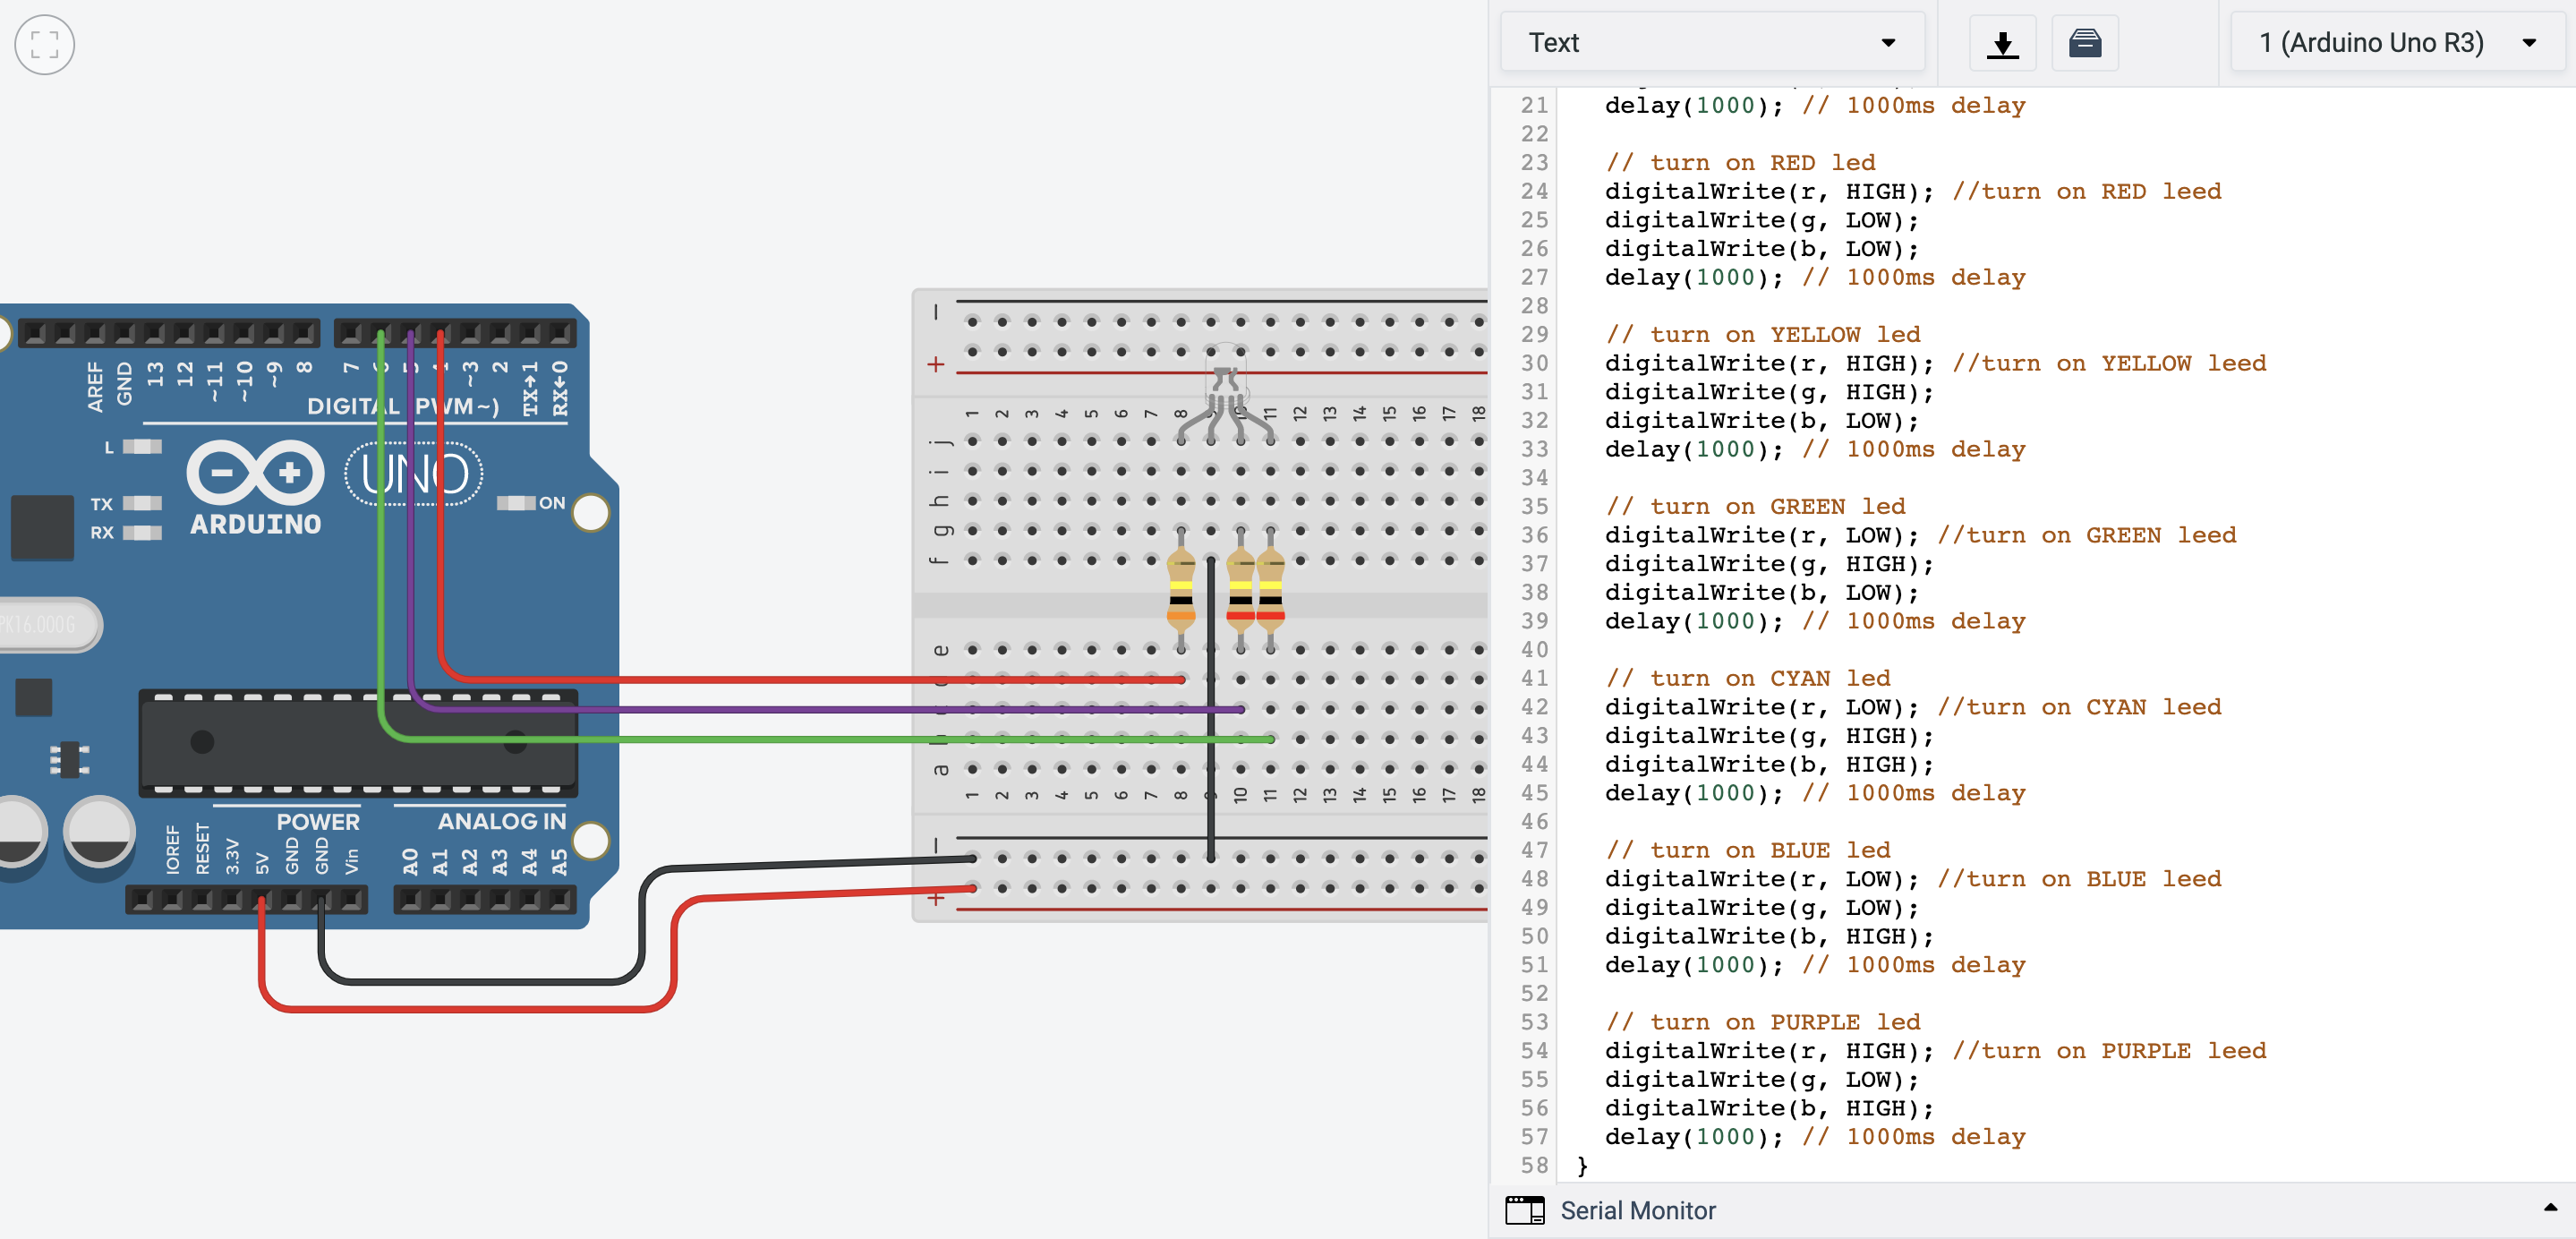
Moving on, we are introduced to the RGB LED. This LED allows us to have a wide variety of colours instead of one set colour by keying in different RBG hex codes. We listed down a few colours in the code under void loop, which causes the different colours to cycle through.
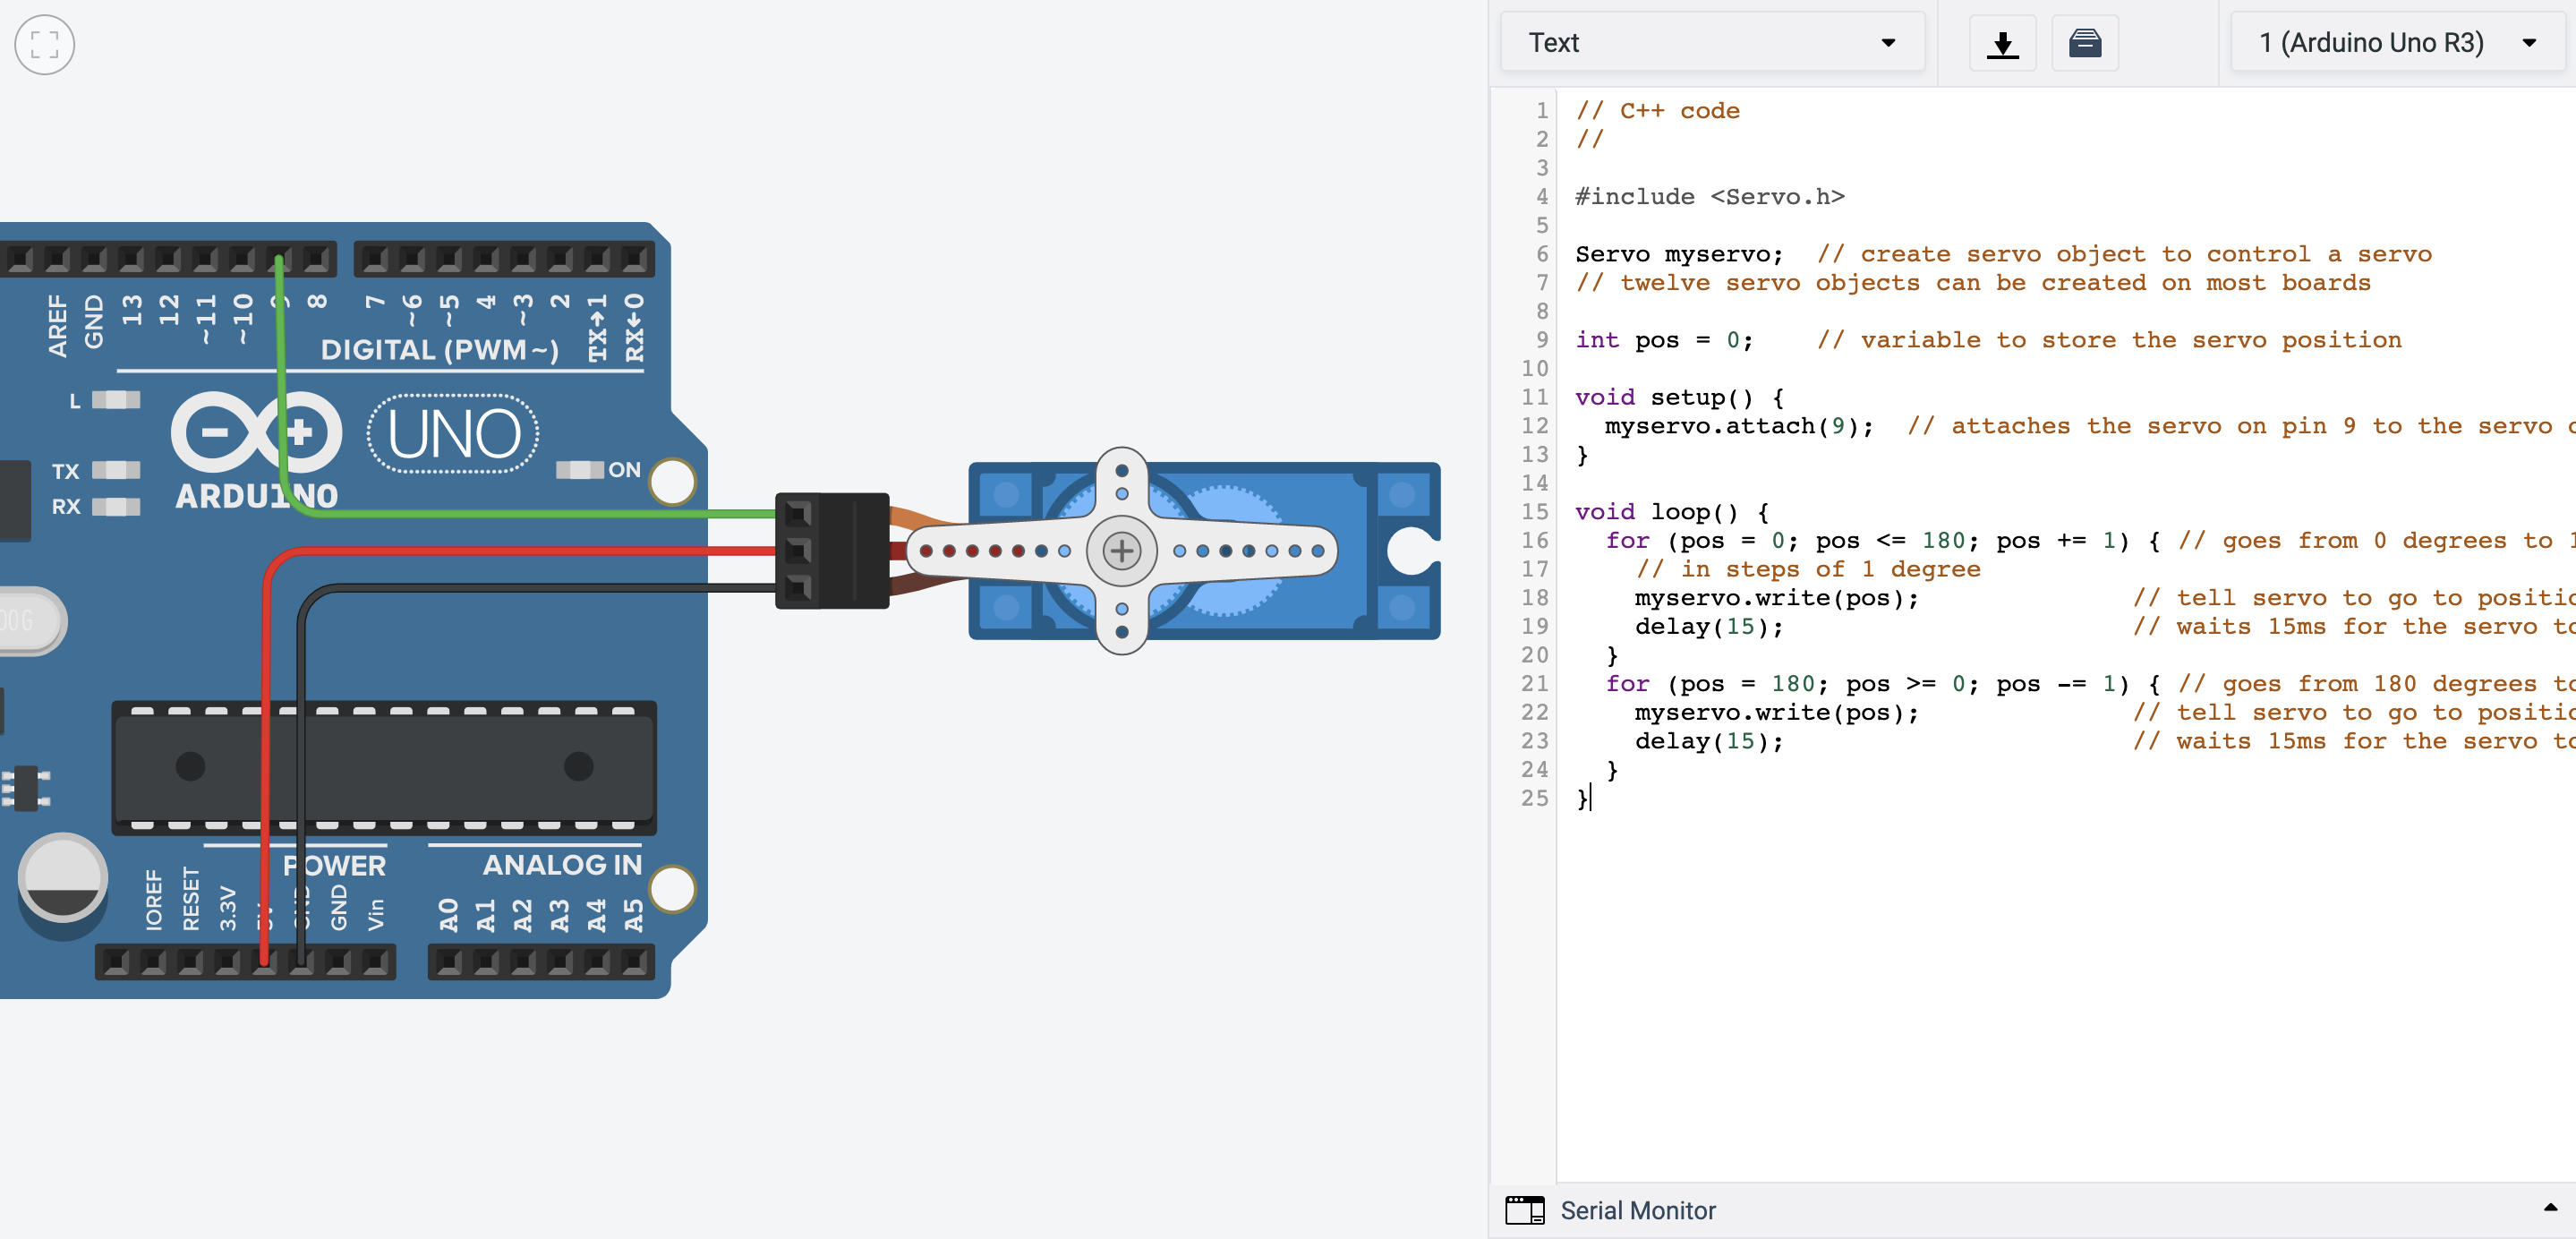
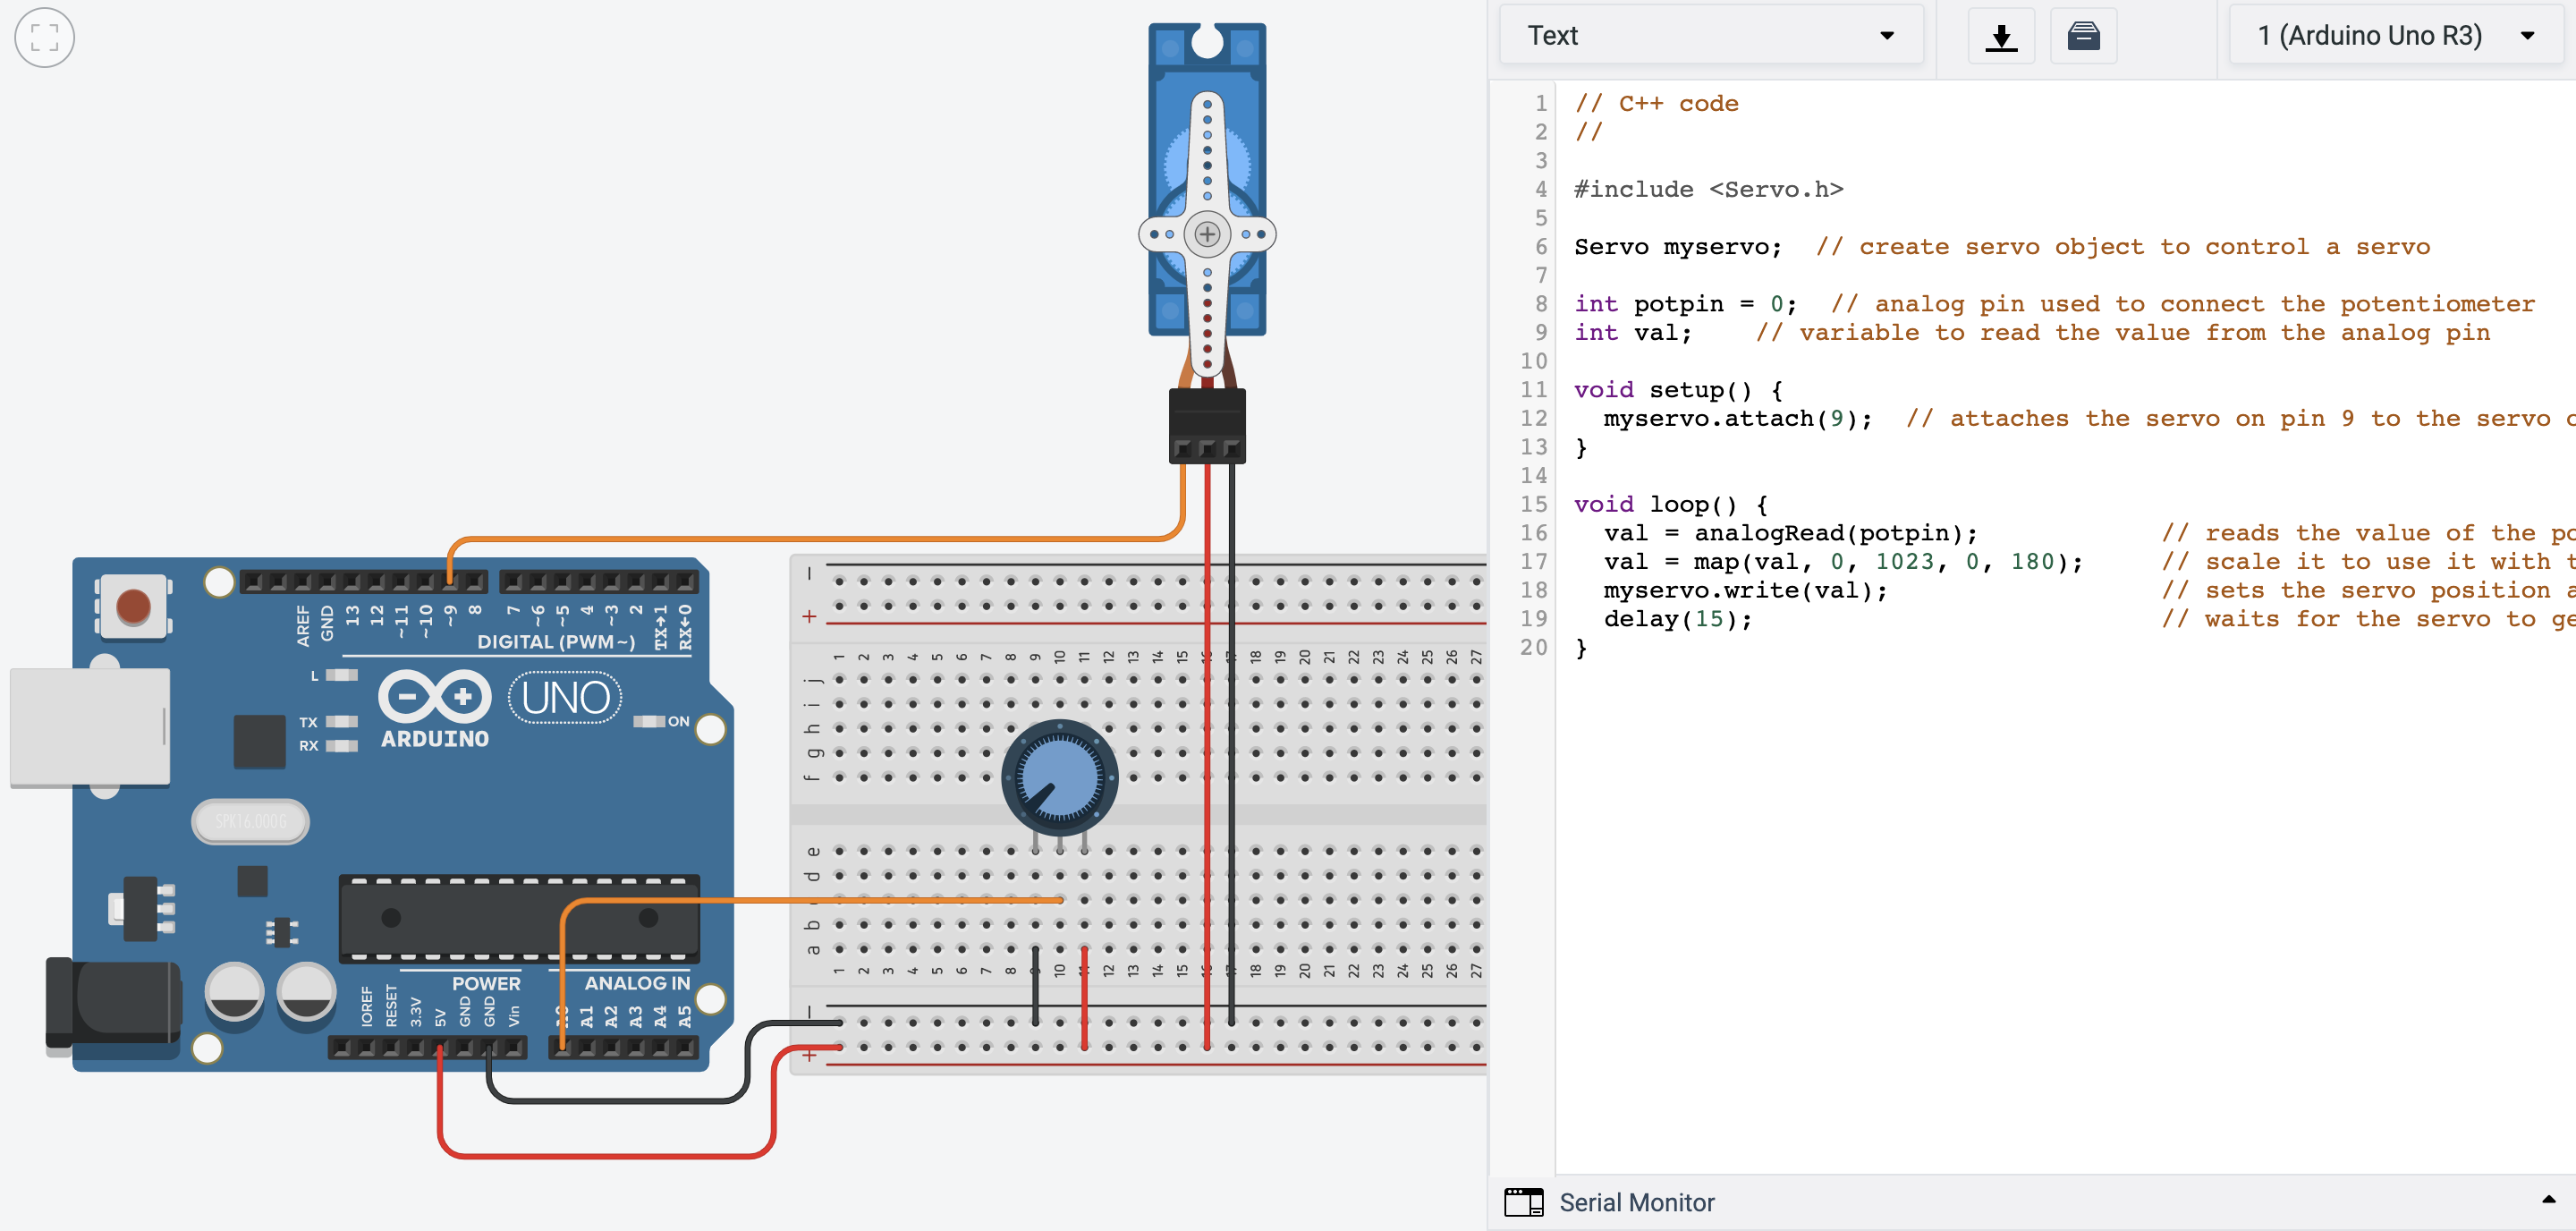
Next, we have the servo motor. We try one with just the servo motor alone, where the servo motor will rotate back and fourth according to the code. We then add a potentiometer, and connect the two. Now, by twisting the potentiometer, the servo motor will follow to what extend it should rotate to.
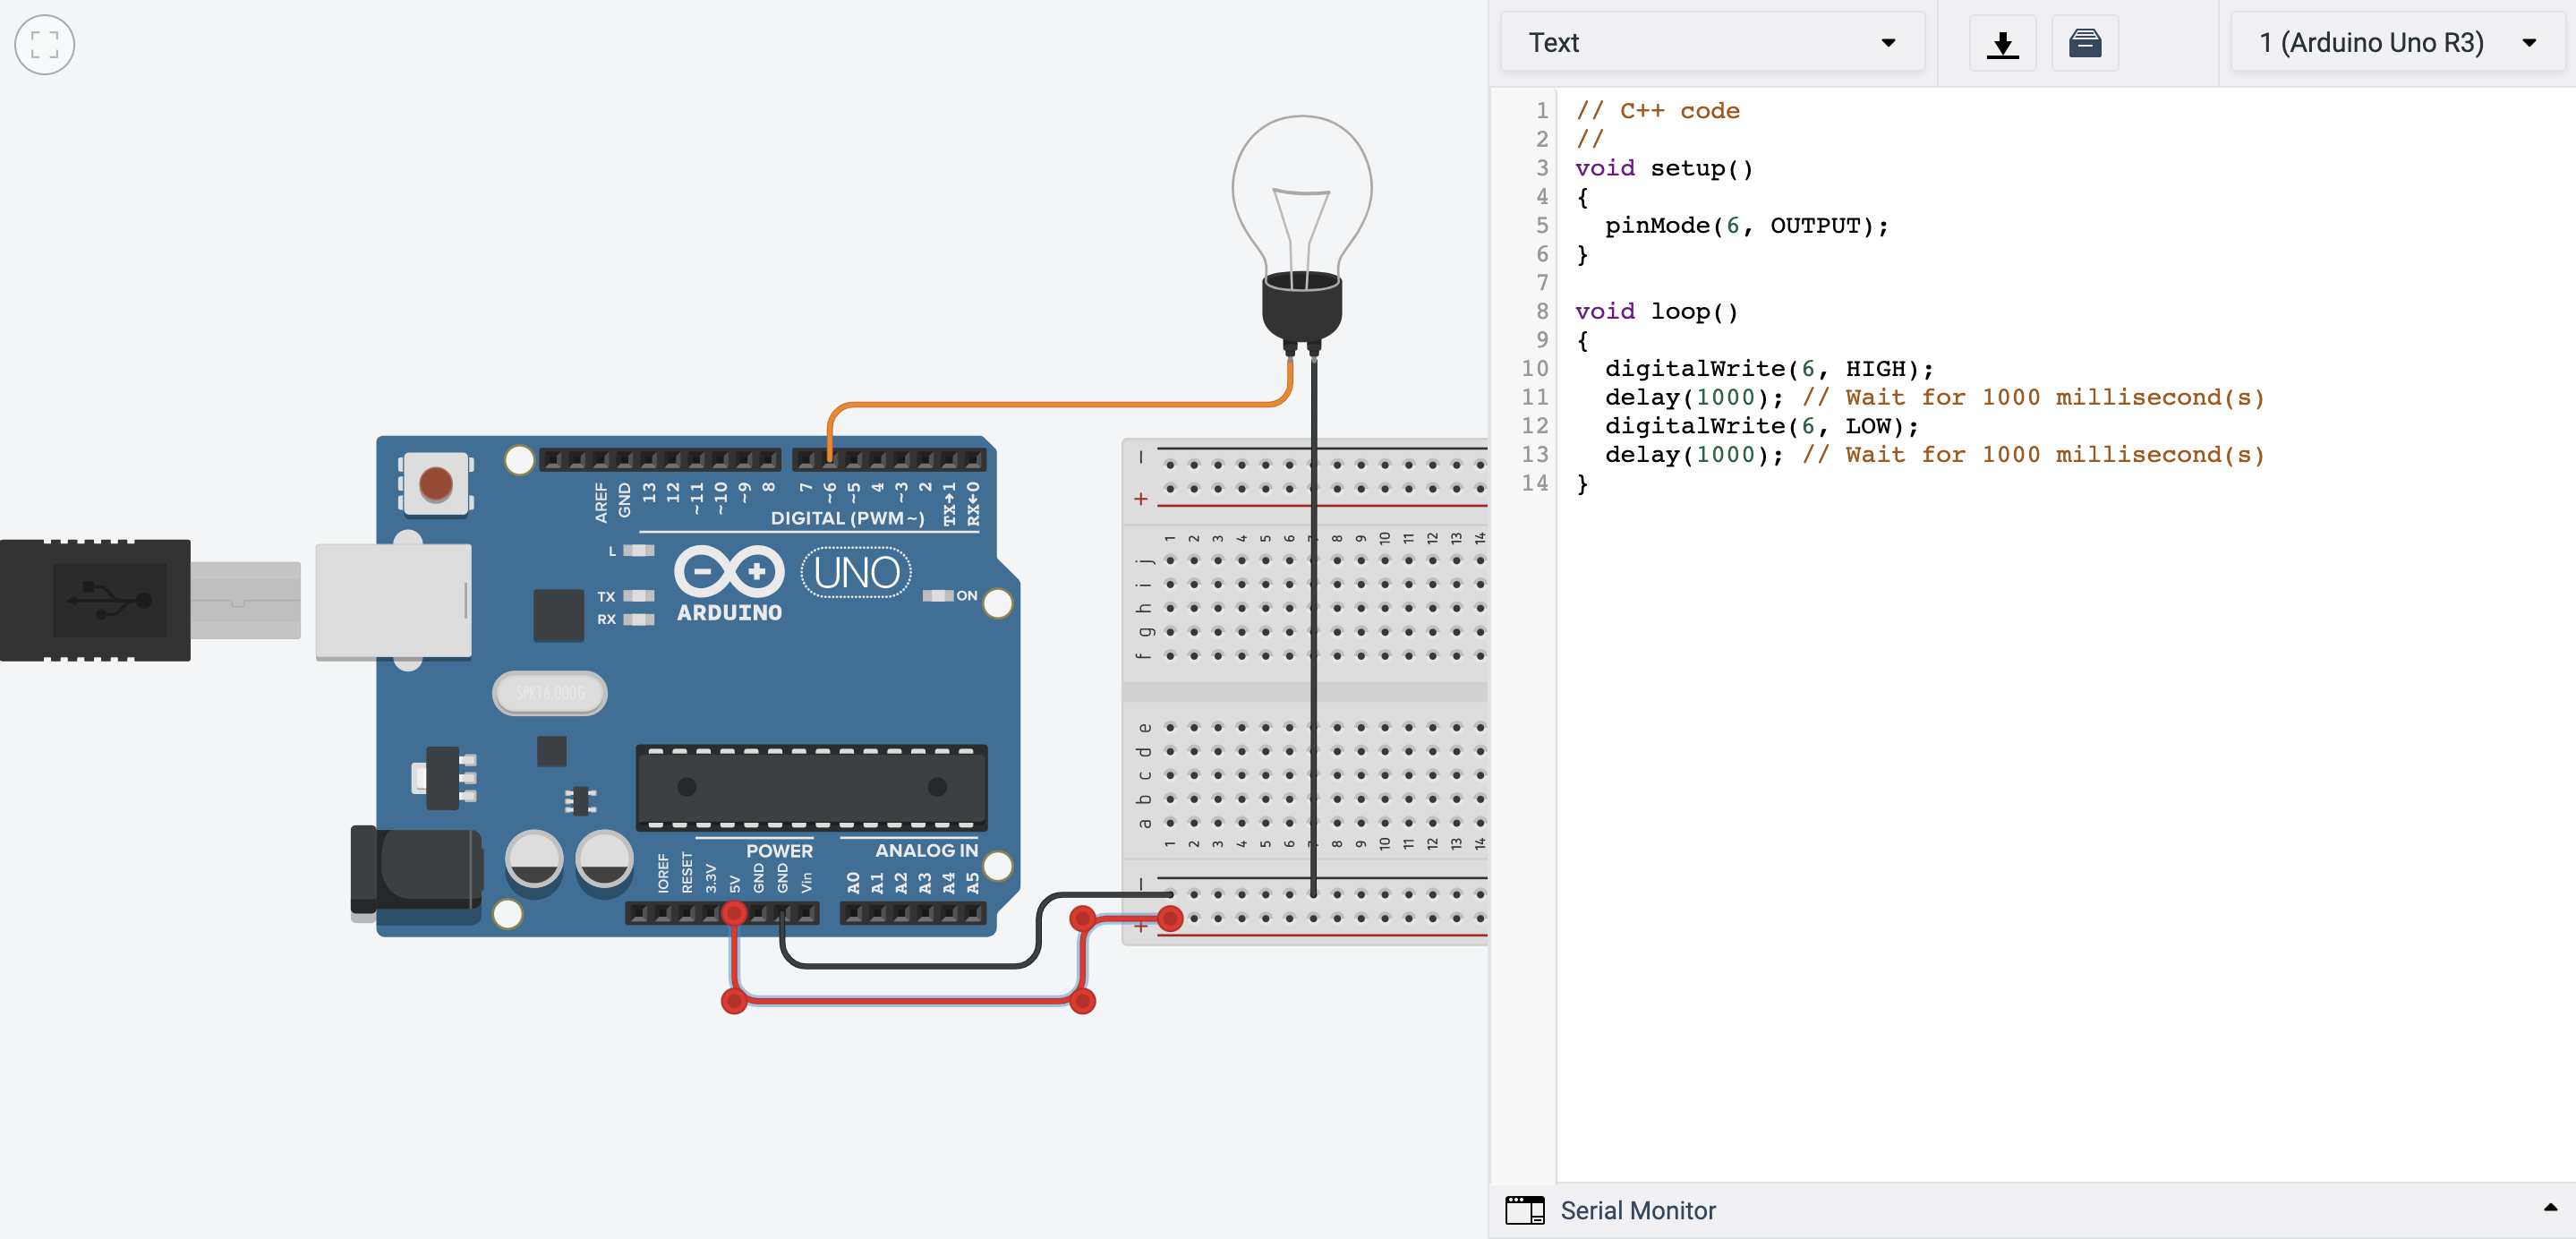
We have a light bulb, where our code causes it to blink on and off.
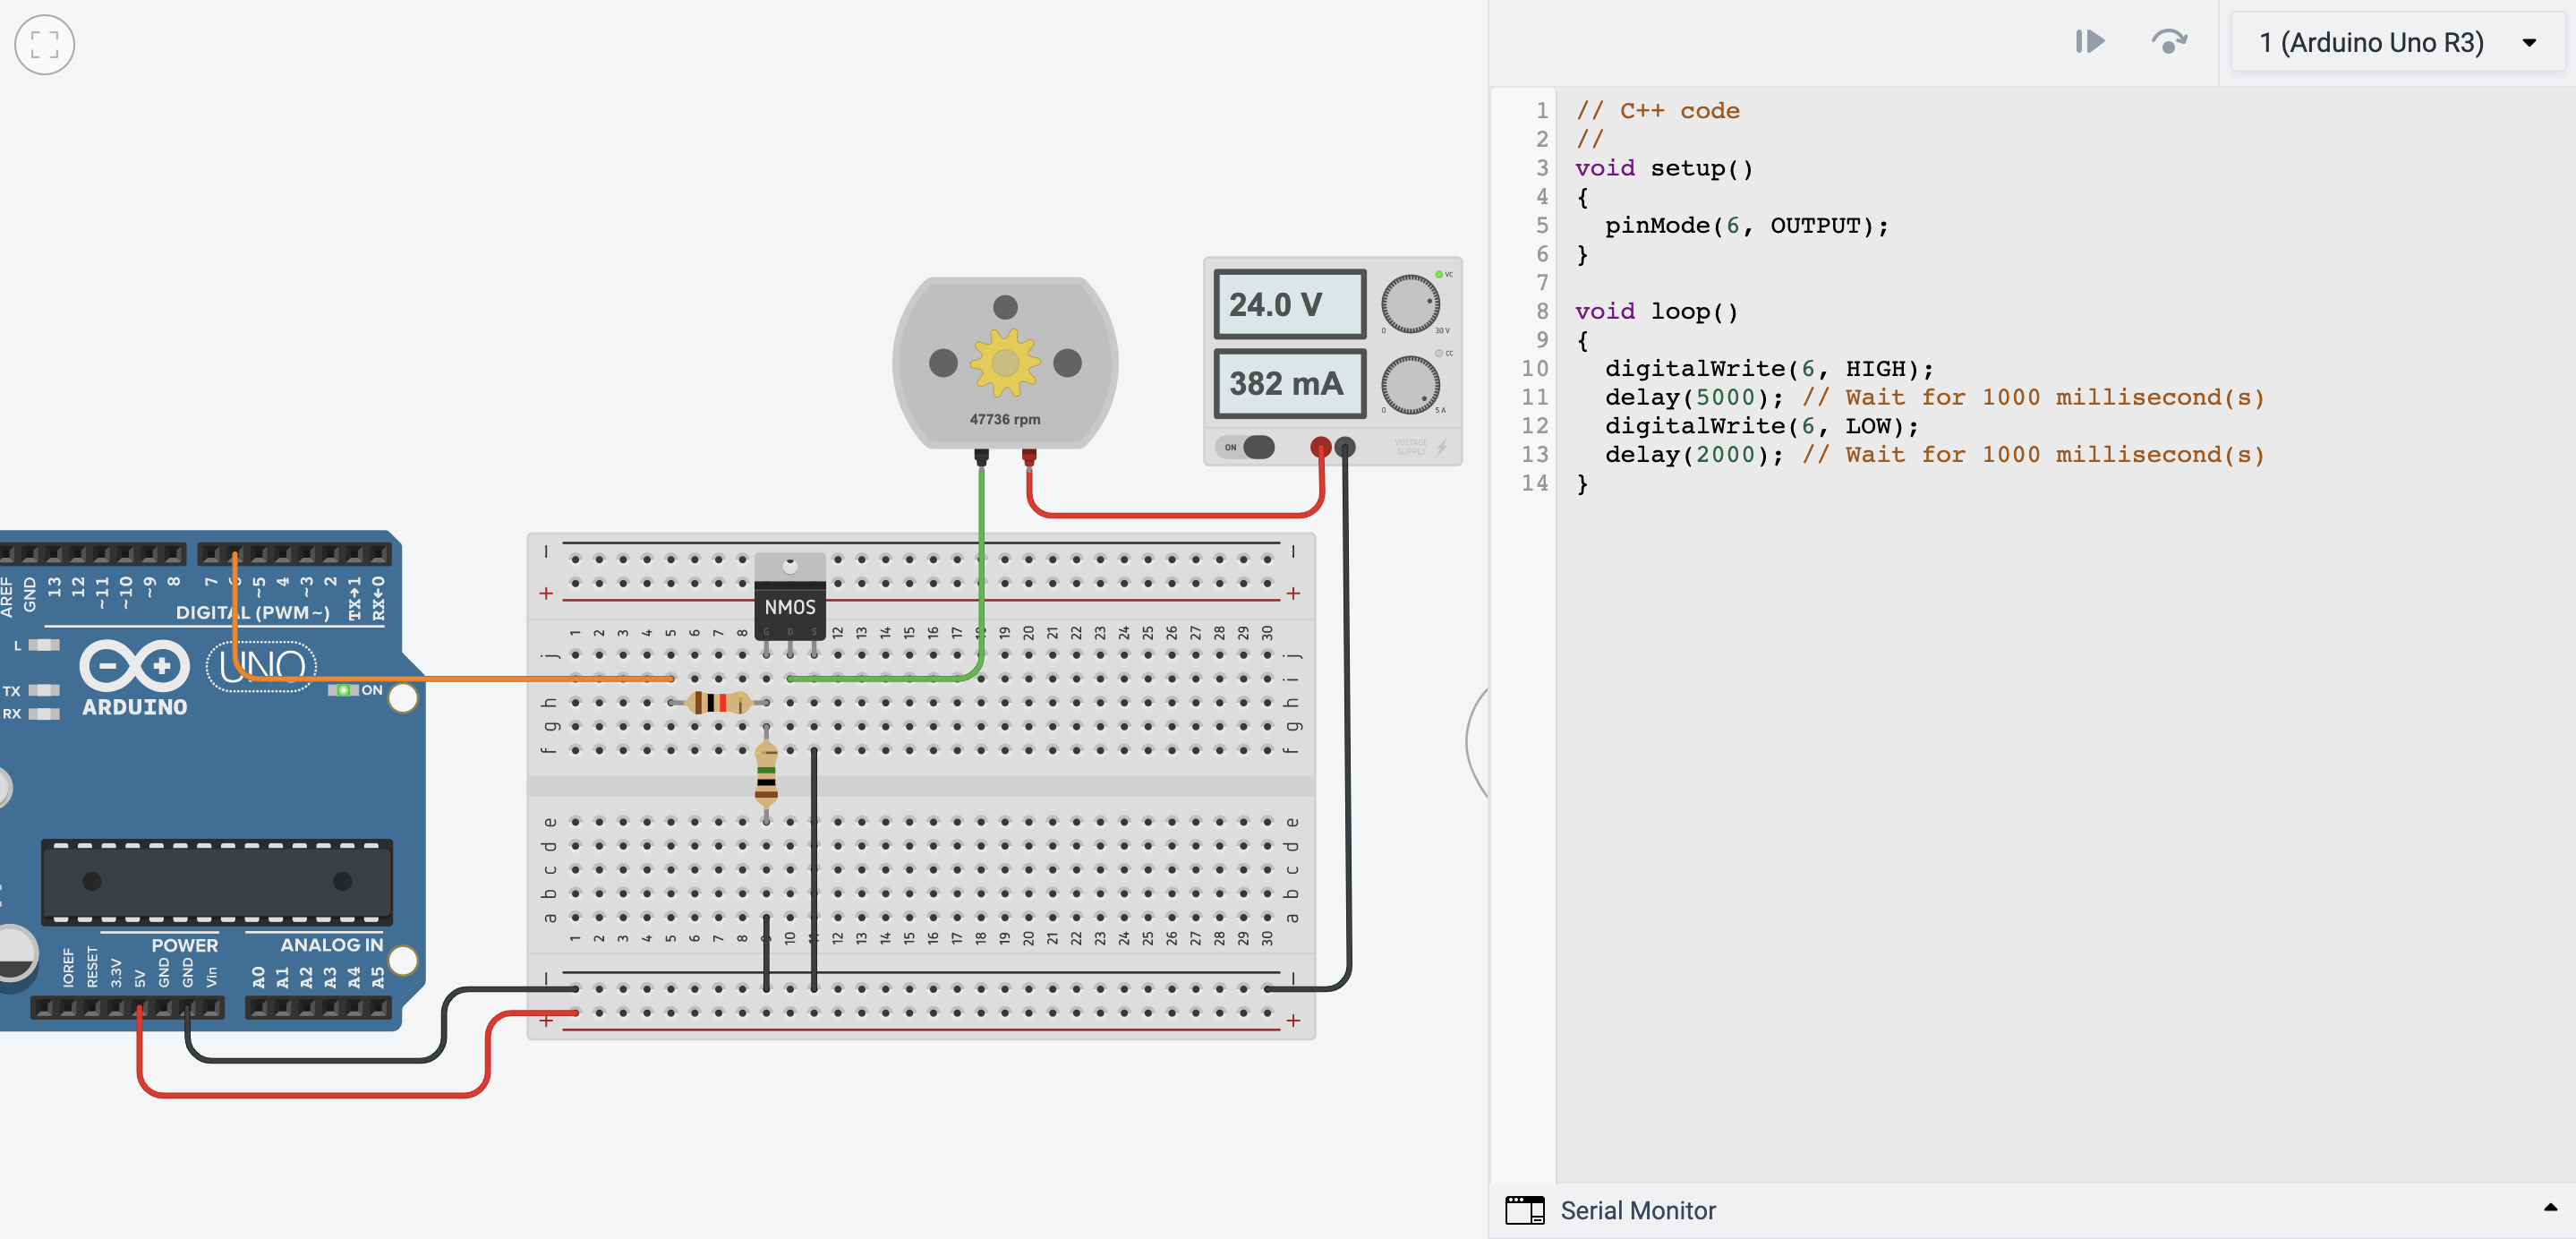
Now, we have a circuit with a transistor, DC motor and a power supply. by adjusting the power supply, the DC motor spins faster or slower, and the voltage is recorded.

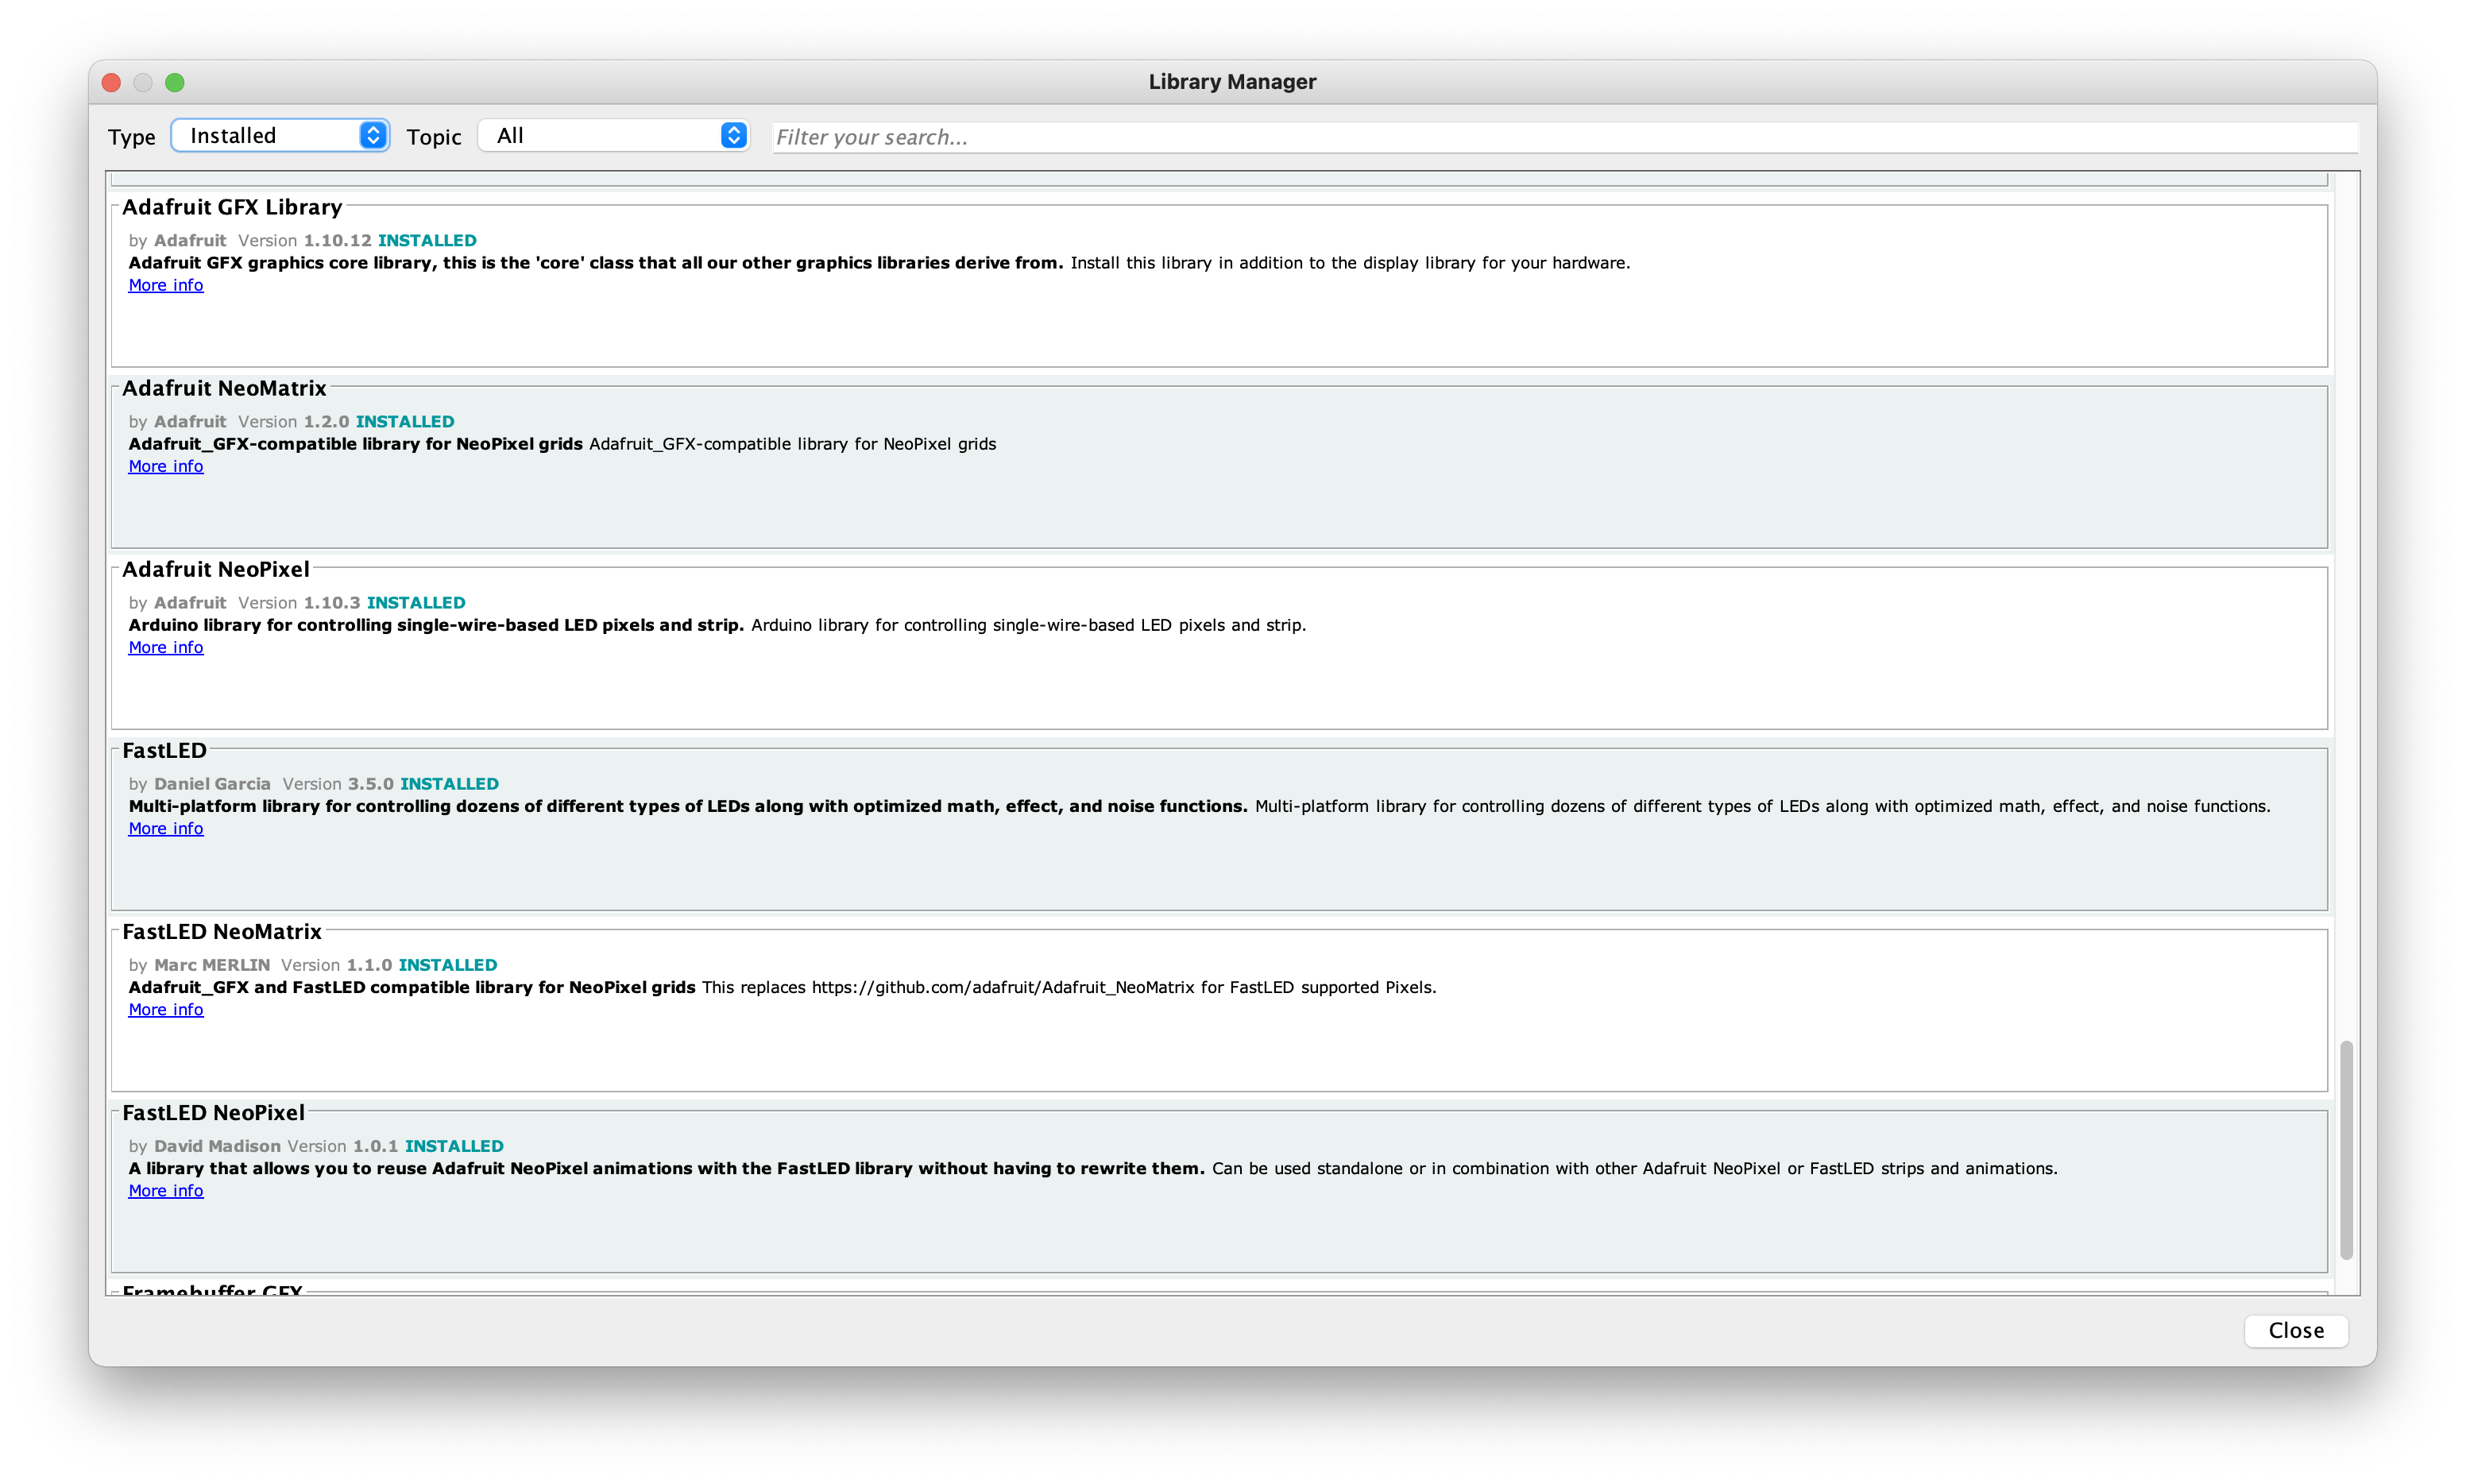
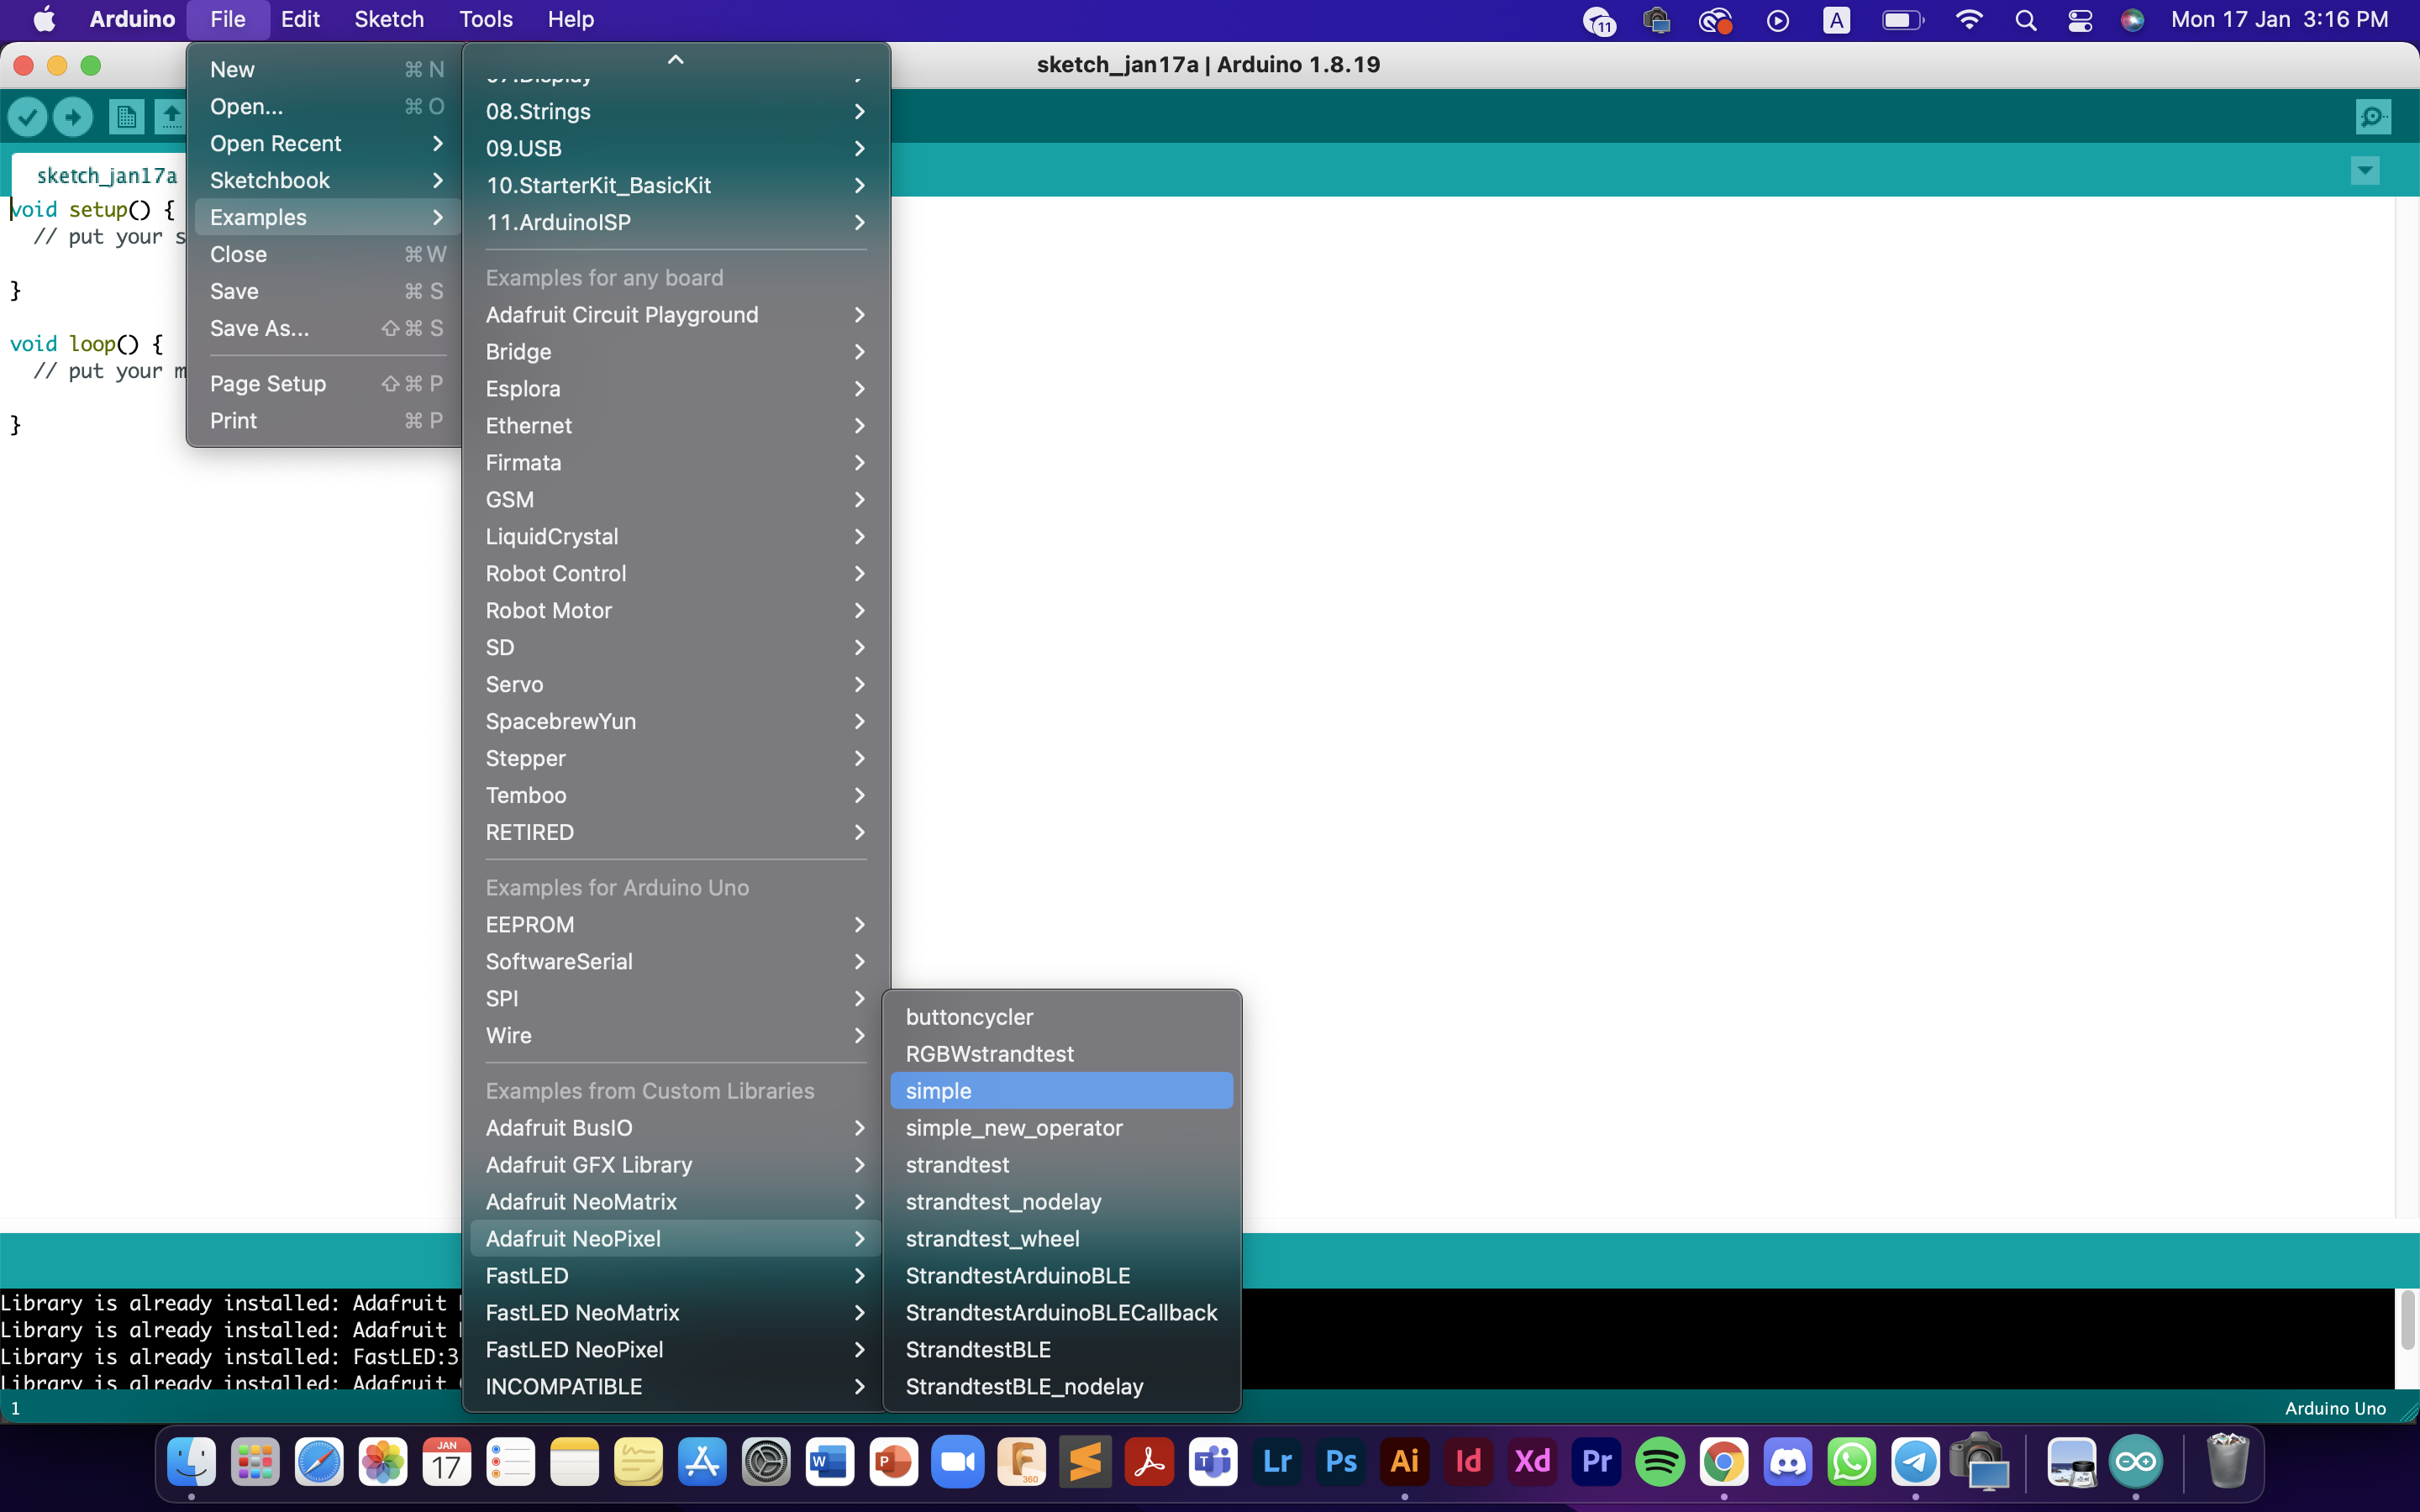
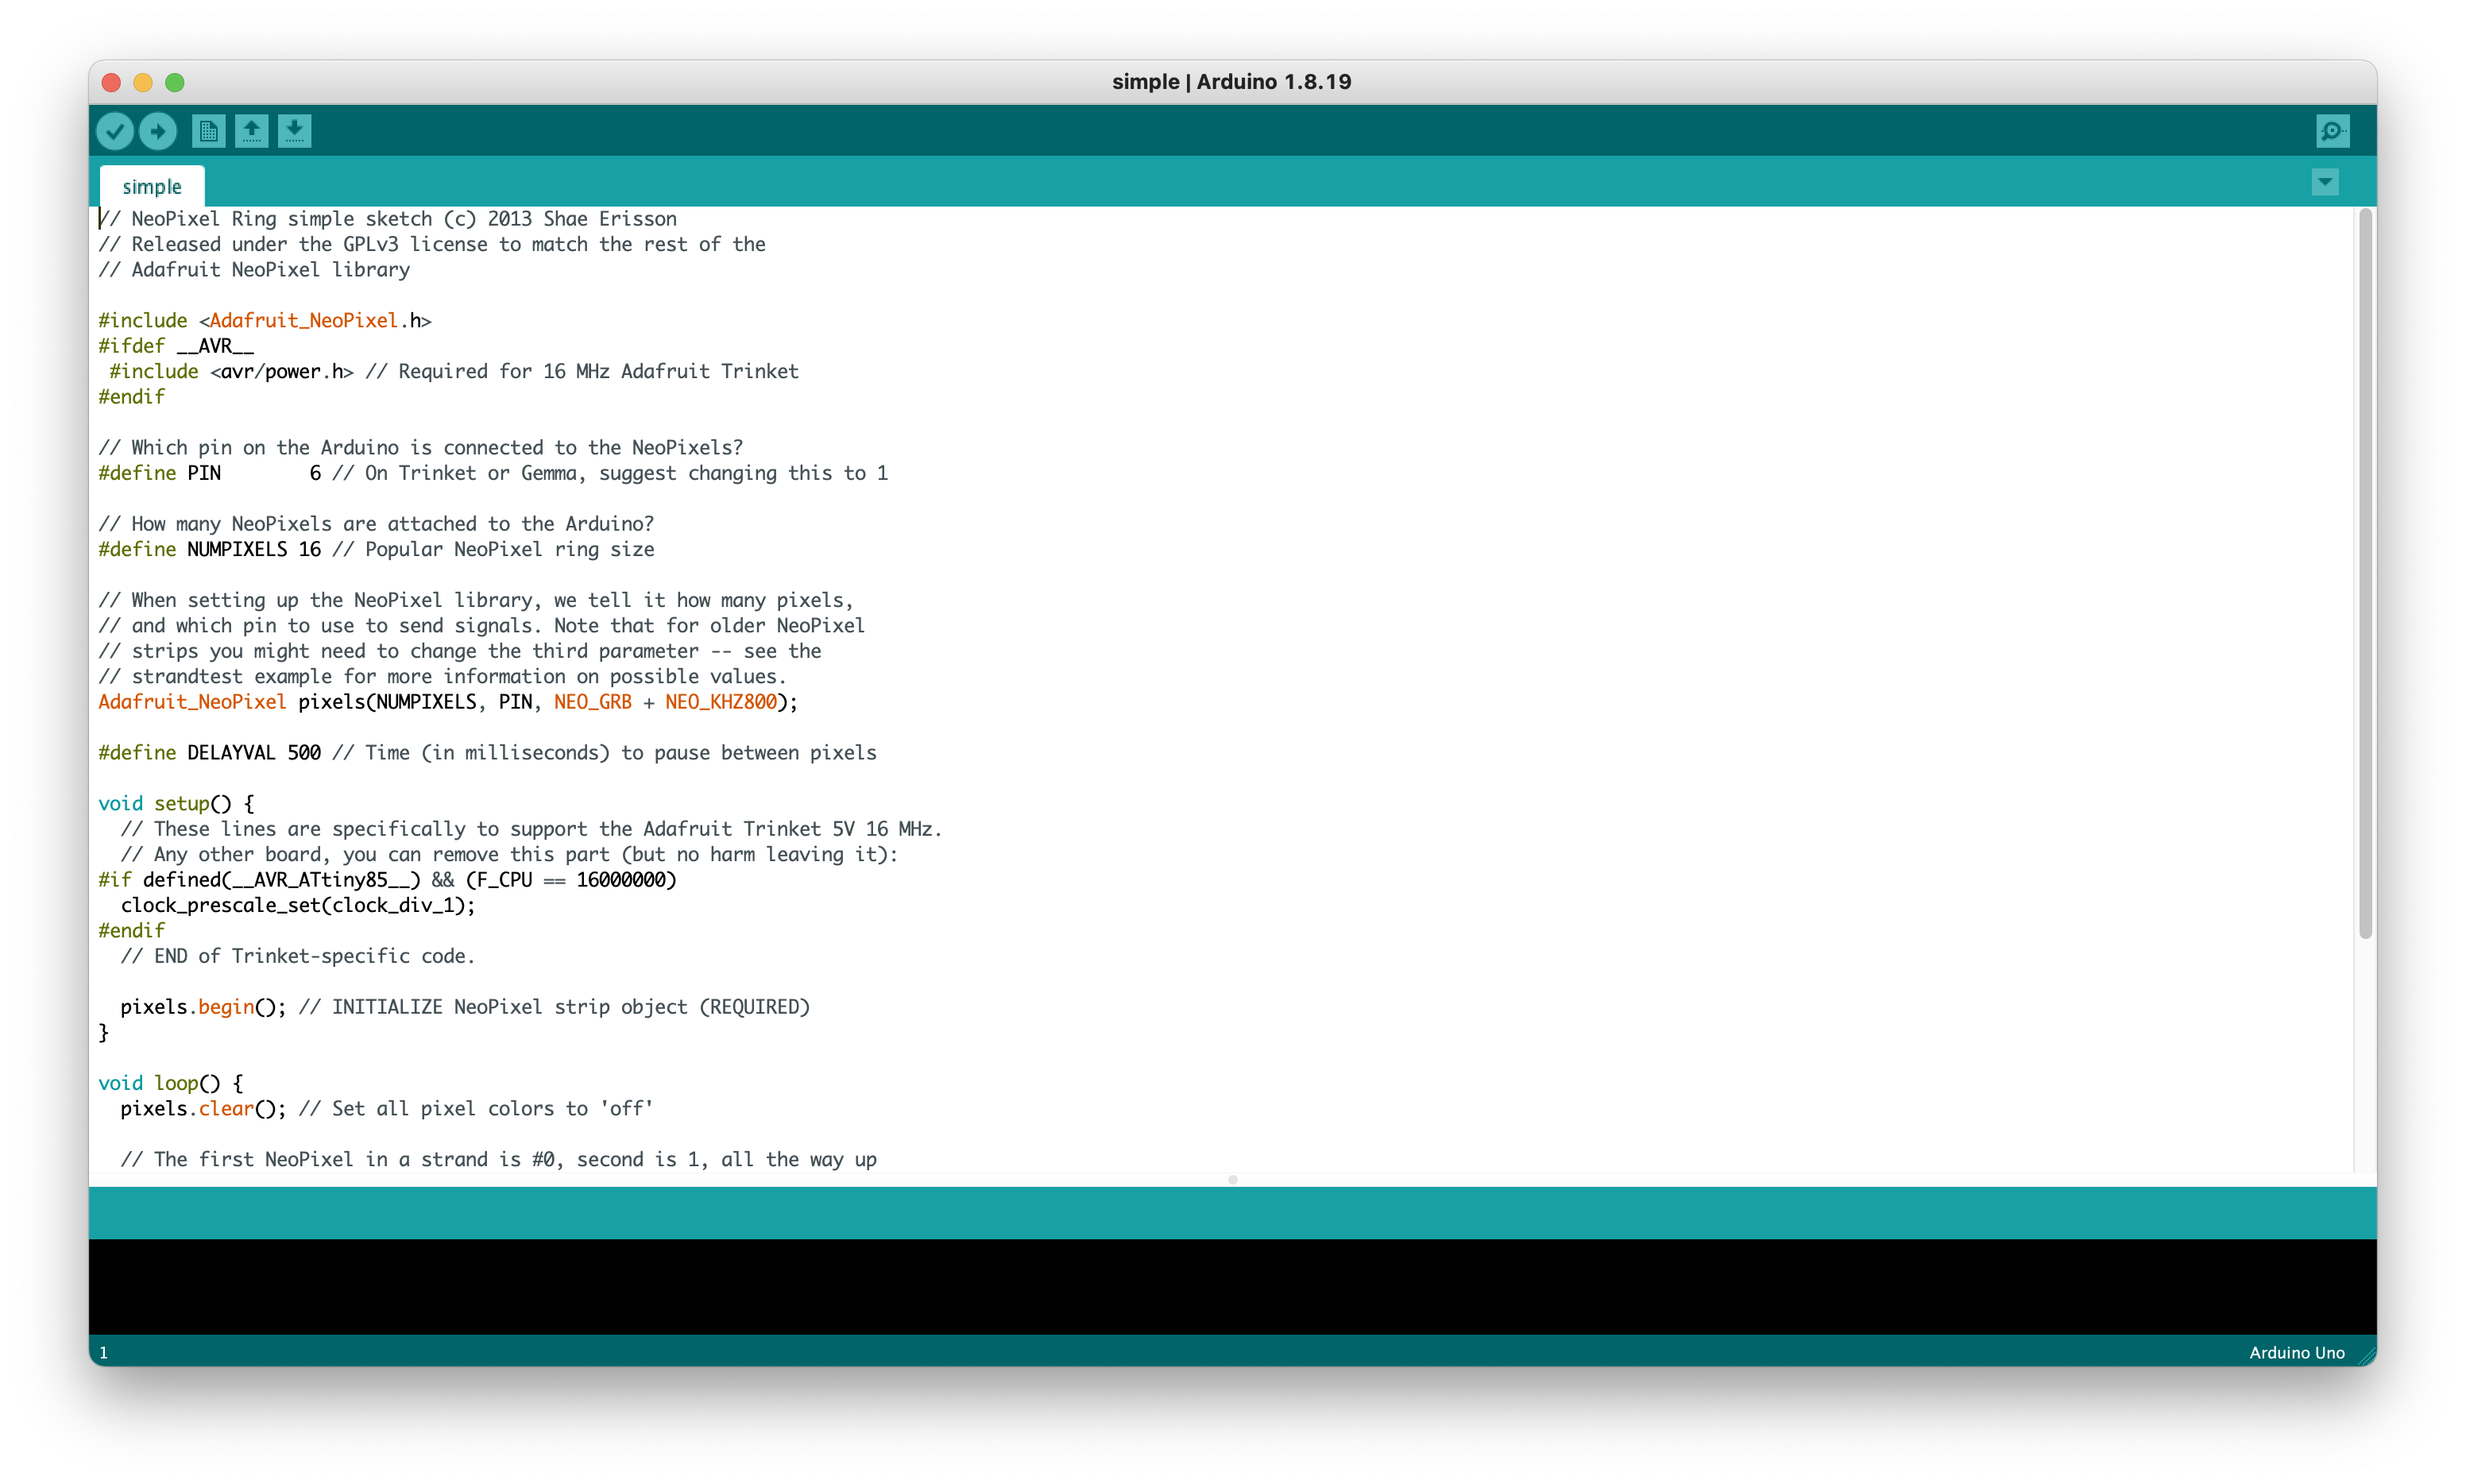
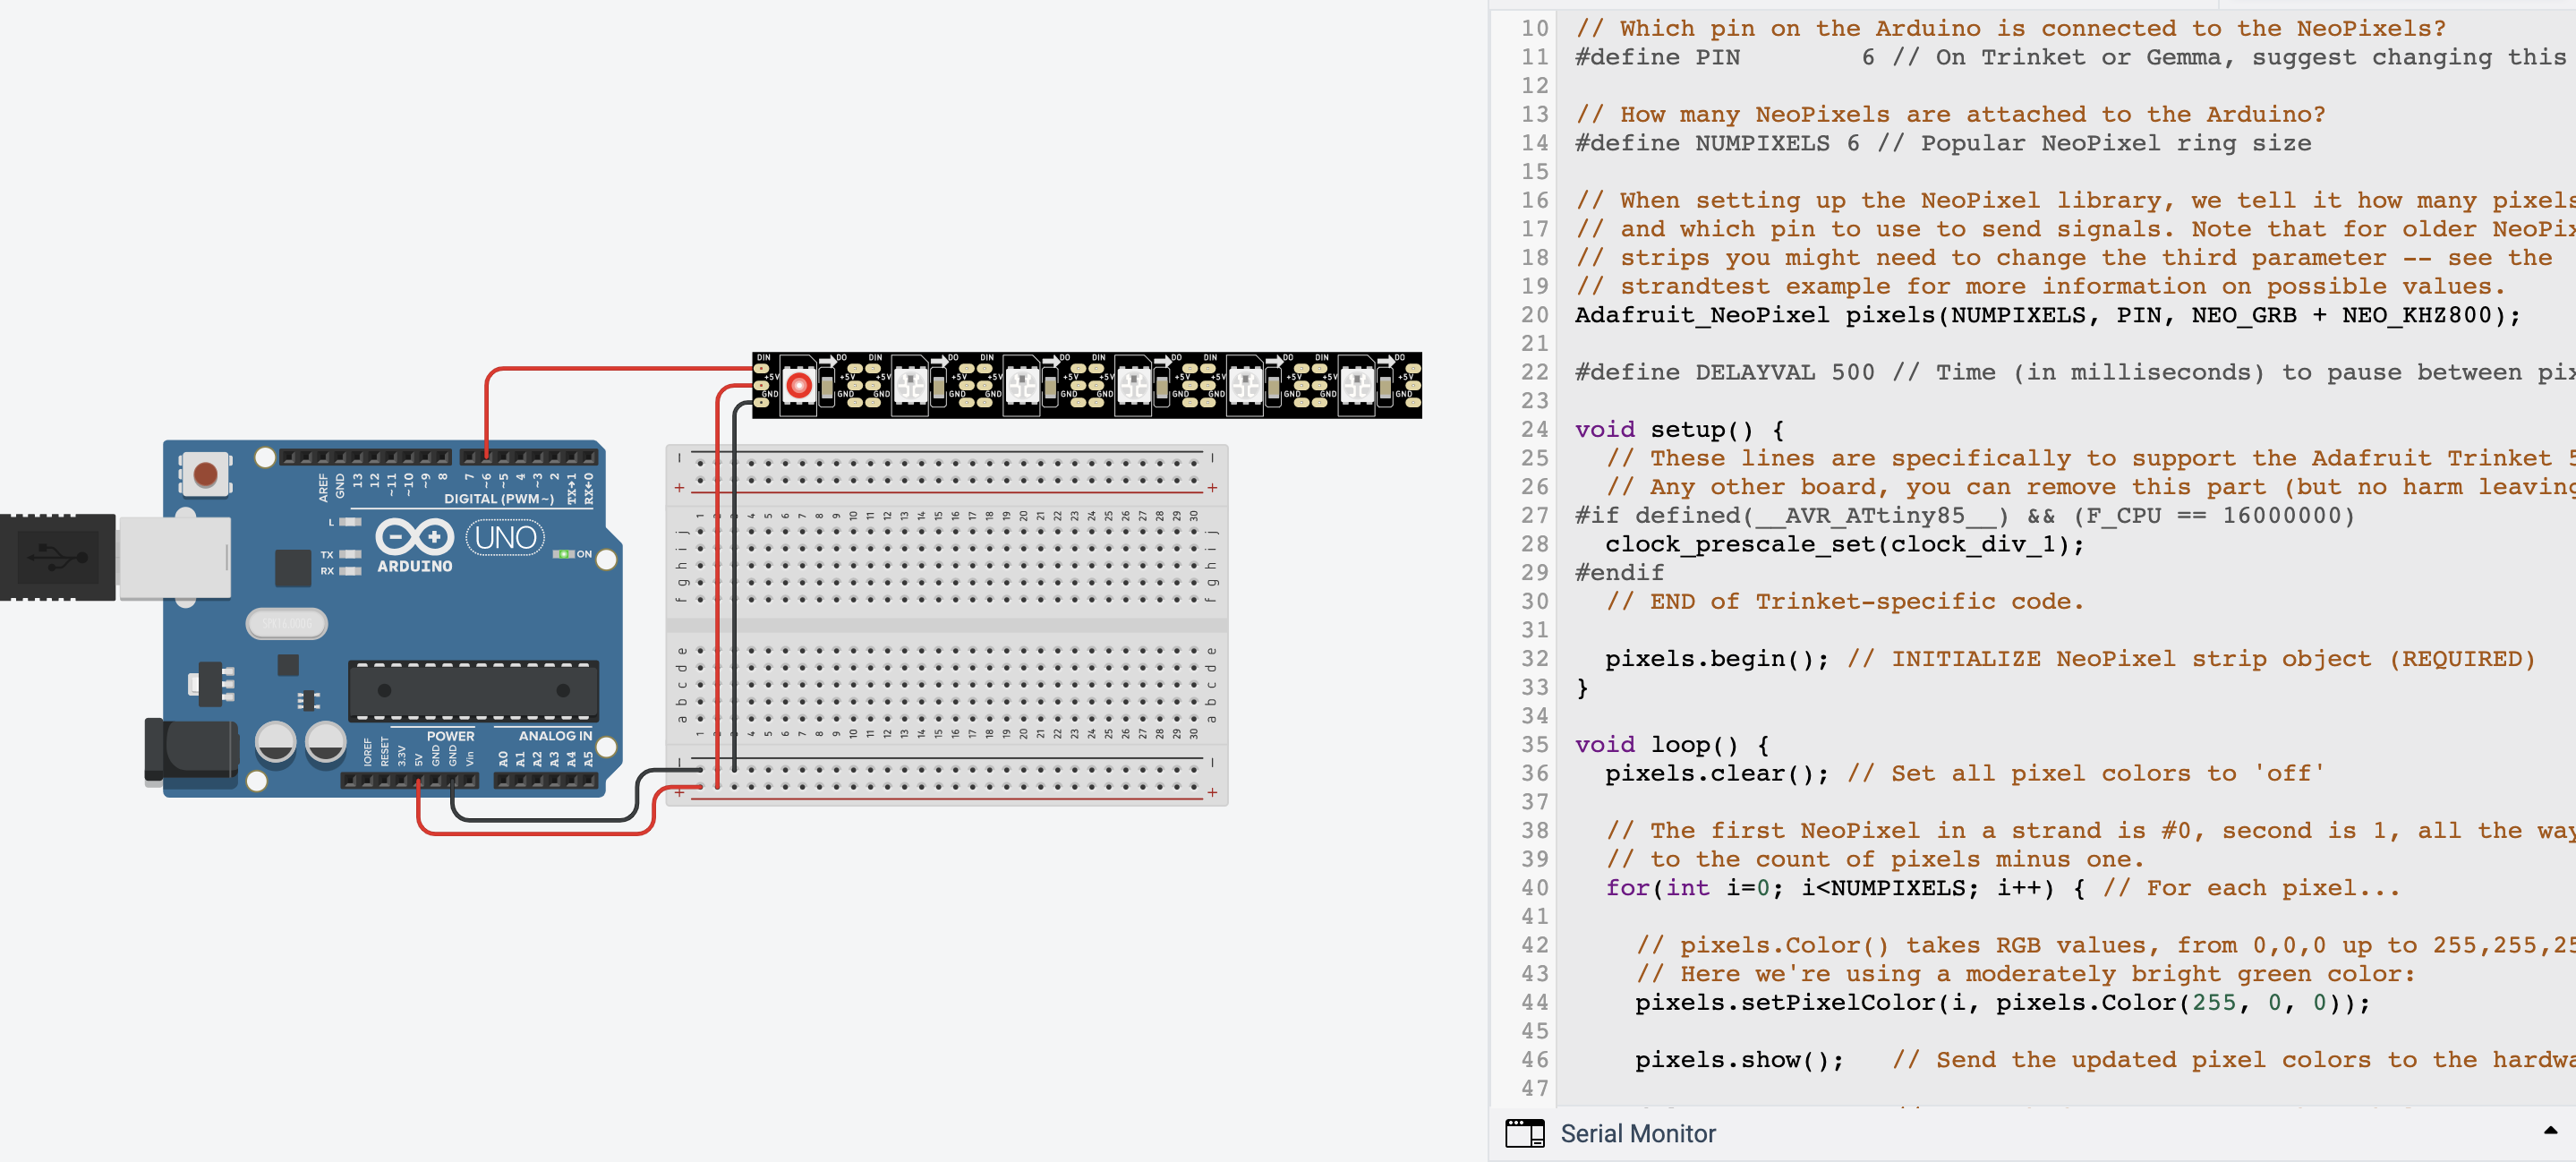
Lastly, we have the Neopixel. We were told that we could download library with the code structure given to us, and that's what we did. We went to the library manager in Arduino, and downloaded Adafruit Neopixel and FastLED libraries. We then used the simple example from the Adafruit neopixel library, and used the code. We added the pin number and number of pixels, and watched as the Neopixels ligted up one by one in red.
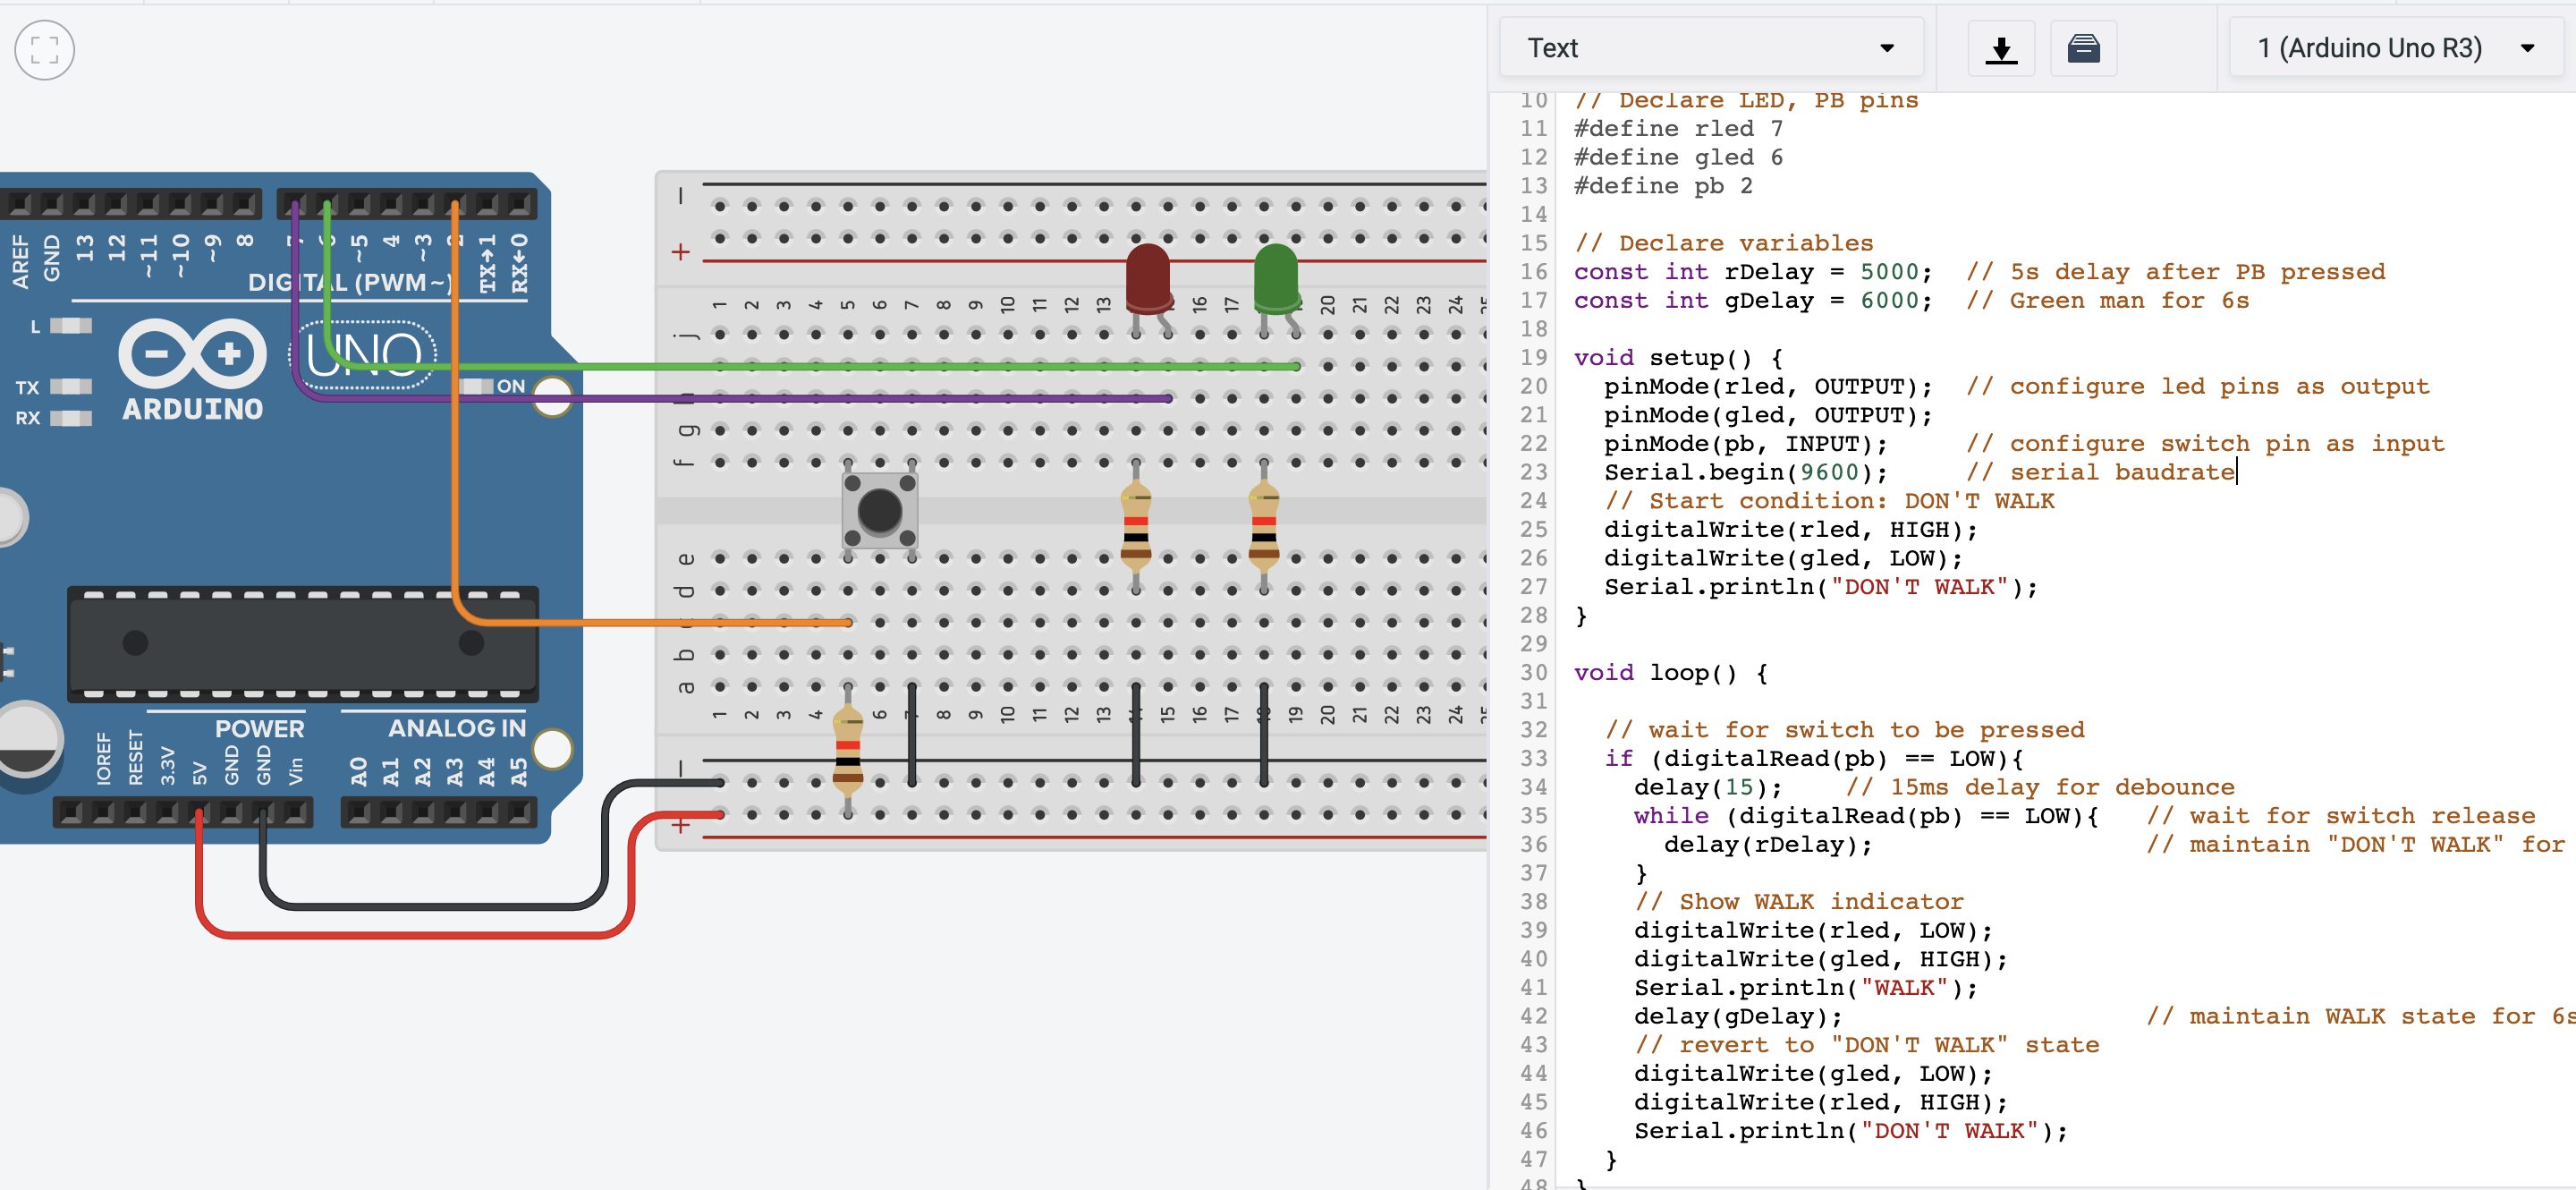
We had to use our learning so far to code a pedastrian crossing. With this circuit, the red LED will be on, until we press the push button. After a few seconds,the red LED will off and the green LED will then light up for a while, before it goes off and the red LED lights up again. In the future, I think it would be cool to also insert a traffic light in this, perhaps using the RGB led for the red, yellow and green lights.
To be honest, if you were to tell me a year ago that I would be doing electrical engineering, I would call you a liar, but look at where I am! I am still quite unsure of the theory behind it, but it was definetly interesting to see how the different parts and the code work together to perform different functions. It was eye opening and gave me an open mindset towards engineering.